Asus P2B-LS P2B-LS User Manual - Page 20
ASUS P2B-L/P2B-S/P2B-LS User's Manual, Attach Mount Bridges, Installing the Pentium II Processor,
 |
View all Asus P2B-LS manuals
Add to My Manuals
Save this manual to your list of manuals |
Page 20 highlights
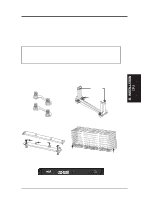
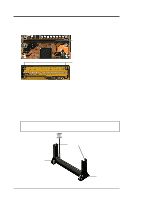
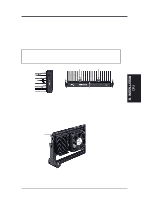
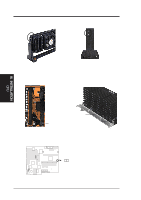
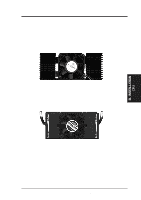
III. INSTALLATION Attach Mount Bridges Four screws should be showing next to each corner of the SEC CPU Slot with the two attach mount bridges installed. SEC CPU slot NOTE: Encircled items are the screws from the mount bridges (1 & 2) Attach Mount Bridges (underside) III. INSTALLATION CPU Installing the Pentium II Processor 1. Mount the Pentium II Retention Mechanism: The retention mechanism is designed to fit into the SEC slot only one way. TIP: Orient the mechanism's lock holes toward the motherboard's chipset (see motherboard layout for the location of the AGPset). Be sure to align the notch in the mechanism with the small rib on one side of the slot and that the mechanism is properly seated on the board. Then, screw the captive nuts in place. WARNING! Do not overtighten the captive nuts. Doing so could damage your motherboard. Tighten captive nuts to no more than 6±1 inch/pound. Lock holes Captive nut Captive nut 20 ASUS P2B-L/P2B-S/P2B-LS User's Manual
-
 1
1 -
2
-
3
-
4
-
5
-
6
-
7
-
8
-
9
-
10
-
11
-
12
-
13
-
14
-
 15
15 -
 16
16 -
 17
17 -
 18
18 -
 19
19 -
 20
20 -
 21
21 -
 22
22 -
 23
23 -
 24
24 -
 25
25 -
26
-
27
-
28
-
29
-
30
-
31
-
32
-
33
-
34
-
35
-
36
-
37
-
38
-
39
-
40
-
41
-
42
-
43
-
44
-
45
-
46
-
47
-
48
-
49
-
50
-
51
-
52
-
53
-
54
-
55
-
56
-
57
-
58
-
59
-
60
-
61
-
62
-
63
-
64
-
65
-
66
-
67
-
68
-
69
-
70
-
71
-
72
-
73
-
74
-
75
-
76
-
77
-
78
-
79
-
80
-
81
-
82
-
83
-
84
-
85
-
86
-
87
-
88
 |
 |
