Asus P30AD P30AD User's Manual - Page 26
Using the memory card reader, Computer, Eject, To use the memory card
 |
View all Asus P30AD manuals
Add to My Manuals
Save this manual to your list of manuals |
Page 26 highlights
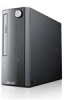
ENGLISH Using the memory card reader Digital cameras and other digital imaging devices use memory cards to store digital picture or media files. The built-in memory card reader on the front panel of your system allows you to read from and write to different memory card drives. To use the memory card: 1. Press PUSH on the front I/O ports cover to open it. 2. Insert the memory card into the card slot. • A memory card is keyed so that it fits in only one direction. DO NOT force a card into a slot to avoid damaging the card. • You can place media in one or more of the card slots and use each media independently. Place only one memory card in a slot at one time. 3. Select a program from the AutoPlay window to access your files. • If AutoPlay is NOT enabled in your computer, hover your mouse pointer over the lower left corner of Windows® desktop then right-click on the Start screen's thumbnail. From the pop-up menu, click File Explorer, and then double-click the memory card icon to access the data on it. • Each card slot has its own drive icon which is displayed on the Computer screen. • The memory card reader LED lights up and blinks when data is being read from or written to the memory card. 4. When finished, right-click the memory card drive icon on the Computer screen, click Eject, and remove the card. Hover your mouse pointer over the lower left corner of Windows® desktop then right-click on the Start screen's thumbnail. From the pop-up menu, click File Explorer to open the Computer screen. Never remove cards while or immediately after reading, copying, formatting, or deleting data on the card or else data loss may occur. To prevent data loss, use "Safely Remove Hardware and Eject Media" in the Windows notification area before removing the memory card. 26 Chapter 4: Using your computer
-
 1
1 -
2
-
3
-
4
-
5
-
6
-
7
-
8
-
9
-
10
-
11
-
12
-
13
-
14
-
15
-
16
-
17
-
18
-
19
-
20
-
 21
21 -
 22
22 -
 23
23 -
 24
24 -
 25
25 -
 26
26 -
 27
27 -
 28
28 -
 29
29 -
 30
30 -
 31
31 -
32
-
33
-
34
-
35
-
36
-
37
-
38
-
39
-
40
-
41
-
42
-
43
-
44
-
45
-
46
-
47
-
48
-
49
-
50
-
51
-
52
-
53
-
54
-
55
-
56
-
57
-
58
-
59
-
60
 |
 |
