Asus P5WD2-E Premium P5WD2-E Premium User's Manual for English Edition - Page 159
black slot. Make sure that the card is properly seated on the slot.
 |
View all Asus P5WD2-E Premium manuals
Add to My Manuals
Save this manual to your list of manuals |
Page 159 highlights
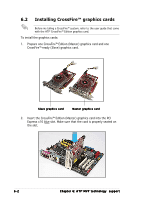
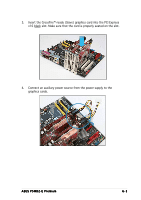
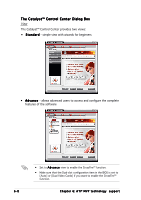
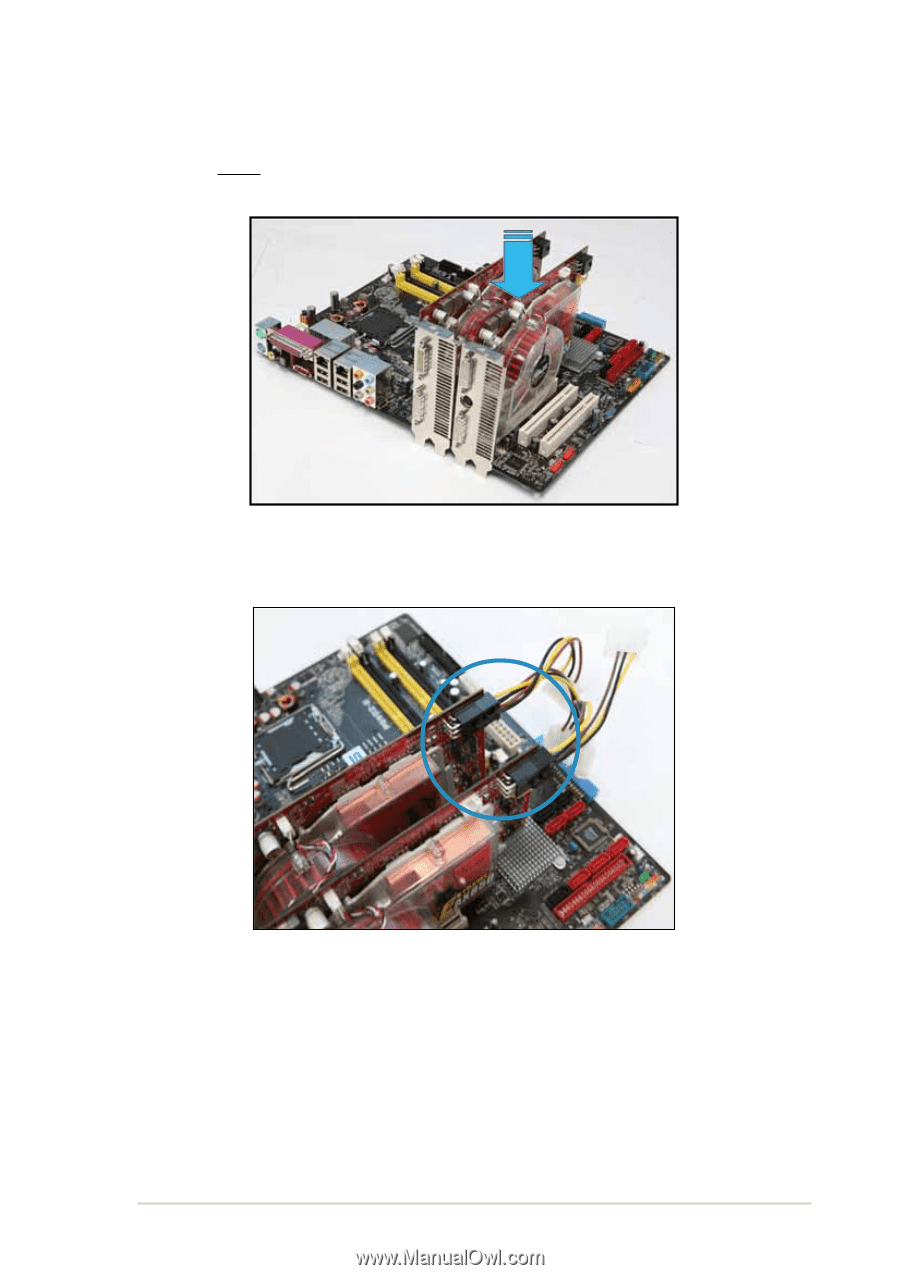
3. Insert the CrossFire™-ready (Slave) graphics card into the PCI Express x16 black slot. Make sure that the card is properly seated on the slot. 4. Connect an auxiliary power source from the power supply to the graphics cards. ASUS P5WD2-E Premium 6-3
-
 1
1 -
2
-
3
-
4
-
5
-
6
-
7
-
8
-
9
-
10
-
11
-
12
-
13
-
14
-
15
-
16
-
17
-
18
-
19
-
20
-
21
-
22
-
23
-
24
-
25
-
26
-
27
-
28
-
29
-
30
-
31
-
32
-
33
-
34
-
35
-
36
-
37
-
38
-
39
-
40
-
41
-
42
-
43
-
44
-
45
-
46
-
47
-
48
-
49
-
50
-
51
-
52
-
53
-
54
-
55
-
56
-
57
-
58
-
59
-
60
-
61
-
62
-
63
-
64
-
65
-
66
-
67
-
68
-
69
-
70
-
71
-
72
-
73
-
74
-
75
-
76
-
77
-
78
-
79
-
80
-
81
-
82
-
83
-
84
-
85
-
86
-
87
-
88
-
89
-
90
-
91
-
92
-
93
-
94
-
95
-
96
-
97
-
98
-
99
-
100
-
101
-
102
-
103
-
104
-
105
-
106
-
107
-
108
-
109
-
110
-
111
-
112
-
113
-
114
-
115
-
116
-
117
-
118
-
119
-
120
-
121
-
122
-
123
-
124
-
125
-
126
-
127
-
128
-
129
-
130
-
131
-
132
-
133
-
134
-
135
-
136
-
137
-
138
-
139
-
140
-
141
-
142
-
143
-
144
-
145
-
146
-
147
-
148
-
149
-
150
-
151
-
152
-
153
-
 154
154 -
 155
155 -
 156
156 -
 157
157 -
 158
158 -
 159
159 -
 160
160 -
 161
161 -
 162
162 -
 163
163 -
 164
164 -
165
-
166
-
167
-
168
-
169
-
170
-
171
-
172
-
173
-
174
 |
 |
ASUS P5WD2-E Premium
ASUS P5WD2-E Premium
ASUS P5WD2-E Premium
ASUS P5WD2-E Premium
ASUS P5WD2-E Premium
6-3
6-3
6-3
6-3
6-3
3.
Insert the CrossFire™-ready (Slave) graphics card into the PCI Express
x16
black slot. Make sure that the card is properly seated on the slot.
4.
Connect an auxiliary power source from the power supply to the
graphics cards.