Asus PRIME H610M-D Intel 600 series Channel BIOS UM English - Page 32
Digi+ VRM, Synch ACDC Loadline with VRM Loadline
 |
View all Asus PRIME H610M-D manuals
Add to My Manuals
Save this manual to your list of manuals |
Page 32 highlights
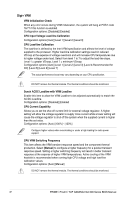
Digi+ VRM VRM Initialization Check When any error occurs during VRM initialization, the system will hang at POST code 76/77 if this function is enabled. Configuration options: [Disabled] [Enabled] CPU Input Voltage Load-line Calibration Configuration options [Auto] [Level 1] [Level 2] [Level 3] CPU Load-line Calibration The load-line is defined by the Intel VRM specification and affects the level of voltage supplied to the processor. Higher load-line calibration settings result in reduced VDroop at the expense of voltage overshoot and will increase CPU temperatures due to higher voltage under load. Select from level 1 to 7 to adjust the load-line slope. Level 1 = greater VDroop, Level 7 = minimum VDroop. Configuration options [Auto] [Level 1] [Level 2] [Level 3] [Level 4:Recommended for OC] [Level 5] [Level 6] [Level 7] The actual performance boost may vary depending on your CPU specification. DO NOT remove the thermal module. The thermal conditions should be monitored. Synch ACDC Loadline with VRM Loadline Enable this item to allow the VRM Loadline to be adjusted automatically to match the AC/DC Loadline. Configuration options: [Disabled] [Enabled CPU Current Capability Allows you to set the shut-off current limit for external voltage regulator. A higher setting will allow the voltage regulator to supply more current while a lower setting will cause the voltage regulator to shut off the system when the supplied current is higher than the set value. Configuration options: [Auto] [100%] - [120%] Configure higher values when overclocking or under a high loading for extra power support. CPU VRM Switching Frequency This item affects the VRM transient response speed and the component thermal production. Select [Manual] to configure a higher frequency for a quicker transient response speed. Setting a higher switching frequency will result in better transient response at the expense of higher VRM temperatures. Active cooling of the VRM heatsink is recommended when running high CPU voltage and high load-line calibration values. Configuration options: [Auto] [Manual] DO NOT remove the thermal module. The thermal conditions should be monitored. 32 PRIME / ProArt / TUF GAMING Intel 600 Series BIOS Manual
-
 1
1 -
2
-
3
-
4
-
5
-
6
-
7
-
8
-
9
-
10
-
11
-
12
-
13
-
14
-
15
-
16
-
17
-
18
-
19
-
20
-
21
-
22
-
23
-
24
-
25
-
26
-
 27
27 -
 28
28 -
 29
29 -
 30
30 -
 31
31 -
 32
32 -
 33
33 -
 34
34 -
 35
35 -
 36
36 -
 37
37 -
38
-
39
-
40
-
41
-
42
-
43
-
44
-
45
-
46
-
47
-
48
-
49
-
50
-
51
-
52
-
53
-
54
-
55
-
56
-
57
-
58
-
59
-
60
-
61
-
62
-
63
-
64
-
65
-
66
-
67
-
68
-
69
-
70
-
71
-
72
-
73
-
74
-
75
-
76
-
77
-
78
-
79
-
80
-
81
-
82
-
83
-
84
-
85
-
86
-
87
-
88
 |
 |
