Asus ROG STRIX H270I GAMING STRIX H270I GAMING Users ManualEnglish
Asus ROG STRIX H270I GAMING Manual
 |
View all Asus ROG STRIX H270I GAMING manuals
Add to My Manuals
Save this manual to your list of manuals |
Asus ROG STRIX H270I GAMING manual content summary:
- Asus ROG STRIX H270I GAMING | STRIX H270I GAMING Users ManualEnglish - Page 1
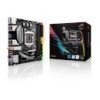
Motherboard STRIX H270I GAMING - Asus ROG STRIX H270I GAMING | STRIX H270I GAMING Users ManualEnglish - Page 2
service will not be extended if: (1) the product is repaired, modified or altered, unless such repair, modification of alteration is authorized in writing by ASUS; or (2) the serial number of the product is defaced or missing. ASUS PROVIDES THIS MANUAL https://www.asus.com/support/ or (2) problems - Asus ROG STRIX H270I GAMING | STRIX H270I GAMING Users ManualEnglish - Page 3
information...v About this guide...vi STRIX H270I GAMING specifications summary viii Package contents...xi Installation tools and components xii Chapter 1: Product Introduction 1.1 Motherboard overview 1-1 1.1.1 Before you proceed 1-1 1.1.2 Motherboard layout 1-2 1.1.3 Central Processing - Asus ROG STRIX H270I GAMING | STRIX H270I GAMING Users ManualEnglish - Page 4
SMART Information 3-14 3.6.11 USB Configuration 3-14 3.7 Monitor menu 3-15 3.8 Boot menu 3-15 3.9 Tool menu 3-16 3.9.1 ASUS EZ Flash 3 Utility 3-16 3.9.2 Secure Erase 3-17 3.9.3 ASUS SPD Information 3-17 3.9.4 Graphics Card Information 3-17 3.10 Exit menu 3-18 3.11 Updating BIOS 3-18 3.11 - Asus ROG STRIX H270I GAMING | STRIX H270I GAMING Users ManualEnglish - Page 5
signal cables from the motherboard, ensure that all service technician or your retailer. Operation safety • Before installing the motherboard and adding devices on it, carefully read all the manuals screws, and staples away from connectors, slots, sockets and circuitry. • Avoid dust, humidity, and - Asus ROG STRIX H270I GAMING | STRIX H270I GAMING Users ManualEnglish - Page 6
motherboard. How this guide is organized This guide contains the following parts: 1. Chapter 1: Product Introduction This chapter describes the features of the motherboard and the new technology it supports 1. ASUS website The ASUS website (www.asus.com) provides updated information on ASUS hardware - Asus ROG STRIX H270I GAMING | STRIX H270I GAMING Users ManualEnglish - Page 7
of the following symbols used throughout this manual. DANGER/WARNING: Information to prevent injury to yourself when trying to complete a task. CAUTION: Information to prevent damage to the components when trying to complete a task. IMPORTANT: Instructions that you MUST follow to complete a task - Asus ROG STRIX H270I GAMING | STRIX H270I GAMING Users ManualEnglish - Page 8
STRIX H270I GAMING specifications summary CPU Chipset Memory Expansion slots VGA Storage LAN Intel® socket 1151 for 7th/ 6th Generation Core™ i7/ Core™ i5/ Core™ i3/ Pentium®, and Celeron® processors* Supports 14nm CPU Supports Intel® Turbo Boost Technology 2.0** * Refer to www.asus.com for Intel® - Asus ROG STRIX H270I GAMING | STRIX H270I GAMING Users ManualEnglish - Page 9
STRIX H270I GAMING specifications summary USB Audio Intel® H270 Chipset - 8 x USB 3.0 ports ( 6 ports at back panel [blue], 2 ports at mid-board [charcoal]) ROG SupremeFX S1220A 8-Channel High Definition Audio CODEC - Supports up to 32-Bit/192kHz playback* - Impedance sense for front and rear - Asus ROG STRIX H270I GAMING | STRIX H270I GAMING Users ManualEnglish - Page 10
STRIX H270I GAMING specifications summary ASUS Special Features Rear Panel I/O Ports Internal I/O connectors BIOS Features Manageability ASUS EZ DIY - ASUS EZ Flash 3 - ASUS CrashFree BIOS 3 Gamers Guardian - SafeSlot - DRAM Overcurrent Protection - ESD Guards on LAN, Audio, KBMS, and USB3.0/2.0 - Asus ROG STRIX H270I GAMING | STRIX H270I GAMING Users ManualEnglish - Page 11
STRIX H270I GAMING 1 x Panel cable 1 x Extension Cable for RGB strips (80cm) 2 x SATA 6Gb/s cables 1 x 2x2 dual-band Wi-Fi moving antennas 2 x M.2 2242 mounting kits 1 x I/O shield 1 x Strix stickers 1 x 10-in-1 ROG cable label 2 x M.2 Screw Packages 1 x Cable tie Support DVD User Guide - Asus ROG STRIX H270I GAMING | STRIX H270I GAMING Users ManualEnglish - Page 12
components Intel® 1151 compatible CPU Fan Intel® 1151 CPU PC chassis SATA hard disk drive Phillips (cross) screwdriver Power supply unit 1 bag of screws DIMM SATA optical disc drive (optional) Graphics card The tools and components listed above are not included in the motherboard package - Asus ROG STRIX H270I GAMING | STRIX H270I GAMING Users ManualEnglish - Page 13
the following precautions before you install motherboard components or change any motherboard settings. • Unplug the power cord from the wall socket before touching any component. • Before to do so may cause severe damage to the motherboard, peripherals, or components. ASUS STRIX H270I GAMING 1-1 - Asus ROG STRIX H270I GAMING | STRIX H270I GAMING Users ManualEnglish - Page 14
AUDIO AAFP 2280 SupremeFX S1220A Codec 2260 TPM PCIE SATA IRST X4 VV 128Mb BIOS Intel® H270 CHA_FAN PCIEX16 14 4 M.2_1(SOCKET3) M.2_2(SOCKET3)Bottom SATA6G_4 SATA6G_3 CLRTC 13 and internal connectors. • M2_2 is located on the bottom of the motherboard. 1-2 Chapter 1: Product Introduction - Asus ROG STRIX H270I GAMING | STRIX H270I GAMING Users ManualEnglish - Page 15
Chapter 1 2 17.0cm(6.7in) 17.0cm(6.7in) ASUS STRIX H270I GAMING 1-3 - Asus ROG STRIX H270I GAMING | STRIX H270I GAMING Users ManualEnglish - Page 16
1.1.3 Central Processing Unit (CPU) The motherboard comes with a surface mount LGA1151 socket designed for the 7th / 6th Generation Intel® Core™ i7 / Intel® Core™ i5 / Intel® Core™ i3, Pentium®, and Celeron® processors. STRIX H270I GAMING CPU socket LGA1151 1-4 Chapter 1: Product Introduction - Asus ROG STRIX H270I GAMING | STRIX H270I GAMING Users ManualEnglish - Page 17
memory The motherboard comes with two DDR4 (Double Data Rate 4) Quad Inline Memory Modules (DIMM) slots. A DDR4 module is notched differently from a DDR, DDR2, or DDR3 module. DO NOT install a DDR, DDR2, or DDR3 memory module to the DDR4 slot. STRIX H270I GAMING 288-pin DDR4 DIMM sockets Recommended - Asus ROG STRIX H270I GAMING | STRIX H270I GAMING Users ManualEnglish - Page 18
and non‑ECC DDR4 DIMMs into the DIMM sockets. • You may install varying memory sizes in or more on the motherboard. c) For more details, refer to the Microsoft® support site at http://support.microsoft. com/kb/929605 ASUS exclusively provides hyper DIMM support function. • Hyper DIMM support - Asus ROG STRIX H270I GAMING | STRIX H270I GAMING Users ManualEnglish - Page 19
Chapter 1 1.1.5 Expansion slots Unplug the power cord before adding or removing expansion cards. Failure to do so may cause you physical injury and damage motherboard components. STRIX H270I GAMING Slot No. Slot Description 1 PCIe x16 slot ASUS STRIX H270I GAMING 1-7 - Asus ROG STRIX H270I GAMING | STRIX H270I GAMING Users ManualEnglish - Page 20
you to clear the CMOS RTC RAM data of the system setup information such as date, time, and system passwords. Chapter 1 +3V_BAT GND CLRTC PIN 1 STRIX H270I GAMING Clear RTC RAM To erase the RTC RAM: 1. Turn OFF the computer and unplug the power cord. 2. Use a metal object such as a screwdriver to - Asus ROG STRIX H270I GAMING | STRIX H270I GAMING Users ManualEnglish - Page 21
strips. RGB_HEADER B R G +12V PIN 1 STRIX H270I GAMING RGB_HEADER connector The RGB header supports 5050 RGB multi-color LED strips (12V/G/R/B), with motherboard. • The LED strip will only light up when the system is operating. • The LED strips are purchased separately. ASUS STRIX H270I GAMING 1-9 - Asus ROG STRIX H270I GAMING | STRIX H270I GAMING Users ManualEnglish - Page 22
POST (Power-On Self-Test): CPU, memory modules, VGA card, and hard disk drives. If an error is found, the critical component's LED stays lit up until the problem is solved. BOOT_DEVICE_LED [yellow green] VGA_LED [white] DRAM_LED [yellow] CPU_LED [red] STRIX H270I GAMING CPU/DRAM/ BOOT_DEVICE/VGA - Asus ROG STRIX H270I GAMING | STRIX H270I GAMING Users ManualEnglish - Page 23
USB3+5V IntA_P1_SSRXIntA_P1_SSRX+ GND IntA_P1_SSTXIntA_P1_SSTX+ GND IntA_P1_DIntA_P1_D+ GND STRIX H270I GAMING USB3.0 Front panel connector The USB 3.0 module is beeps and warnings. SPEAKER Speaker Out GND GND +5V PIN 1 STRIX H270I GAMING Speaker Out connector ASUS STRIX H270I GAMING 1-11 - Asus ROG STRIX H270I GAMING | STRIX H270I GAMING Users ManualEnglish - Page 24
R PORT1 R PORT1 L PIN 1 HD-audio-compliant pin definition STRIX H270I GAMING Analog front panel connector We recommend that you connect a high-definition front panel audio module to this connector to avail of the motherboard's high-definition audio capability. 4. ATX power connectors (24-pin - Asus ROG STRIX H270I GAMING | STRIX H270I GAMING Users ManualEnglish - Page 25
connector (14-1 pin TPM) This connector supports a Trusted Platform Module (TPM) system, and 10 configuration with the Intel® Rapid Storage Technology through the onboard Intel® H270 chipset. A B SATA6G_1 GND GND STRIX H270I GAMING Intel® SATA 6.0Gb/s connectors ASUS STRIX H270I GAMING - Asus ROG STRIX H270I GAMING | STRIX H270I GAMING Users ManualEnglish - Page 26
fan connectors. Insufficient air flow inside the system may damage the motherboard components. These are not jumpers! Do not place jumper caps C CHA_FAN GND CHA FAN PWR CHA FAN IN +5V C STRIX H270I GAMING Fan connectors • The CPU_FAN connector supports the CPU fan of maximum 1A (12 W) fan power. - Asus ROG STRIX H270I GAMING | STRIX H270I GAMING Users ManualEnglish - Page 27
STRIX H270I GAMING M.2(SOCKET3) (Bottom) • M.2_1 socket supports SATA/ PCIe 3.0 x4 mode M Key design and type 2242/ 2260/ 2280 SATA/ PCIe 3.0 x4 storage devices. • M.2_2 socket supports M.2 socket. 3. Secure the M.2 SSD module to the M.2 socket with a screw. 3 2 1 ASUS STRIX H270I GAMING 1-15 - Asus ROG STRIX H270I GAMING | STRIX H270I GAMING Users ManualEnglish - Page 28
1 9. System panel connector (10-1 pin PANEL) This connector supports several chassis-mounted functions. +PWR LED PWR BTN +HDD_LED RESET F_PANEL GND PWR PWR_LEDPWR_LED+ (NC) HWRST# Ground HDD_LEDHDD_LED+ PIN 1 STRIX H270I GAMING System panel connector • System power LED (2-pin PWR_LED) This - Asus ROG STRIX H270I GAMING | STRIX H270I GAMING Users ManualEnglish - Page 29
steps are the same for all models. 2.1.1 Motherboard installation 1. Install the ASUS I/O Shield to the chassis rear I/O panel. 2. Place the motherboard into the chassis, ensuring that its rear I/O ports are aligned to the chassis' rear I/O panel. Chapter 2 ASUS STRIX H270I GAMING 2-1 - Asus ROG STRIX H270I GAMING | STRIX H270I GAMING Users ManualEnglish - Page 30
3. Place six (6) screws into the holes indicated by circles to secure the motherboard to the chassis. Chapter 2 DO NOT overtighten the screws! Doing so can damage the motherboard. 2-2 Chapter 2: Basic Installation - Asus ROG STRIX H270I GAMING | STRIX H270I GAMING Users ManualEnglish - Page 31
a CPU designed for LGA1155 and LGA1156 sockets on the LGA1151 socket. A B Chapter 2 C A B ASUS will not cover damages resulting from incorrect CPU installation/removal, incorrect CPU orientation/placement, or other damages resulting from negligence by the user. ASUS STRIX H270I GAMING 2-3 - Asus ROG STRIX H270I GAMING | STRIX H270I GAMING Users ManualEnglish - Page 32
2.1.3 CPU heatsink and fan assembly installation Apply the Thermal Interface Material to the CPU heatsink and CPU before you install the heatsink and fan, if necessary. To install the CPU heatsink and fan assembly Chapter 2 2-4 Chapter 2: Basic Installation - Asus ROG STRIX H270I GAMING | STRIX H270I GAMING Users ManualEnglish - Page 33
To uninstall the CPU heatsink and fan assembly Chapter 2 ASUS STRIX H270I GAMING 2-5 - Asus ROG STRIX H270I GAMING | STRIX H270I GAMING Users ManualEnglish - Page 34
2.1.4 DIMM installation Chapter 2 To remove a DIMM 2-6 Chapter 2: Basic Installation - Asus ROG STRIX H270I GAMING | STRIX H270I GAMING Users ManualEnglish - Page 35
2.1.5 ATX power connection Ensure to connect the 8-pin power plug. Chapter 2 ASUS STRIX H270I GAMING 2-7 - Asus ROG STRIX H270I GAMING | STRIX H270I GAMING Users ManualEnglish - Page 36
2.1.6 SATA device connection OR Chapter 2 2-8 Chapter 2: Basic Installation - Asus ROG STRIX H270I GAMING | STRIX H270I GAMING Users ManualEnglish - Page 37
2.1.7 Front I/O connector To install front panel connector To install USB 3.0 connector To install front panel audio connector USB 3.0 AAFP 2.1.8 Expansion card installation To install PCIe x16 cards Chapter 2 ASUS STRIX H270I GAMING 2-9 - Asus ROG STRIX H270I GAMING | STRIX H270I GAMING Users ManualEnglish - Page 38
2.1.9 M.2 installation Chapter 2 3 2 1 2-10 Chapter 2: Basic Installation - Asus ROG STRIX H270I GAMING | STRIX H270I GAMING Users ManualEnglish - Page 39
connector to the Wi-Fi ports at the back of the chassis. IO Shield • Ensure that the ASUS 2x2 dual band Wi-Fi antenna is securely installed to the Wi-Fi ports. • Ensure that the , but the Wi-Fi antenna installation procedure is the same for all models. Chapter 2 ASUS STRIX H270I GAMING 2-11 - Asus ROG STRIX H270I GAMING | STRIX H270I GAMING Users ManualEnglish - Page 40
Chapter 2 2.2 Motherboard rear and audio connections 2.2.1 Rear I/O connection 1 2 7 6 5 43 Rear panel connectors 1. DisplayPort 2. Intel® and Realtek® LAN ports* 3. Audio I/O ports** 4. Optical S/PDIF Out port 5. Wi-Fi 802.11 a/b/g/n/ac, Bluetooth V4.0 6. USB 3.0 ports 7. HDMI port * and - Asus ROG STRIX H270I GAMING | STRIX H270I GAMING Users ManualEnglish - Page 41
Side speaker Front Speaker Out Mic In Center/Subwoofer Rear Speaker Out 2.2.2 Audio I/O connections Audio I/O ports Connect to Headphone and Mic Connect to Stereo Speakers ASUS STRIX H270I GAMING 2-13 - Asus ROG STRIX H270I GAMING | STRIX H270I GAMING Users ManualEnglish - Page 42
Connect to 2 channel Speakers Connect to 4 channel Speakers Connect to 5.1 channel Speakers Chapter 2 If you are using Windows® 8.1/10 platform, use only the light blue audio port for Side Speaker Out in a 5.1-channel configuration. 2-14 Chapter 2: Basic Installation - Asus ROG STRIX H270I GAMING | STRIX H270I GAMING Users ManualEnglish - Page 43
Connect to 7.1 channel Speakers Chapter 2 ASUS STRIX H270I GAMING 2-15 - Asus ROG STRIX H270I GAMING | STRIX H270I GAMING Users ManualEnglish - Page 44
you turned on the power, the system may have failed a power-on test. Check the jumper settings and connections or call your retailer for assistance. hold down the key to enter the BIOS Setup. Follow the instructions in Chapter 3. 2.4 Turning off the computer While the system is ON, press - Asus ROG STRIX H270I GAMING | STRIX H270I GAMING Users ManualEnglish - Page 45
ASUS STRIX H270I GAMING 2-17 Chapter 2 - Asus ROG STRIX H270I GAMING | STRIX H270I GAMING Users ManualEnglish - Page 46
smoothness as your operating system. The term "BIOS" in this user manual refers to "UEFI BIOS" unless otherwise specified. BIOS (Basic Input and trained service personnel. When downloading or updating the BIOS file, rename it as H270IG.CAP for this motherboard. Chapter 3 ASUS STRIX H270I GAMING - Asus ROG STRIX H270I GAMING | STRIX H270I GAMING Users ManualEnglish - Page 47
to guide you in -On Self Test (POST). If motherboard to the default value. See section 1.1.6 Headers for information on how to erase the RTC RAM via the Clear CMOS jumper. • The BIOS setup program does not support the Bluetooth devices. Please visit ASUS website for the detailed BIOS content manual - Asus ROG STRIX H270I GAMING | STRIX H270I GAMING Users ManualEnglish - Page 48
Mode item in section Boot menu for details. Displays the CPU/motherboard temperature, CPU voltage output, CPU/chassis/power fan speed, and SATA RAID mode for Intel Rapid Storage Technology Displays the CPU Fan's speed. Click the button to manually tune the fans Loads ASUS STRIX H270I GAMING 3-3 - Asus ROG STRIX H270I GAMING | STRIX H270I GAMING Users ManualEnglish - Page 49
3.2.2 Advanced Mode The Advanced Mode provides advanced options for experienced end-users to configure the BIOS settings. The figure below shows an example of the Advanced Mode. Refer to the following sections for the detailed configurations. To switch from EZ Mode to Advanced Mode, click Advanced - Asus ROG STRIX H270I GAMING | STRIX H270I GAMING Users ManualEnglish - Page 50
3.3 My Favorites for more information. Q-Fan Control(F6) This button above the menu bar displays the current settings of your fans. Use this button to manually tweak the fans to your desired settings. Refer to section 3.2.3 QFan Control for more information. Chapter 3 ASUS STRIX H270I GAMING 3-5 - Asus ROG STRIX H270I GAMING | STRIX H270I GAMING Users ManualEnglish - Page 51
over this button to show a QR code, scan this QR code on your mobile device to connect to the BIOS FAQ web page of the ASUS support website. You can also scan the following QR code: Hot keys This button above the menu bar contains the navigation keys for the BIOS setup - Asus ROG STRIX H270I GAMING | STRIX H270I GAMING Users ManualEnglish - Page 52
3.2.3 QFan Control The QFan Control allows you to set a fan profile or manually configure the operating speed of your CPU and chassis fans. Click to select a fan Click to undo the changes Click to go back to main menu Select to manually configure your fans Chapter 3 ASUS STRIX H270I GAMING 3-7 - Asus ROG STRIX H270I GAMING | STRIX H270I GAMING Users ManualEnglish - Page 53
configure your fans' operating speed. Chapter 3 Speed points To configure your fans: Select to manually configure your fans 1. Select the fan that you want to configure and to view its current status. 2. Click and drag the speed points to adjust - Asus ROG STRIX H270I GAMING | STRIX H270I GAMING Users ManualEnglish - Page 54
3 My Favorites comes with several performance, power saving, and fast boot related items by default. You can personalize this screen by adding or removing items. ASUS STRIX H270I GAMING 3-9 - Asus ROG STRIX H270I GAMING | STRIX H270I GAMING Users ManualEnglish - Page 55
Adding items to My Favorites To add BIOS items: 1. Press on your keyboard or click Setup Tree Map screen. from the BIOS screen to open 2. On the Setup Tree Map screen, select the BIOS items that you want to save in My Favorites screen. Main menu panel Selected shortcut items Submenu panel - Asus ROG STRIX H270I GAMING | STRIX H270I GAMING Users ManualEnglish - Page 56
The configuration options for this section vary depending on the CPU and DIMM model you installed on the motherboard. CPU Core Ratio [Auto] This item allows you to set the CPU core ratio limit per core menu allow you to set the CPU ratio and their features. Chapter 3 ASUS STRIX H270I GAMING 3-11 - Asus ROG STRIX H270I GAMING | STRIX H270I GAMING Users ManualEnglish - Page 57
Intel(R) SpeedStep(tm) [Auto] This item allows the operating system to dynamically adjust the processor voltage and cores frequency, resulting to a decreased average power consumption and - Asus ROG STRIX H270I GAMING | STRIX H270I GAMING Users ManualEnglish - Page 58
] [Disabled] SMART Self Test [On] SMART (Self-Monitoring, Analysis and Reporting Technology) is a monitoring system that shows a warning message during POST (Power-on Self Test) when an error occurs in the hard disks. Configuration options: [On] [Off] Chapter 3 ASUS STRIX H270I GAMING 3-13 - Asus ROG STRIX H270I GAMING | STRIX H270I GAMING Users ManualEnglish - Page 59
controller. [Disabled] Disables the controller. Intel LAN Controller [Enabled] [Enabled] Enables the Intel® LAN controller. [Disabled] Disables The items in this menu allow you to configure Ipv4 / Ipv6 PXE support. 3.6.10 HDD/SSD SMART Information This menu displays the SMART information of - Asus ROG STRIX H270I GAMING | STRIX H270I GAMING Users ManualEnglish - Page 60
the individual USB ports. Refer to section 1.1.2 Motherboard layout for the location of the USB ports support the non-UEFI driver add-on devices or the Windows® UEFI mode. [Disabled] Disable the CSM to fully support the Windows® Security Update and Security Boot. Chapter 3 ASUS STRIX H270I GAMING - Asus ROG STRIX H270I GAMING | STRIX H270I GAMING Users ManualEnglish - Page 61
appears on the screen depends on the number of devices installed in the system. To select the boot device during system startup, press when ASUS Logo appears. Boot Override These items display the available devices. The number of device items that appears on the screen depends on the number of - Asus ROG STRIX H270I GAMING | STRIX H270I GAMING Users ManualEnglish - Page 62
mode menu. Check the ASUS support site for a full list of SSDs tested with Secure Erase. The supported on Intel® SATA port. For more information about Intel® SATA ports, refer to section 1.1.2 Motherboard layout of this manual supported on selected ASUS graphics cards. ASUS STRIX H270I GAMING 3-17 - Asus ROG STRIX H270I GAMING | STRIX H270I GAMING Users ManualEnglish - Page 63
of BIOS, DO NOT manually update the BIOS. Inappropriate BIOS updating may result to system's failure to boot. Carefully follow the instructions in this chapter to update your BIOS when necessary. Visit http://www.asus.com to download the latest BIOS file for this motherboard. The following utilities - Asus ROG STRIX H270I GAMING | STRIX H270I GAMING Users ManualEnglish - Page 64
an ISP (Internet Service Provider). • This utility is available in the support DVD that comes with the motherboard package. 3.11.2 ASUS EZ Flash 3 ASUS EZ Flash 3 update process is done. STRIX H270I GAMING Date: 23/03/2017 23/03/2017 15:36 16779264 SH270IG.CAP ASUS STRIX H270I GAMING 3-19 - Asus ROG STRIX H270I GAMING | STRIX H270I GAMING Users ManualEnglish - Page 65
can support devices Mode of the BIOS setup program. Go to the Tool menu to select ASUS EZ Flash Utility and press . 2. Select via Internet. Chapter 3 connection method, and then press . 4. Follow the onscreen instructions to complete the update. 5. Reboot the system when the update - Asus ROG STRIX H270I GAMING | STRIX H270I GAMING Users ManualEnglish - Page 66
download the file at https://www.asus.com/support/ and save it to a USB flash drive. Recovering the BIOS To recover the BIOS: 1. Turn on the system. 2. Insert the motherboard support DVD to the optical drive, or BIOS! Doing so can cause system boot failure! Chapter 3 ASUS STRIX H270I GAMING 3-21 - Asus ROG STRIX H270I GAMING | STRIX H270I GAMING Users ManualEnglish - Page 67
Chapter 3 3-22 Chapter 3: BIOS Setup - Asus ROG STRIX H270I GAMING | STRIX H270I GAMING Users ManualEnglish - Page 68
including interference that may cause undesired operation. This equipment has been tested and found to comply with the limits for a Class B not installed and used in accordance with manufacturer's instructions, may cause harmful interference to radio communications. ASUS STRIX H270I GAMING A-1 - Asus ROG STRIX H270I GAMING | STRIX H270I GAMING Users ManualEnglish - Page 69
Appendix Compliance Statement of Innovation, Science and Economic Development Canada (ISED) Compliance Statement of Innovation, Science and Economic Development Canada (ISED) This Class B digital apparatus complies with Canadian ICES-003, RSS-210, and CAN ICES3(B)/NMB-3(B). This device complies - Asus ROG STRIX H270I GAMING | STRIX H270I GAMING Users ManualEnglish - Page 70
ASUS REACH website at http://csr.asus.com/english/REACH.htm. DO NOT throw the motherboard in municipal waste. ASUS Recycling/Takeback Services ASUS recycling and takeback programs instructions and transmitter operating conditions for satisfying RF exposure compliance. ASUS STRIX H270I GAMING A-3 - Asus ROG STRIX H270I GAMING | STRIX H270I GAMING Users ManualEnglish - Page 71
Appendix FCC Bluetooth Wireless Compliance The antenna used with this transmitter must not be co-located or operated in conjunction with any other antenna or transmitter subject to the conditions of the FCC Grant. Bluetooth Industry Canada Statement This Class B device meets all requirements of the - Asus ROG STRIX H270I GAMING | STRIX H270I GAMING Users ManualEnglish - Page 72
Direktīvas 2014/53/ES būtiskajām prasībām un citiem citiem saistošajiem nosacījumiem. Pilns ES atbilstības paziņojuma teksts pieejams šeit: https://www.asus.com/support/ Wi-Fi darbība 5150-5350 MHz ir jāierobežo lietošanai telpās valstīs, kuras norādītas tālāk. ASUS STRIX H270I GAMING A-5 - Asus ROG STRIX H270I GAMING | STRIX H270I GAMING Users ManualEnglish - Page 73
kraven och andra relevanta bestämmelser i direktiv 2014/53/EU. Fullständig text av EU-försäkran om överensstämmelse finns på https://www.asus.com/support/ WiFi som använder 5150-5350 MHz kommer att begränsas för användning inomhus i de länder som anges i tabellen: ASUSTek Computer Inc 2014 - Asus ROG STRIX H270I GAMING | STRIX H270I GAMING Users ManualEnglish - Page 74
Harkort Str. 21-23, 40880 Ratingen, Germany Fax +49-2102-959931 Web site http://www.asus.com/de Online contact http://eu-rma.asus.com/sales Technical Support Telephone +49-2102-5789555 Support Fax +49-2102-959911 Online support http://qr.asus.com/techserv ASUS STRIX H270I GAMING A-7 - Asus ROG STRIX H270I GAMING | STRIX H270I GAMING Users ManualEnglish - Page 75
Section 2. 1077(a) Responsible Party Name: Asus Computer International Address: 800 Corporate Way, Fremont, CA 94539. Phone/Fax No: (510)739-3777/(510)608-4555 hereby declares that the product Product Name : Motherboard Model Number : STRIX H270I GAMING Conforms to the following specifications: FCC
-
 1
1 -
 2
2 -
 3
3 -
 4
4 -
 5
5 -
 6
6 -
 7
7 -
8
-
9
-
10
-
11
-
12
-
13
-
14
-
15
-
16
-
17
-
18
-
19
-
20
-
21
-
22
-
23
-
24
-
25
-
26
-
27
-
28
-
29
-
30
-
31
-
32
-
33
-
34
-
35
-
36
-
37
-
38
-
39
-
40
-
41
-
42
-
43
-
44
-
45
-
46
-
47
-
48
-
49
-
50
-
51
-
52
-
53
-
54
-
55
-
56
-
57
-
58
-
59
-
60
-
61
-
62
-
63
-
64
-
65
-
66
-
67
-
68
-
69
-
70
-
71
-
72
-
73
-
74
-
75
 |
 |

Motherboard
STRIX H270I
GAMING