Asus ROG STRIX H270I GAMING STRIX H270I GAMING Users ManualEnglish - Page 62
Secure Erase, 3.9.3 ASUS SPD Information, 3.9.4 Graphics Card Information, GPU Post
 |
View all Asus ROG STRIX H270I GAMING manuals
Add to My Manuals
Save this manual to your list of manuals |
Page 62 highlights
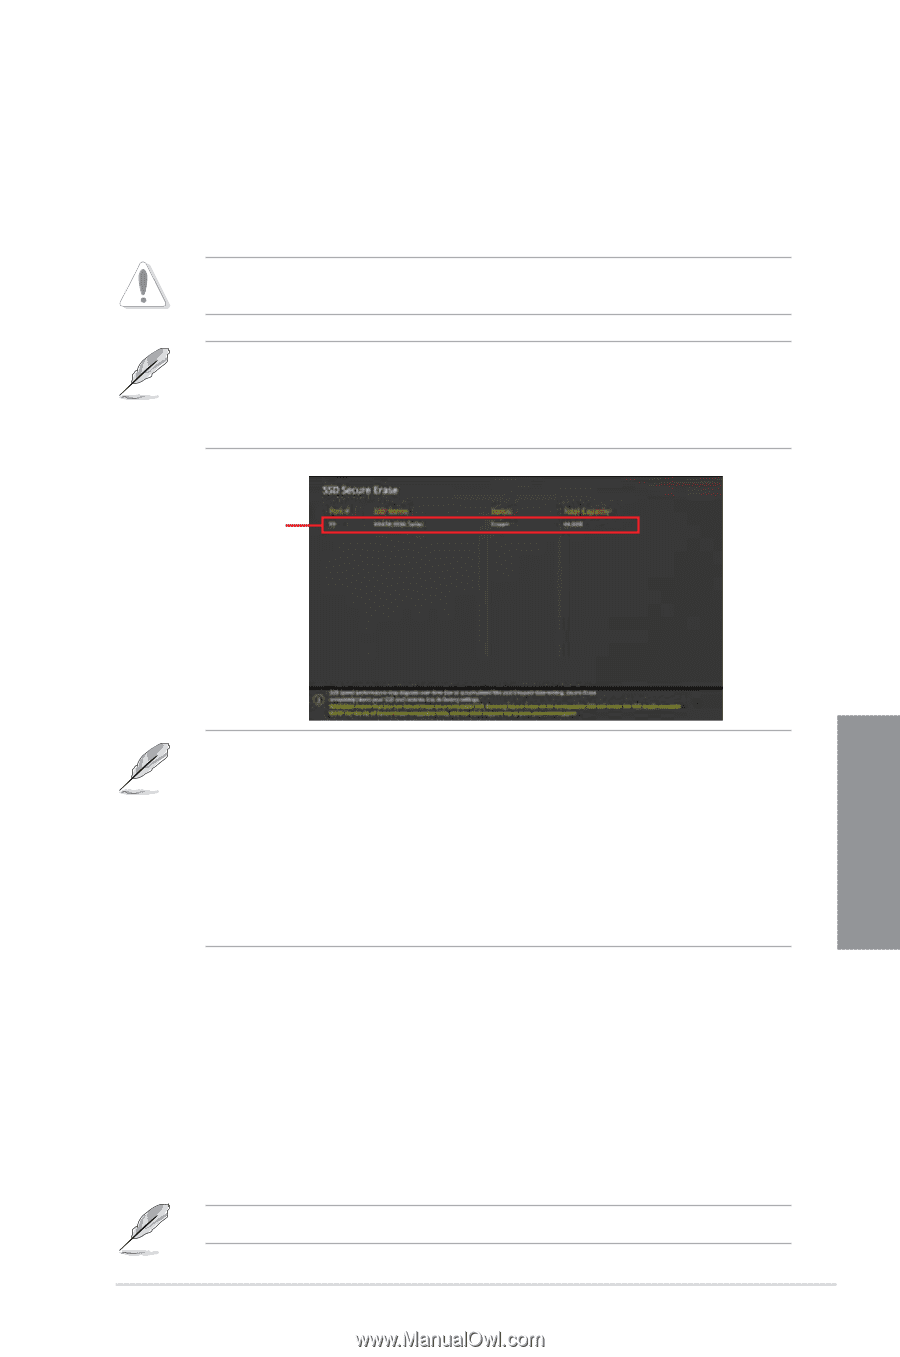
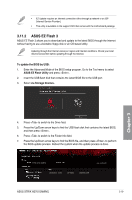
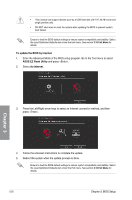
3.9.2 Secure Erase SSD speeds may lower over time as with any storage medium due to data processing. Secure Erase completely and safely cleans your SSD, restoring it to factory performance levels. To launch Secure Erase, click Tool > Secure Erase on the Advanced mode menu. Check the ASUS support site for a full list of SSDs tested with Secure Erase. The drive may become unstable if you run Secure Erase on an incompatible SSD. • The time to erase the contents of your SSD may take a while depending on its size. Do not turn off the system during the process. • Secure Erase is only supported on Intel® SATA port. For more information about Intel® SATA ports, refer to section 1.1.2 Motherboard layout of this manual. Displays the available SSDs Chapter 3 Status definition: • Frozen. The frozen state is the result of a BIOS protective measure. The BIOS guards drives that do not have password protection by freezing them prior to booting. If the drive is frozen, a power off or hard reset of your PC must be performed to proceed with the Secure Erase. • Locked. SSDs might be locked if the Secure Erase process is either incomplete or was stopped. This may be due to a third party software that uses a different password defined by ASUS. You have to unlock the SSD in the software before proceeding with Secure Erase. 3.9.3 ASUS SPD Information This item allows you to view the DRAM SPD information. 3.9.4 Graphics Card Information This item displays the information about the graphics card installed in your system. GPU Post This item displays the information and recommended configuration for the PCIE slots that the graphics card is installed in your system. This feature is only supported on selected ASUS graphics cards. ASUS STRIX H270I GAMING 3-17
-
 1
1 -
2
-
3
-
4
-
5
-
6
-
7
-
8
-
9
-
10
-
11
-
12
-
13
-
14
-
15
-
16
-
17
-
18
-
19
-
20
-
21
-
22
-
23
-
24
-
25
-
26
-
27
-
28
-
29
-
30
-
31
-
32
-
33
-
34
-
35
-
36
-
37
-
38
-
39
-
40
-
41
-
42
-
43
-
44
-
45
-
46
-
47
-
48
-
49
-
50
-
51
-
52
-
53
-
54
-
55
-
56
-
 57
57 -
 58
58 -
 59
59 -
 60
60 -
 61
61 -
 62
62 -
 63
63 -
 64
64 -
 65
65 -
 66
66 -
 67
67 -
68
-
69
-
70
-
71
-
72
-
73
-
74
-
75
 |
 |