Asus TS300-E3 PA4 TS300-E3 - Page 36
hole align as shown. When
 |
View all Asus TS300-E3 PA4 manuals
Add to My Manuals
Save this manual to your list of manuals |
Page 36 highlights
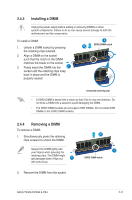
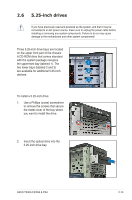
3. Make sure that the drive and bay hole align as shown. When in place, the drive protrudes about an inch from the front panel. 4. Secure the drive with a screw. 5. Connect the IDE cable to the IDE connector on the back of the drive. 6. Connect a 4-pin plug from the power supply to the power connector on the back of the drive. IDE cable Power plug 2-16 Chapter 2: Hardware setup
-
 1
1 -
2
-
3
-
4
-
5
-
6
-
7
-
8
-
9
-
10
-
11
-
12
-
13
-
14
-
15
-
16
-
17
-
18
-
19
-
20
-
21
-
22
-
23
-
24
-
25
-
26
-
27
-
28
-
29
-
30
-
 31
31 -
 32
32 -
 33
33 -
 34
34 -
 35
35 -
 36
36 -
 37
37 -
 38
38 -
 39
39 -
 40
40 -
 41
41 -
42
-
43
-
44
-
45
-
46
-
47
-
48
-
49
-
50
-
51
-
52
-
53
-
54
-
55
-
56
-
57
-
58
-
59
-
60
-
61
-
62
-
63
-
64
-
65
-
66
-
67
-
68
-
69
-
70
-
71
-
72
-
73
-
74
-
75
-
76
-
77
-
78
-
79
-
80
-
81
-
82
-
83
-
84
-
85
-
86
-
87
-
88
-
89
-
90
-
91
-
92
-
93
-
94
-
95
-
96
-
97
-
98
-
99
-
100
-
101
-
102
-
103
-
104
-
105
-
106
-
107
-
108
-
109
-
110
-
111
-
112
-
113
-
114
-
115
-
116
-
117
-
118
-
119
-
120
-
121
-
122
-
123
-
124
-
125
-
126
-
127
-
128
-
129
-
130
-
131
-
132
-
133
-
134
-
135
-
136
-
137
-
138
-
139
-
140
-
141
-
142
-
143
-
144
-
145
-
146
-
147
-
148
-
149
-
150
-
151
-
152
-
153
-
154
-
155
-
156
-
157
-
158
-
159
-
160
-
161
-
162
-
163
-
164
-
165
-
166
-
167
-
168
-
169
-
170
-
171
-
172
-
173
-
174
-
175
-
176
-
177
-
178
-
179
-
180
-
181
-
182
-
183
-
184
-
185
-
186
-
187
-
188
-
189
-
190
-
191
-
192
-
193
-
194
-
195
-
196
-
197
-
198
-
199
-
200
-
201
-
202
-
203
-
204
 |
 |
Chapter 2:
Hardware setup
2-16
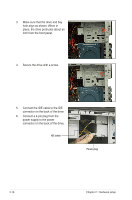
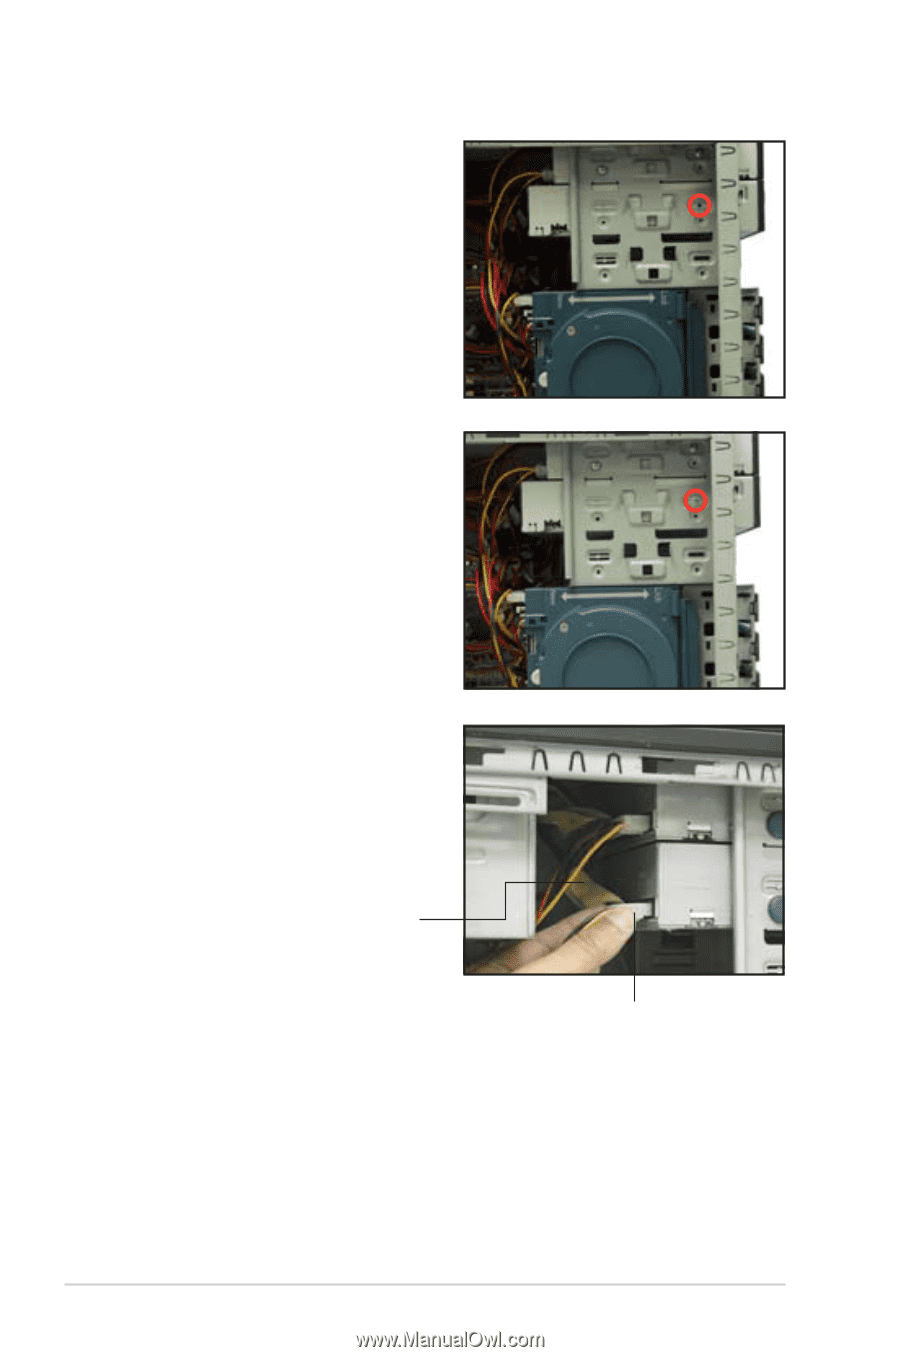
5.
Connect the IDE cable to the IDE
connector on the back of the drive.
6.
Connect a 4-pin plug from the
power supply to the power
connector on the back of the drive.
IDE cable
Power plug
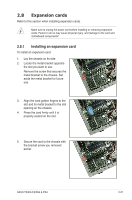
3.
Make sure that the drive and bay
hole align as shown. When in
place, the drive protrudes about an
inch from the front panel.
4.
Secure the drive with a screw.