Asus VivoMini VM65N VivoMini V Seriese Barebone User Manual English - Page 31
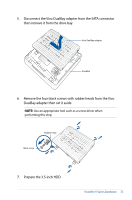
DualBay adapter, then slide it towards the SATA connector.
 |
View all Asus VivoMini VM65N manuals
Add to My Manuals
Save this manual to your list of manuals |
Page 31 highlights
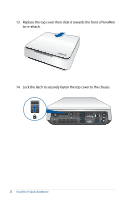
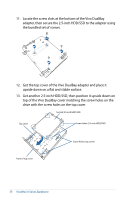
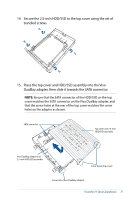
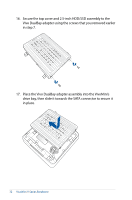
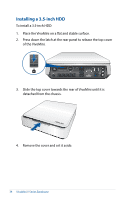
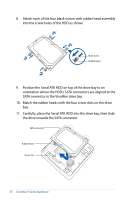
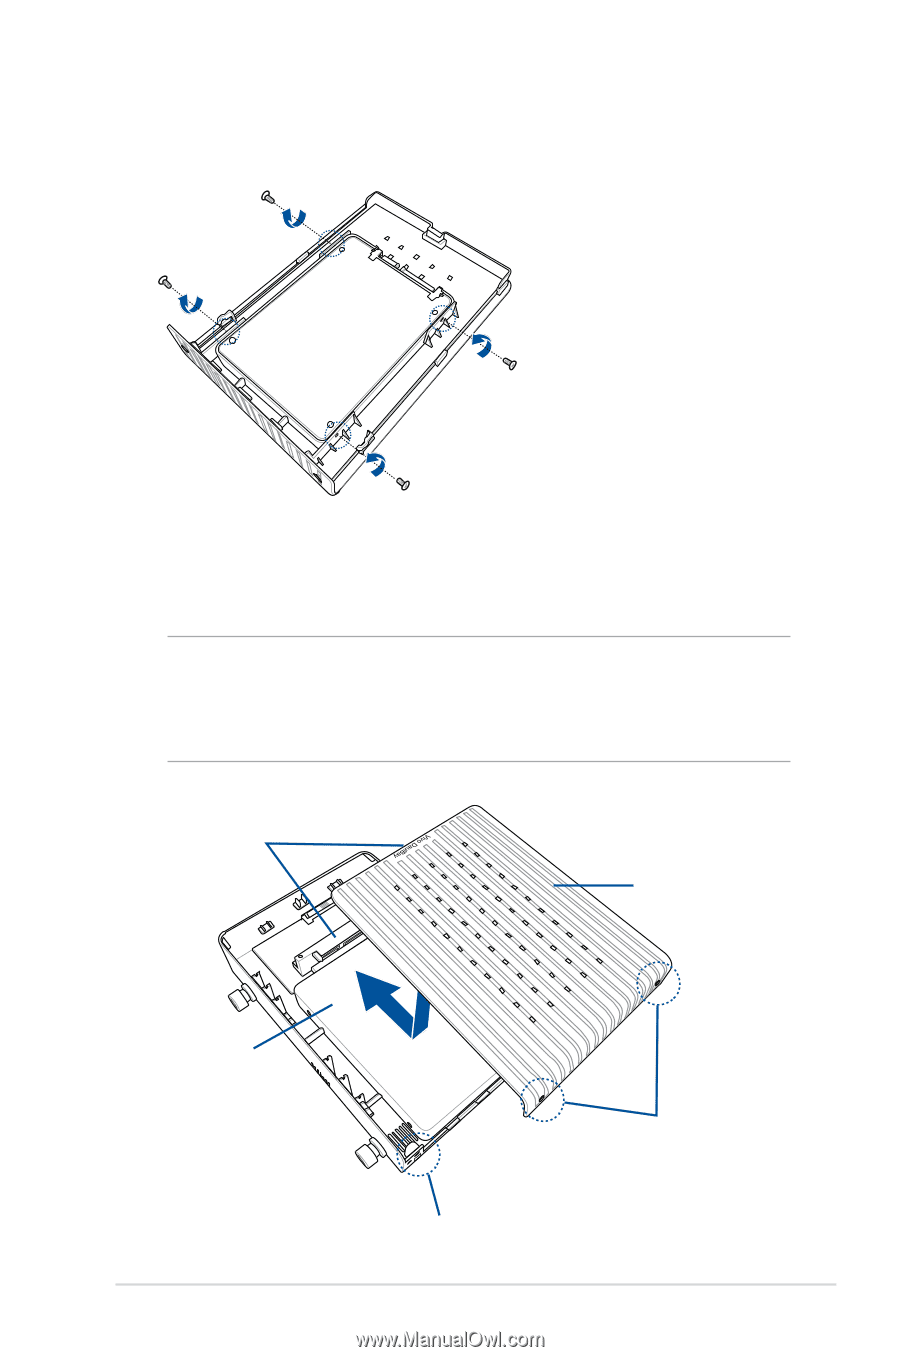
14. Secure the 2.5-inch HDD/SSD to the top cover using the set of bundled screws. 15. Place the top cover and HDD/SSD assembly into the Vivo DualBay adapter, then slide it towards the SATA connector. NOTE: Ensure that the SATA connector of the HDD/SSD on the top cover matches the SATA connector on the Vivo DualBay adapter, and that the screw holes at the rear of the top cover matches the screw holes on the adapter as shown. SATA connector Top cover and 2.5-inch HDD/SSD assembly Vivo DualBay adapter and 2.5-inch HDD/SSD assembly Screw holes (top cover) screw holes (Vivo DualBay adapter) VivoMini V Series Barebone 31
-
 1
1 -
2
-
3
-
4
-
5
-
6
-
7
-
8
-
9
-
10
-
11
-
12
-
13
-
14
-
15
-
16
-
17
-
18
-
19
-
20
-
21
-
22
-
23
-
24
-
25
-
 26
26 -
 27
27 -
 28
28 -
 29
29 -
 30
30 -
 31
31 -
 32
32 -
 33
33 -
 34
34 -
 35
35 -
 36
36 -
37
-
38
-
39
-
40
-
41
-
42
-
43
-
44
-
45
-
46
-
47
-
48
-
49
-
50
-
51
-
52
-
53
-
54
 |
 |
VivoMini V Series Barebone
31
14.
Secure the 2.5-inch HDD/SSD to the top cover using the set of
bundled screws.
15. Place the top cover and HDD/SSD assembly into the Vivo
DualBay adapter, then slide it towards the SATA connector.
NOTE:
Ensure that the SATA connector of the HDD/SSD on the top
cover matches the SATA connector on the Vivo DualBay adapter, and
that the screw holes at the rear of the top cover matches the screw
holes on the adapter as shown.
SATA connector
Top cover and 2.5-inch
HDD/SSD assembly
Screw holes (top cover)
screw holes (Vivo DualBay adapter)
Vivo DualBay adapter and
2.5-inch HDD/SSD assembly