BenQ HT5550 User Manual - Page 34
INSTALLATION menu, Projector, Position, Test Pattern, Aspect Ratio, 12V Trigger, High Altitude
 |
View all BenQ HT5550 manuals
Add to My Manuals
Save this manual to your list of manuals |
Page 34 highlights
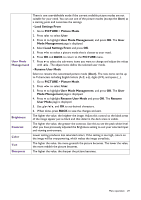
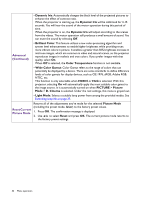
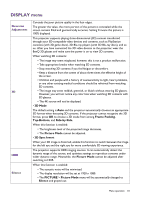
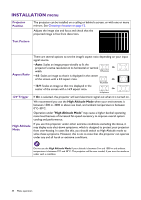
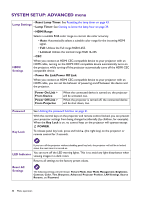
INSTALLATION menu Projector Position The projector can be installed on a ceiling or behind a screen, or with one or more mirrors. See Choosing a location on page 12. Adjusts the image size and focus and check that the projected image is free from distortion. Test Pattern There are several options to set the image's aspect ratio depending on your input signal source. Aspect Ratio • Auto: Scales an image proportionally to fit the projector's native resolution in its horizontal or vertical width. 15:9 picture • 4:3: Scales an image so that it is displayed in the center of the screen with a 4:3 aspect ratio. • 16:9: Scales an image so that it is displayed in the center of the screen with a 16:9 aspect ratio. 4:3 picture 16:9 picture 12V Trigger If On is selected, the projector will send electronic signal out when it is turned on. We recommend you use the High Altitude Mode when your environment is between 1500 m-3000 m above sea level, and ambient temperature is between 0°C-30°C. Operation under "High Altitude Mode" may cause a higher decibel operating noise level because of increased fan speed necessary to improve overall system cooling and performance. High Altitude Mode If you use this projector under other extreme conditions excluding the above, it may display auto shut-down symptoms, which is designed to protect your projector from over-heating. In cases like this, you should switch to High Altitude mode to solve these symptoms. However, this is not to state that this projector can operate under any and all harsh or extreme conditions. Do not use the High Altitude Mode if your altitude is between 0 m and 1500 m and ambient temperature is between 0°C and 35°C. The projector will be over cooled, if you turn the mode on under such a condition. 34 Menu operation
-
 1
1 -
2
-
3
-
4
-
5
-
6
-
7
-
8
-
9
-
10
-
11
-
12
-
13
-
14
-
15
-
16
-
17
-
18
-
19
-
20
-
21
-
22
-
23
-
24
-
25
-
26
-
27
-
28
-
 29
29 -
 30
30 -
 31
31 -
 32
32 -
 33
33 -
 34
34 -
 35
35 -
 36
36 -
 37
37 -
 38
38 -
 39
39 -
40
-
41
-
42
-
43
-
44
-
45
-
46
-
47
-
48
-
49
 |
 |
