Bernina 2000 Manual - Page 10
Overlock, stitches, stitch, selection
 |
View all Bernina 2000 manuals
Add to My Manuals
Save this manual to your list of manuals |
Page 10 highlights
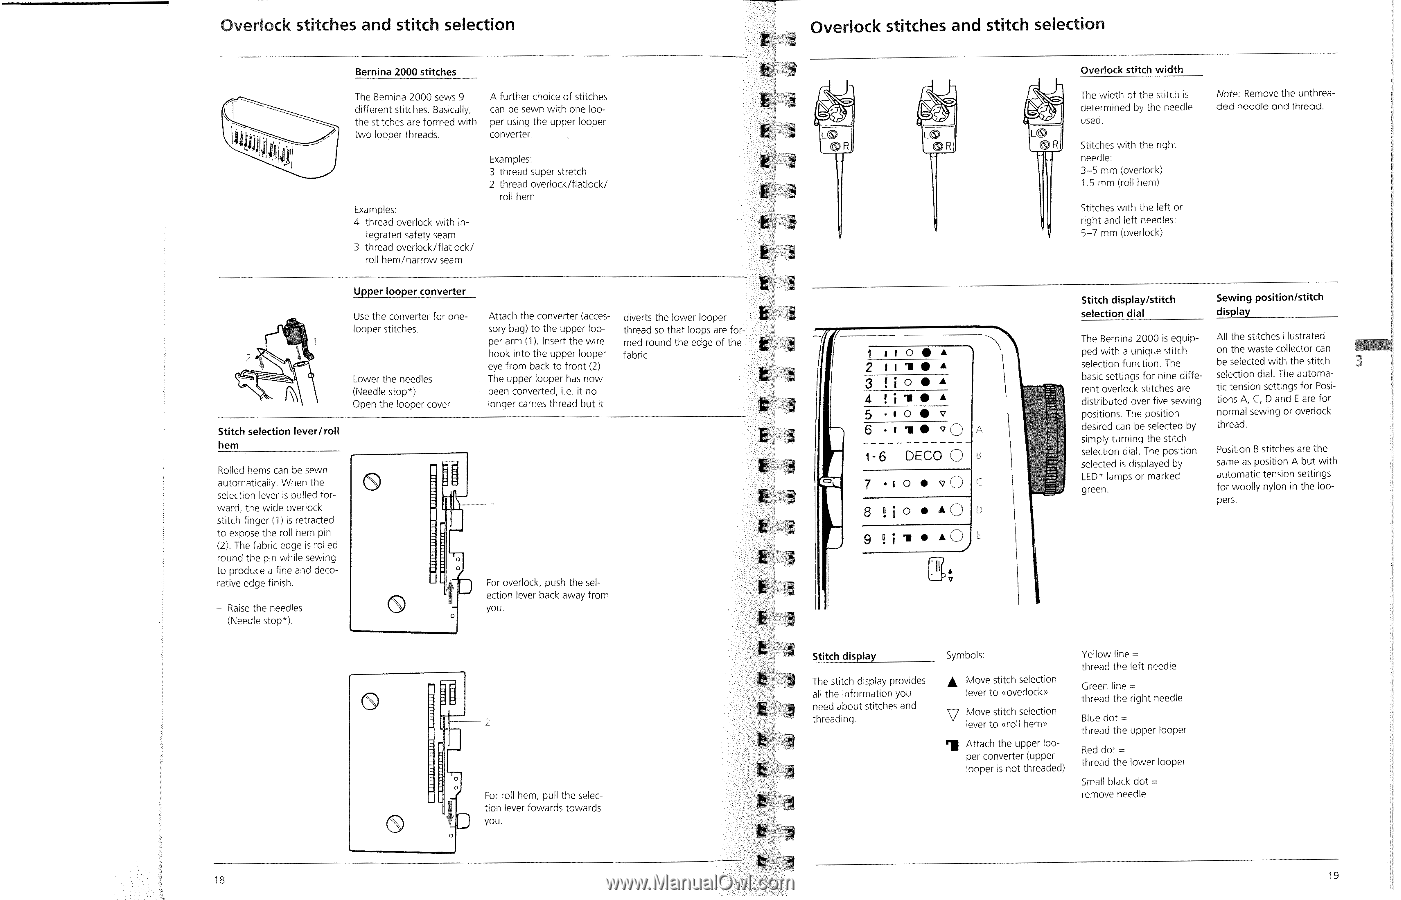
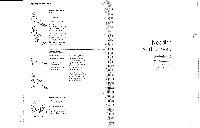
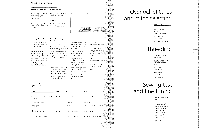
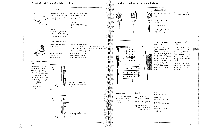
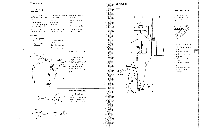
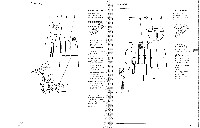
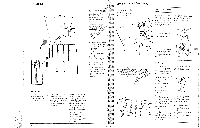
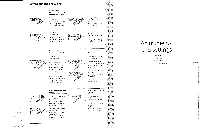
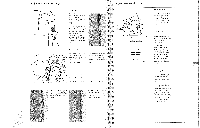
Overlock stitches and stitch selection 404#(41.,1 Bernina 2000 stitches The Bernina 2000 sews 9 different stitches. Basically, the stitches are formed with two looper threads. A further choice of stitches can be sewn with one looper using the upper looper converter. Examples: 4 thread overlock with in- tegrated safety seam 3 thread overlock/flatlock/ roll hem/narrow seam Examples: 3 thread super stretch 2 thread overlock/flatlock/ roll hem Upper looper converter Use the converter for onelooper stitches. Lower the needles (Needle stop*) Open the looper cover Attach the converter (accessory bag) to the upper looper arm (1). Insert the wire hook into the upper looper eye from back to front (2). The upper looper has now been converted, i.e. it no longer carries thread but it diverts the lower looper thread so that loops are formed round the edge of the fabric. Stitch selection lever/roll hem Rolled hems can be sewn automatically. When the selection lever is pulled forward, the wide overlock stitch finger (1) is retracted to expose the roll hem pin (2). The fabric edge is rolled round the pin while sewing to produce a fine and decorative edge finish. - Raise the needles (Needle stop*). 0 0 For overlock, push the selection lever back away from you. 0 OOP O 2 0 0 For roll hem, pull the selec- tion lever fowards towards O you. 0 18 Overlock stitches and stitch selection LCD R Overlock stitch width The width of the stitch is determined by the needle used. Note: Remove the unthreaded needle and thread. R (S1)R Stitches with the right needle: 3-S mm (overlock) 1.5 mm (roll hem) Stitches with the left or right and left needles: 5-7 mm (overlock) I O• • 2 • A 3 O• A 4 • • 5 O • 6 • 1 'I • v O A 1-6 DECO O B 7 • uo • vO C 8 (! io • •O 9 a i -§ • •O E Stitch display/stitch selection dial Sewing position/stitch display The Bernina 2000 is equipped with a unique stitch selection function. The basic settings for nine different overlock stitches are distributed over five sewing positions. The position desired can be selected by simply turning the stitch selection dial. The position selected is displayed by LED* lamps or marked green. All the stitches illustrated on the waste collector can be selected with the stitch selection dial. The automatic tension settings for Positions A, C, D and E are for normal sewing or overlock thread. Position B stitches are the same as position A but with automatic tension settings for woolly nylon in the loopers. Stitch display The stitch display provides all the information you need about stitches and threading. Symbols: A Move stitch selection lever to «overlock» Move stitch selection lever to groll hem» Attach the upper looper converter (upper looper is not threaded) Yellow line = thread the left needle Green line = thread the right needle Blue dot = thread the upper loope' Red dot = thread the lower looper Small black dot = remove needle 19
-
 1
1 -
2
-
3
-
4
-
 5
5 -
 6
6 -
 7
7 -
 8
8 -
 9
9 -
 10
10 -
 11
11 -
 12
12 -
 13
13 -
 14
14 -
 15
15 -
16
-
17
-
18
-
19
-
20
-
21
-
22
-
23
-
24
-
25
-
26
 |
 |