Bernina 2000 Manual - Page 19
INNiII
 |
View all Bernina 2000 manuals
Add to My Manuals
Save this manual to your list of manuals |
Page 19 highlights
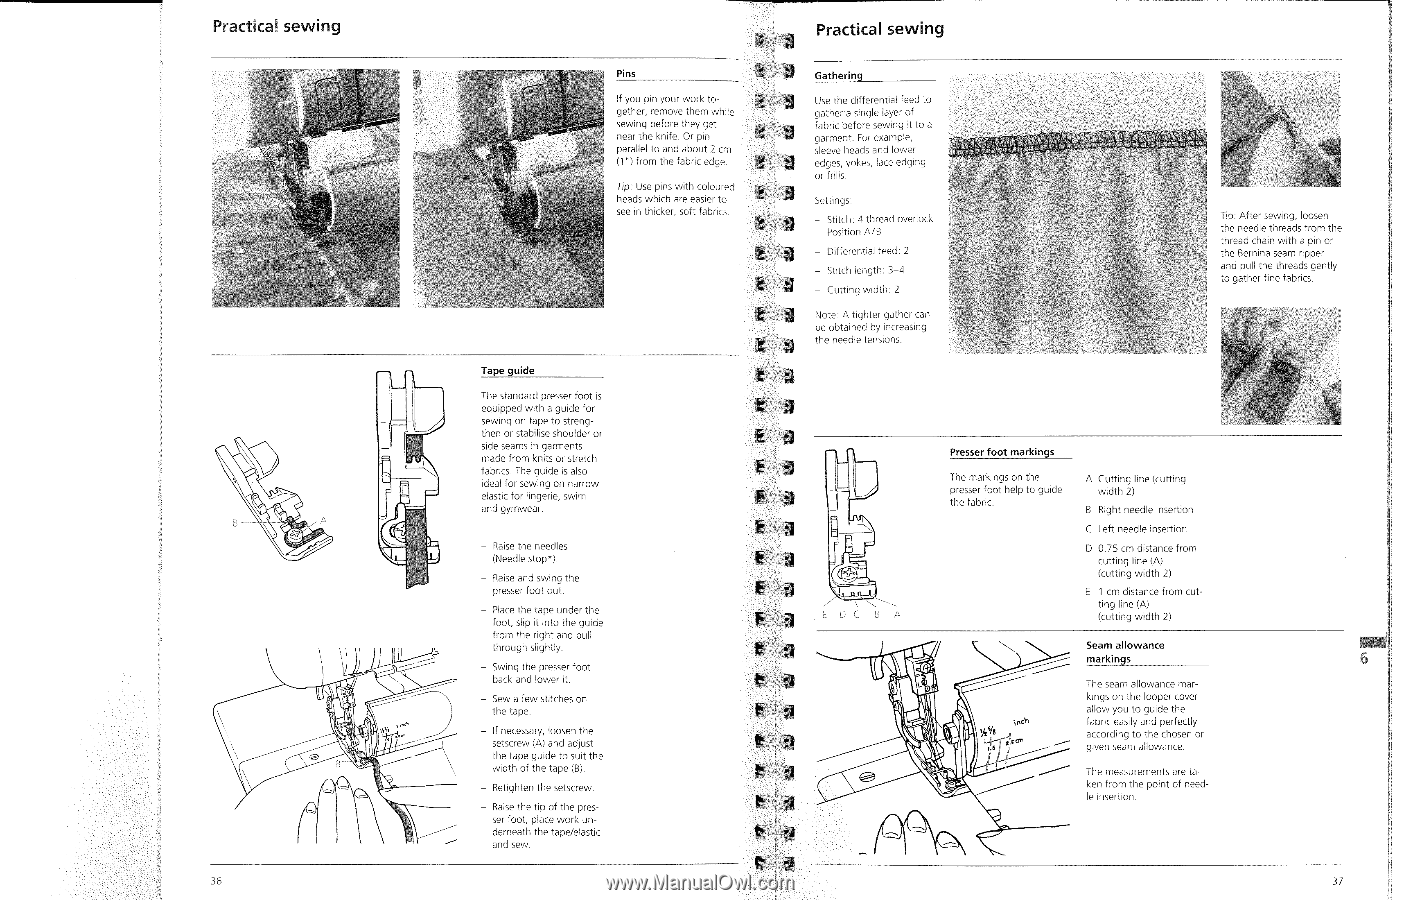
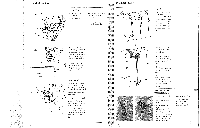
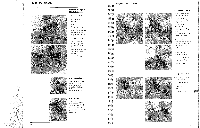
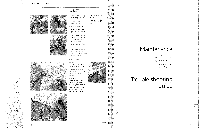
Practical sewing I fay li 36 tui rn Pins If you pin your work together, remove them while sewing before they get near the knife. Or pin parallel to and about 2 cm (1") from the fabric edge. Tip: Use pins with coloured heads which are easier to see in thicker, soft fabrics. Tape guide The standard presser foot is equipped with a guide for sewing on tape to strengthen or stabilise shoulder or side seams in garments made from knits or stretch fabrics. The guide is also ideal for sewing on narrow elastic for lingerie, swim and gymwear. - Raise the needles (Needle stop*). - Raise and swing the presser foot out. - Place the tape under the foot. slip it into the guide from the right and pull through slightly. - Swing the presser foot back and lower it. - Sew a few stitches on the tape. - If necessary, loosen the setscrew (A) and adjust the tape guide to suit the width of the tape (W. - Retighten the setscrew. - Raise the tip of the presser foot, place work underneath the tape/elastic and sew. Practical sewing Gathering Use the differential feed to gather a single layer of fabric before sewing it to a garment. For example, sleeve heads and lower edges, yokes, lace edging or frills. Settings: - Stitch: 4 thread overlock Position A/B - Differential feed: 2 - Stitch length: 3-4 - Cutting width: 2 Note: A tighter gather can be obtained by increasing the needle tensions. f. tiP pirJ Ifi rxa lip Tip: After sewing, loosen the needle threads from the thread chain with a pin or the Bernina seam ripper and pull the threads gently to gather fine fabrics. 1'4 INNiII Presser foot markings The markings on the presser foot help to guide the fabric. A Cutting line (cutting width 2) B Right needle insertion C Left needle insertion D 0.75 cm distance from cutting line (A) (cutting width 2) E 1 cm distance from cut- ting line (A) D C (cutting width 2) Seam allowance markings The seam allowance mar- kings on the looper cover allow you to guide the fabric easily and perfectly Vs according to the chosen or given seam allowance. The measurements are taken from the point of needle insertion. 37
-
 1
1 -
2
-
3
-
4
-
5
-
6
-
7
-
8
-
9
-
10
-
11
-
12
-
13
-
 14
14 -
 15
15 -
 16
16 -
 17
17 -
 18
18 -
 19
19 -
 20
20 -
 21
21 -
 22
22 -
 23
23 -
 24
24 -
25
-
26
 |
 |