Bernina 2000 Manual - Page 11
Threading
 |
View all Bernina 2000 manuals
Add to My Manuals
Save this manual to your list of manuals |
Page 11 highlights
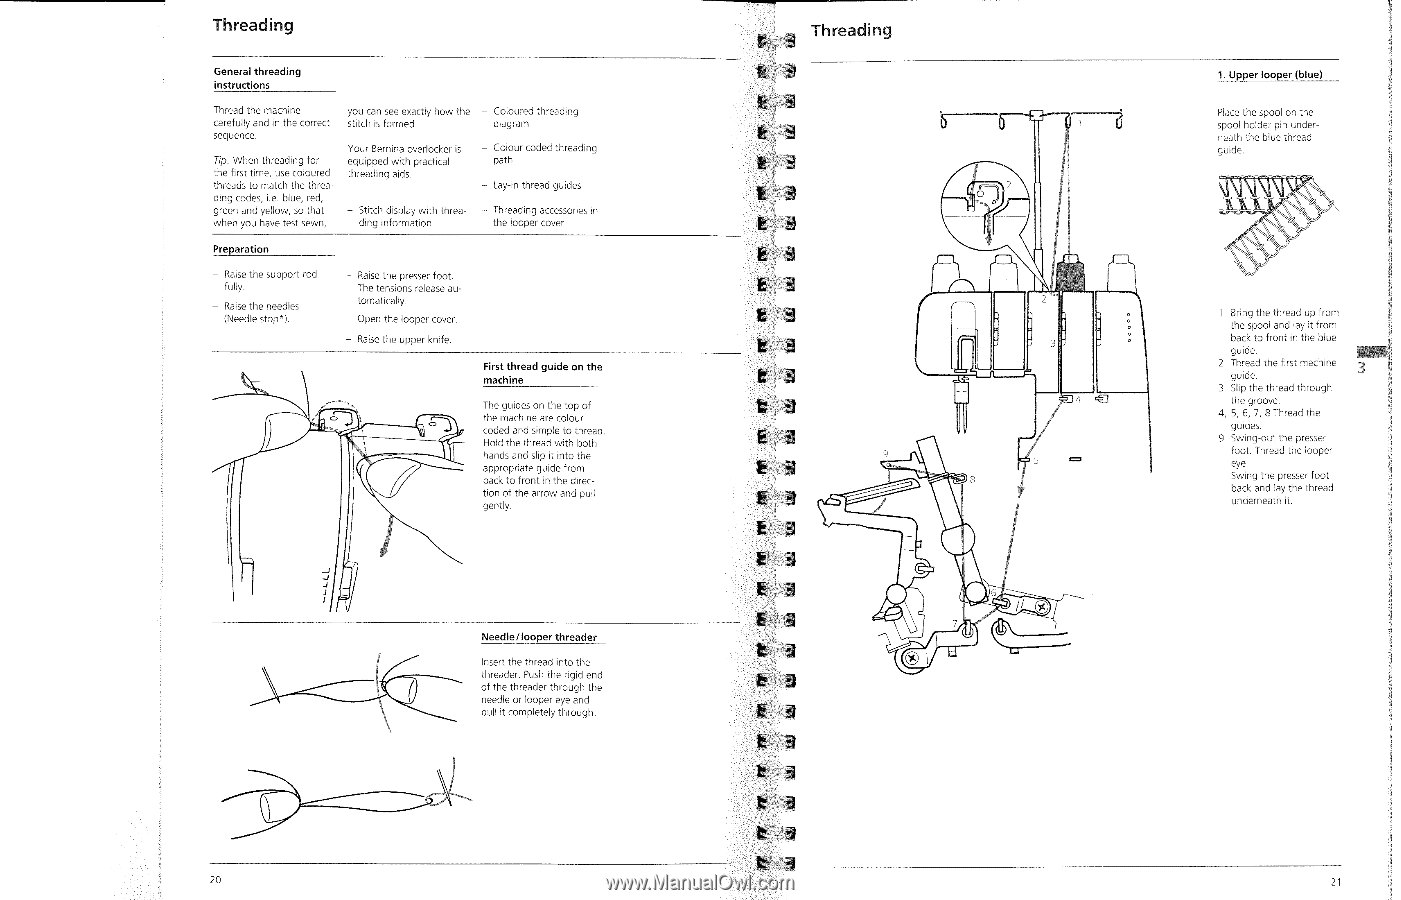
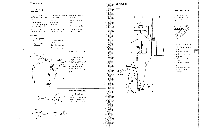
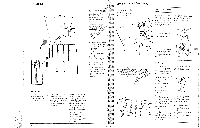
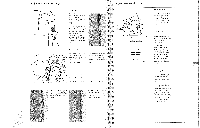
Threading General threading instructions Thread the machine carefully and in the correct sequence. Tip: When threading for the first time, use coloured threads to match the threading codes, i.e. blue, red, green and yellow, so that when you have test sewn, you can see exactly how the stitch is formed. Your Bernina overlocker is equipped with practical threading aids. - Stitch display with threading information - Coloured threading diagram - Colour coded threading path - Lay-in thread guides - Threading accessories in the looper cover Preparation - Raise the support rod fully. - Raise the needles (Needle stop*). - Raise the presser foot. The tensions release automatically. - Open the looper cover. - Raise the upper knife. First thread guide on the machine s-D The guides on the top of the machine are colour coded and simple to thread. Hold the thread with both hands and slip it into the appropriate guide from back to front in the direction of the arrow and pull gently. Needle/looper threader Insert the thread into the threader. Push the rigid end of the threader through the needle or looper eye and pull it completely through. 20 Threading b 1. Upper looper (blue) d Place the spool on the spool holder pin under- neath the blue thread guide. - 3 I 1 Bring the thread up from 0 0 the spool and lay it from 0 back to front in the blue guide. 2 Thread the first machine guide. 3 Slip the thread through the groove. 4, 5, 6, 7, 8 Thread the guides. 9 Swing-out the presser foot. Thread the looper eye. Swing the presser foot back and lay the thread underneath it. (i) 21
-
 1
1 -
2
-
3
-
4
-
5
-
 6
6 -
 7
7 -
 8
8 -
 9
9 -
 10
10 -
 11
11 -
 12
12 -
 13
13 -
 14
14 -
 15
15 -
 16
16 -
17
-
18
-
19
-
20
-
21
-
22
-
23
-
24
-
25
-
26
 |
 |