Bernina 43 Manual - Page 20
Sewing, Applications
 |
View all Bernina 43 manuals
Add to My Manuals
Save this manual to your list of manuals |
Page 20 highlights
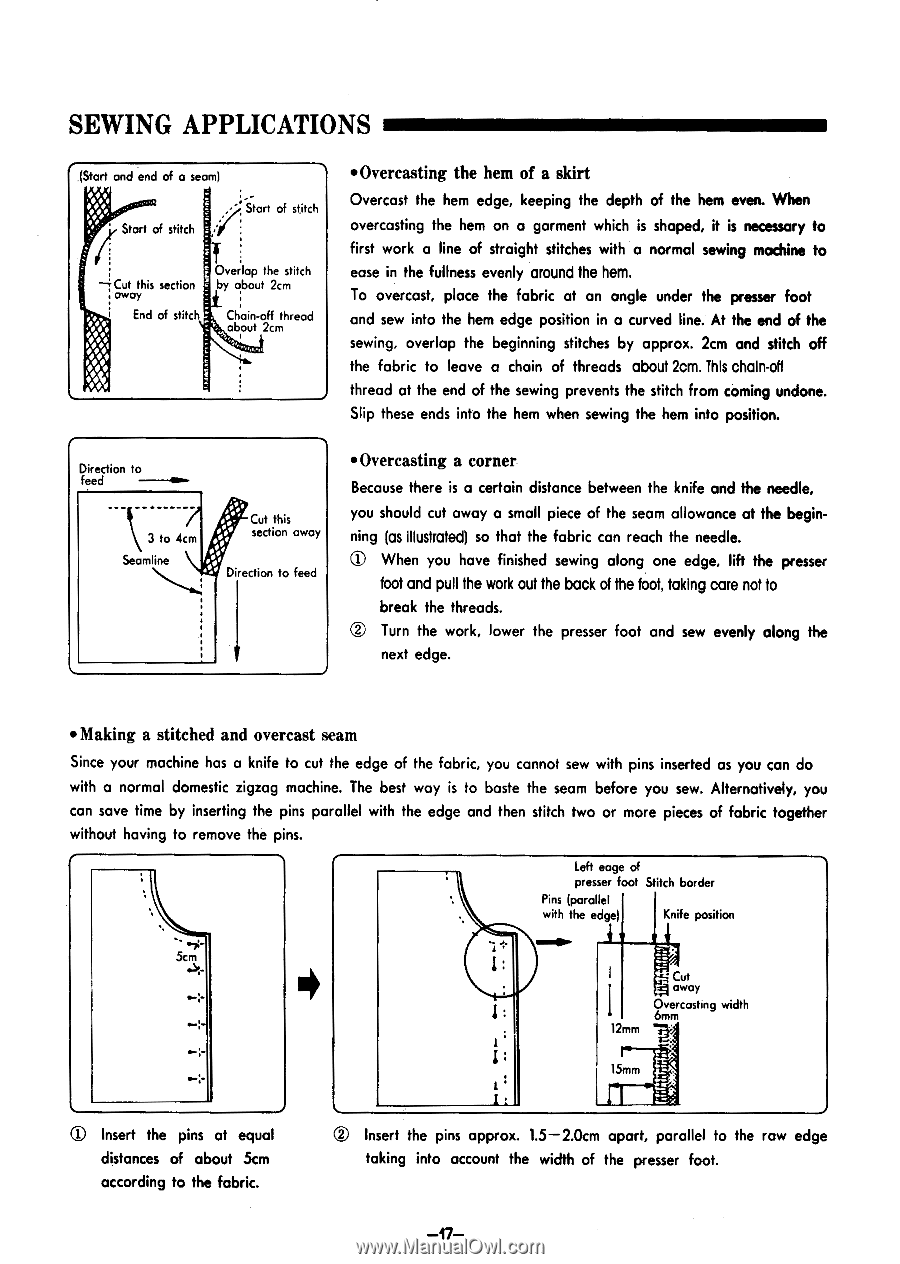
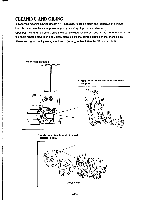
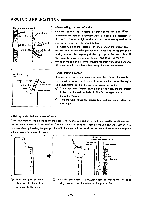
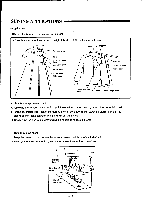
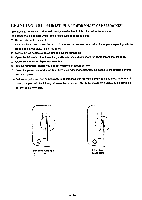
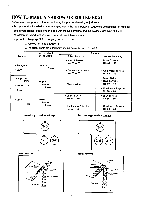
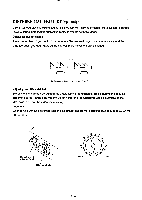
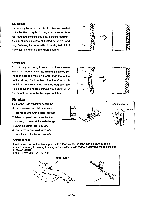
SEWING APPLICATIONS (Start and end of a seam) OVA Start of stitch Start of stitch 'Cut this section • away End of stitch .1100. Overlap the stitch by about 2cm Chain-off thread about 2cm • Overcasting the hem of a skirt Overcast the hem edge, keeping the depth of the hem even. When overcasting the hem on a garment which is shaped, it is necessary to first work a line of straight stitches with a normal sewing machine to ease in the fullness evenly around the hem. To overcast, place the fabric at an angle under the presser foot and sew into the hem edge position in a curved line. At the end of the sewing, overlap the beginning stitches by approx. 2cm and stitch off the fabric to leave a chain of threads about 2cm. This chain-off thread at the end of the sewing prevents the stitch from coming undone. Slip these ends into the hem when sewing the hem into position. Direction to feed 3 to 4cm Seamline Cut this section away Direction to feed • Overcasting a corner Because there is a certain distance between the knife and the needle, you should cut away a small piece of the seam allowance at the beginning (as illustrated) so that the fabric can reach the needle. 0 When you have finished sewing along one edge, lift the presser foot and pull the work out the back of the foot, taking care not to break the threads. C) Turn the work, lower the presser foot and sew evenly along the next edge. • Making a stitched and overcast seam Since your machine has a knife to cut the edge of the fabric, you cannot sew with pins inserted as you can do with a normal domestic zigzag machine. The best way is to baste the seam before you sew. Alternatively, you can save time by inserting the pins parallel with the edge and then stitch two or more pieces of fabric together without having to remove the pins. Left eage of presser foot S itch border Pins (parallel with the edge) Knife position `a- 5cAm - d. -.4 Cut away Overcasting width 6mm 12mm 15mm Insert the pins at equal distances of about 5cm according to the fabric. © Insert the pins approx. 1.5-2.0cm apart, parallel to the raw edge taking into account the width of the presser foot. -17-
-
 1
1 -
2
-
3
-
4
-
5
-
6
-
7
-
8
-
9
-
10
-
11
-
12
-
13
-
14
-
 15
15 -
 16
16 -
 17
17 -
 18
18 -
 19
19 -
 20
20 -
 21
21 -
 22
22 -
 23
23 -
 24
24 -
 25
25 -
26
-
27
 |
 |