Bernina 43 Manual - Page 9
Threading, Machine
 |
View all Bernina 43 manuals
Add to My Manuals
Save this manual to your list of manuals |
Page 9 highlights
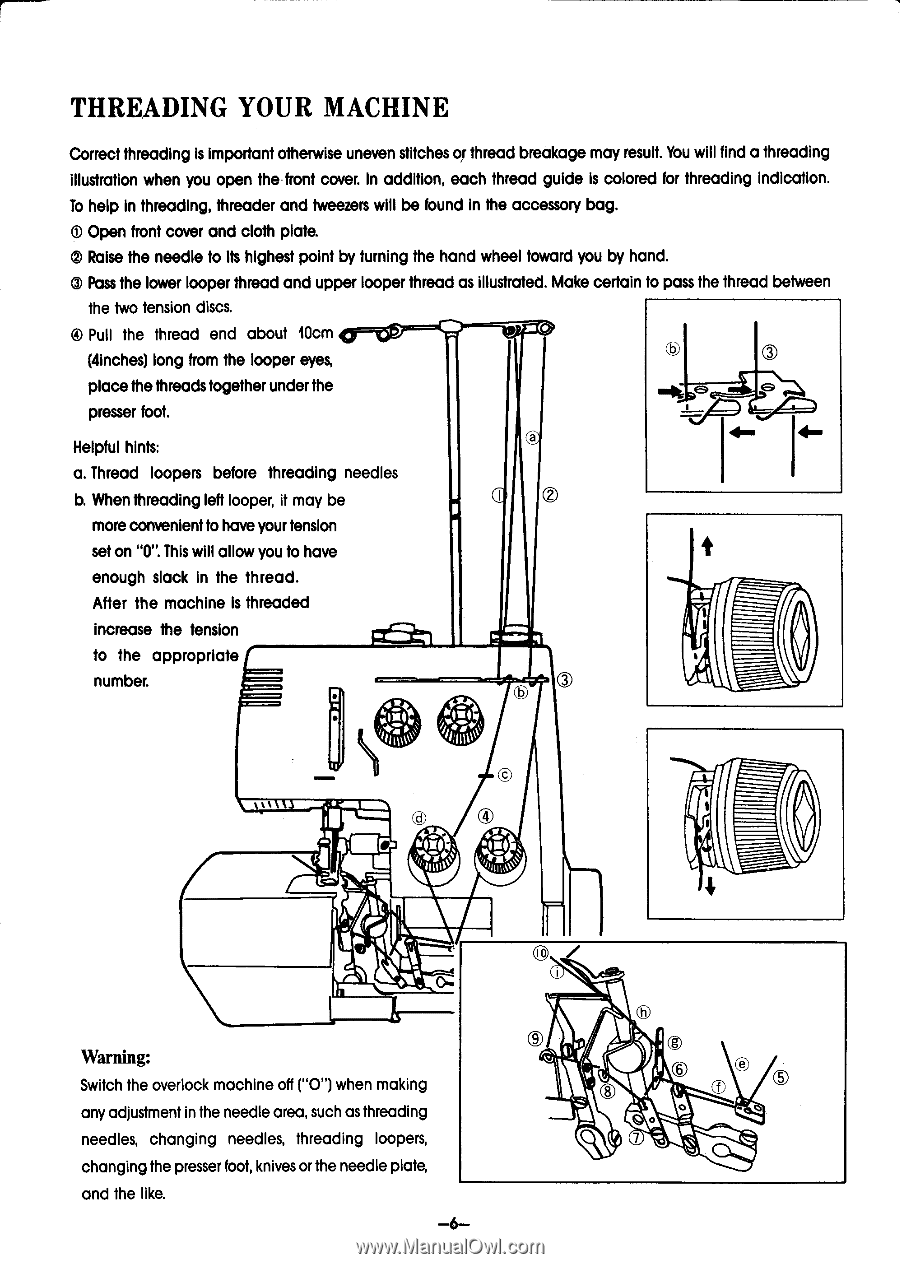
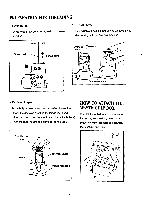
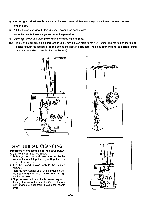
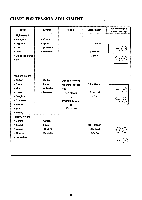
THREADING YOUR MACHINE Correct threading is Important otherwise uneven stitches or thread breakage may result. You will find a threading illustration when you open the front cover. In addition, each thread guide is colored for threading indication. To help in threading, threader and tweezers will be found in the accessory bag. 0 Open front cover and cloth plate. e Raise the needle to its highest point by turning the hand wheel toward you by hand. 0 Pass the lower looper thread and upper looper thread as illustrated. Make certain to pass the thread between the two tension discs. 0 Pull the thread end about 10cm (4inches) long from the looper eyes, C)) place the threads together under the presser foot. Helpful hints: a. Thread loopers before threading needles b. When threading left looper, it may be more convenient to have your tension set on "0". This will allow you to have enough slack in the thread. After the machine Is threaded increase the tension to the appropriate Prc: 1 number. ick 4 1W CD • Warning: Switch the overlock machine off ("0") when making any adjustment in the needle area, such as threading needles, changing needles, threading loopers, changing the presser foot, knives or the needle plate, and the like. -6- 0 0 7
-
 1
1 -
2
-
3
-
 4
4 -
 5
5 -
 6
6 -
 7
7 -
 8
8 -
 9
9 -
 10
10 -
 11
11 -
 12
12 -
 13
13 -
 14
14 -
15
-
16
-
17
-
18
-
19
-
20
-
21
-
22
-
23
-
24
-
25
-
26
-
27
 |
 |