Binatone HomeSurf 742 User Guide - Page 6
Basic operations of your Homesurf Tablet
 |
View all Binatone HomeSurf 742 manuals
Add to My Manuals
Save this manual to your list of manuals |
Page 6 highlights
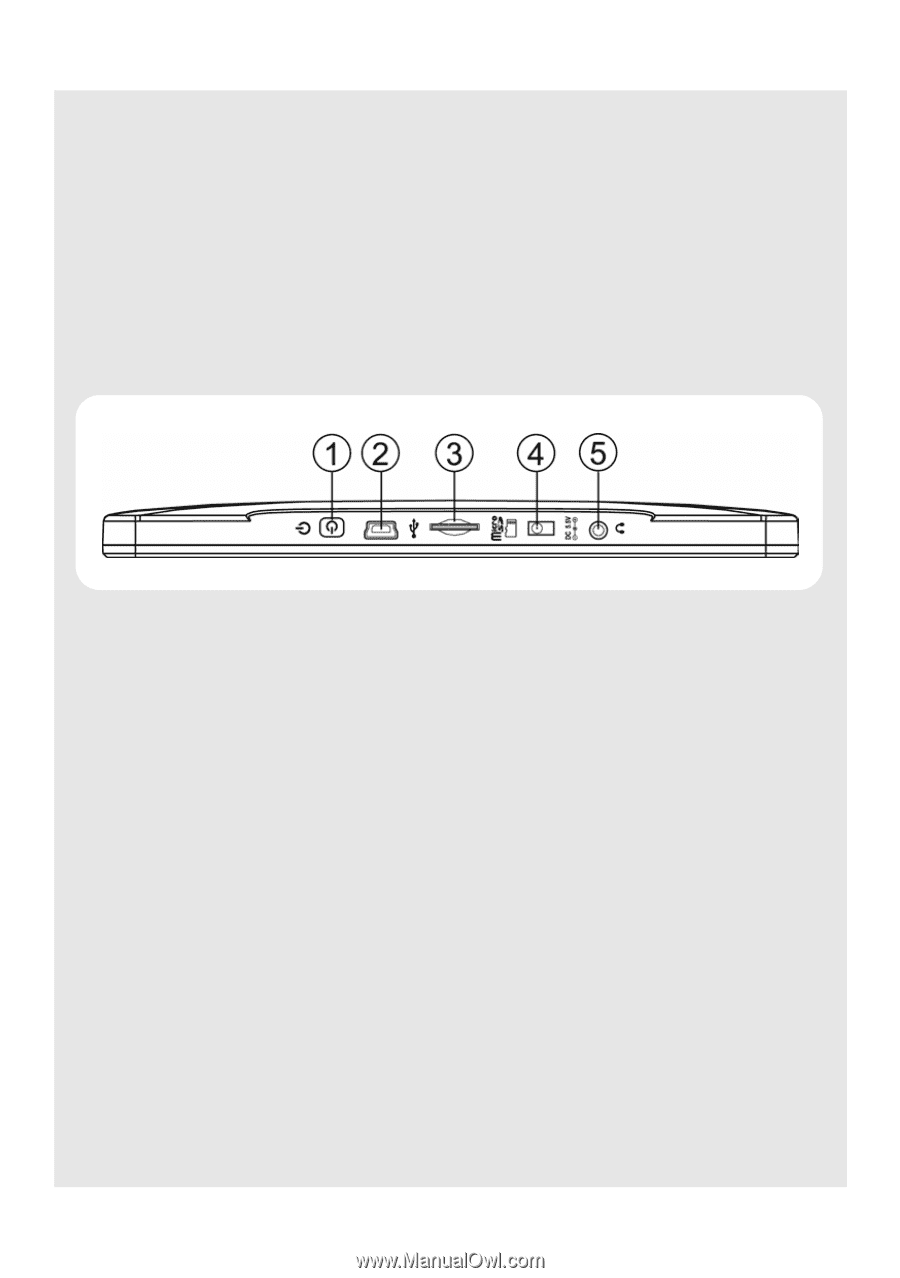
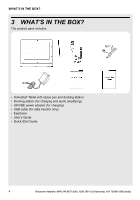
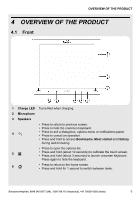
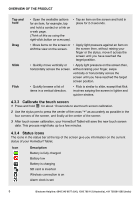
OVERVIEW OF THE PRODUCT 7+ 8- Press to increase volume. Press to reduce volume. B O H + - Note , , , and are capacitive sensing keys that can be activated with a light touch of the finger. The LED lights up in blue when you power on the HomeSurf Tablet. 4.2 Side 1P Press to power up or down 2U • Plug in the USB cable for connection to a PC for data transfer. Note The USB port is for data transfer with a PC only. You cannot use it for charging. 3 Micro SD card slot Insert your micro SD card 4 Power connector Plug in the power adaptor for charging 5Q Plug in a 2.5mm headset to listen to music and watch videos 4.3 Basic operations of your Homesurf Tablet You can operate the HomeSurf Tablet by touching the surface of the display using the Stylus pen (included) or with your finger. 6 Binatone Helpline: 0845 345 9677 (UK), 1300 768 112 (Australia), +91 7503011385 (India)
-
 1
1 -
 2
2 -
 3
3 -
 4
4 -
 5
5 -
 6
6 -
 7
7 -
 8
8 -
 9
9 -
 10
10 -
 11
11 -
 12
12 -
13
-
14
-
15
-
16
-
17
-
18
-
19
-
20
-
21
-
22
-
23
-
24
-
25
-
26
-
27
-
28
-
29
-
30
-
31
-
32
-
33
-
34
-
35
-
36
-
37
-
38
-
39
-
40
-
41
-
42
-
43
-
44
-
45
-
46
-
47
-
48
-
49
-
50
-
51
-
52
-
53
-
54
-
55
-
56
-
57
-
58
-
59
-
60
-
61
-
62
-
63
-
64
-
65
-
66
-
67
-
68
-
69
-
70
-
71
-
72
-
73
-
74
-
75
-
76
-
77
-
78
-
79
-
80
-
81
-
82
-
83
-
84
-
85
 |
 |