Blackberry PRD-10459-016 User Guide - Page 319
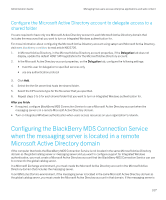
Click a BlackBerry MDS Connection Service instance., view > MDS Connection Service
 |
View all Blackberry PRD-10459-016 manuals
Add to My Manuals
Save this manual to your list of manuals |
Page 319 highlights
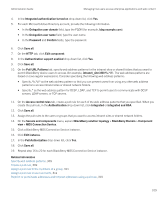
Administration Guide Managing how users access enterprise applications and web content 4. In the Integrated authentication turned on drop-down list, click Yes. 5. For each Microsoft Active Directory account, provide the following information: • In the Delegation user domain field, type the FQDN (for example, ldap.example.com). • In the Delegation user name field, type the user name. • In the Password and Confirm fields, type the password. 6. Click Save all. 7. On the HTTP tab, click Edit component. 8. In the Authentication support enabled drop-down list, click Yes. 9. Click Save all. 10. On the Pull URL Patterns tab, specify web address patterns for the intranet sites or shared folders that you want to permit BlackBerry device users to access (for example, intranet_site(:80)?(\/.*)?). The web address patterns are based on Java regular expressions. Consider specifying the following web address patterns: • Specify .*\:.*\/.* as the web address pattern so that you can prevent users from using any other web address patterns to access intranet sites or shared network folders. • Specify .* as the web address pattern for OCSP, LDAP, and TCP to permit users to communicate with OCSP servers, LDAP servers, or TCP servers. 11. On the Access control rules tab, create a pull rule for each of the web address patterns that you specified. When you create the pull rule, in the Authentication drop-down list, click Integrated or Integrated and RSA. 12. Click Save all. 13. Assign the pull rules to the users or groups that you want to access intranet sites or shared network folders. 14. On the Servers and components menu, expand BlackBerry solution topology > BlackBerry Domain > Component view > MDS Connection Service. 15. Click a BlackBerry MDS Connection Service instance. 16. Click Edit instance. 17. In the Pull Authorization drop-down list, click Yes. 18. Click Save all. 19. Repeat step 16 to 20 for each BlackBerry MDS Connection Service instance. Related information Specify web address patterns, 309 Create a pull rule, 309 Assign a pull rule to the members of a group, 311 Assign a pull rule to user accounts, 311 Restrict or permit web addresses and Intranet addresses using a pull rule, 310 319
-
 1
1 -
2
-
3
-
4
-
5
-
6
-
7
-
8
-
9
-
10
-
11
-
12
-
13
-
14
-
15
-
16
-
17
-
18
-
19
-
20
-
21
-
22
-
23
-
24
-
25
-
26
-
27
-
28
-
29
-
30
-
31
-
32
-
33
-
34
-
35
-
36
-
37
-
38
-
39
-
40
-
41
-
42
-
43
-
44
-
45
-
46
-
47
-
48
-
49
-
50
-
51
-
52
-
53
-
54
-
55
-
56
-
57
-
58
-
59
-
60
-
61
-
62
-
63
-
64
-
65
-
66
-
67
-
68
-
69
-
70
-
71
-
72
-
73
-
74
-
75
-
76
-
77
-
78
-
79
-
80
-
81
-
82
-
83
-
84
-
85
-
86
-
87
-
88
-
89
-
90
-
91
-
92
-
93
-
94
-
95
-
96
-
97
-
98
-
99
-
100
-
101
-
102
-
103
-
104
-
105
-
106
-
107
-
108
-
109
-
110
-
111
-
112
-
113
-
114
-
115
-
116
-
117
-
118
-
119
-
120
-
121
-
122
-
123
-
124
-
125
-
126
-
127
-
128
-
129
-
130
-
131
-
132
-
133
-
134
-
135
-
136
-
137
-
138
-
139
-
140
-
141
-
142
-
143
-
144
-
145
-
146
-
147
-
148
-
149
-
150
-
151
-
152
-
153
-
154
-
155
-
156
-
157
-
158
-
159
-
160
-
161
-
162
-
163
-
164
-
165
-
166
-
167
-
168
-
169
-
170
-
171
-
172
-
173
-
174
-
175
-
176
-
177
-
178
-
179
-
180
-
181
-
182
-
183
-
184
-
185
-
186
-
187
-
188
-
189
-
190
-
191
-
192
-
193
-
194
-
195
-
196
-
197
-
198
-
199
-
200
-
201
-
202
-
203
-
204
-
205
-
206
-
207
-
208
-
209
-
210
-
211
-
212
-
213
-
214
-
215
-
216
-
217
-
218
-
219
-
220
-
221
-
222
-
223
-
224
-
225
-
226
-
227
-
228
-
229
-
230
-
231
-
232
-
233
-
234
-
235
-
236
-
237
-
238
-
239
-
240
-
241
-
242
-
243
-
244
-
245
-
246
-
247
-
248
-
249
-
250
-
251
-
252
-
253
-
254
-
255
-
256
-
257
-
258
-
259
-
260
-
261
-
262
-
263
-
264
-
265
-
266
-
267
-
268
-
269
-
270
-
271
-
272
-
273
-
274
-
275
-
276
-
277
-
278
-
279
-
280
-
281
-
282
-
283
-
284
-
285
-
286
-
287
-
288
-
289
-
290
-
291
-
292
-
293
-
294
-
295
-
296
-
297
-
298
-
299
-
300
-
301
-
302
-
303
-
304
-
305
-
306
-
307
-
308
-
309
-
310
-
311
-
312
-
313
-
 314
314 -
 315
315 -
 316
316 -
 317
317 -
 318
318 -
 319
319 -
 320
320 -
 321
321 -
 322
322 -
 323
323 -
 324
324 -
325
-
326
-
327
-
328
-
329
-
330
-
331
-
332
-
333
-
334
-
335
-
336
-
337
-
338
-
339
-
340
-
341
-
342
-
343
-
344
-
345
-
346
-
347
-
348
-
349
-
350
-
351
-
352
-
353
-
354
-
355
-
356
-
357
-
358
-
359
-
360
-
361
-
362
-
363
-
364
-
365
-
366
-
367
-
368
-
369
-
370
-
371
-
372
-
373
-
374
-
375
-
376
-
377
-
378
-
379
-
380
-
381
-
382
-
383
-
384
-
385
-
386
-
387
-
388
-
389
-
390
-
391
-
392
-
393
-
394
-
395
-
396
-
397
-
398
-
399
-
400
-
401
-
402
-
403
-
404
-
405
-
406
-
407
-
408
-
409
-
410
-
411
-
412
-
413
-
414
-
415
-
416
-
417
-
418
-
419
-
420
-
421
-
422
-
423
-
424
-
425
-
426
-
427
-
428
-
429
-
430
-
431
-
432
-
433
-
434
-
435
-
436
-
437
-
438
-
439
-
440
-
441
-
442
-
443
-
444
-
445
-
446
-
447
-
448
-
449
-
450
-
451
-
452
-
453
-
454
-
455
-
456
-
457
-
458
-
459
-
460
-
461
-
462
-
463
-
464
-
465
-
466
-
467
-
468
-
469
-
470
-
471
-
472
-
473
-
474
-
475
-
476
-
477
-
478
-
479
-
480
-
481
-
482
-
483
-
484
-
485
-
486
-
487
-
488
-
489
-
490
-
491
-
492
-
493
-
494
-
495
-
496
-
497
-
498
-
499
-
500
 |
 |
