Bosch B21CL80SNS Instructions for Use - Page 9
Installing the handles - manual
 |
View all Bosch B21CL80SNS manuals
Add to My Manuals
Save this manual to your list of manuals |
Page 9 highlights
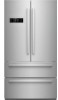
Electrical connection WARNING Risk of electric shock and fire if electrical connection is not installed properly! Plug into a fixed, grounded 3-prong outlet only. The outlet must be installed and grounded according to code by a qualified electrician. If necessary, have the installation inspected by a qualified technician to ensure it is properly grounded. Never remove grounding conductor. Do not use an extension cord, adapters or power strip. Non-compliance with these instructions may result in death, fire or an electric shock. Improper connection of the grounding conductor may result in an electric shock. If you are in doubt whether the appliance has been grounded properly, have the appliance tested by a qualified electrician. The receptacle must be installed according to the Installation Manual. Connect the appliance to 115 V/60 Hz AC through a correctly installed 3-pole grounded receptacle. The receptacle must be protected with a 10 to 16 A fuse. The appliance comes with a UL registered 3-wire Power Cord. Please see the following table: Appliance Fridge-freezer Maximum simultaneous load 6.0 amps Check on the Rating Plate whether the indicated voltage and current type correspond with the values of your power supply. The location of the Rating Plate can be found in the chapter "Customer Service". WARNING Never connect the appliance to electronic energy saving devices. Our appliances can be used with power line and sine-controlled inverters. Power line-controlled inverters are used for photovoltaic systems which are connected directly to the national grid. Sine-controlled inverters must be used for isolated applications (e.g. on ships or in mountain lodges) which are not connected directly to the national grid. en-us Installing the handles Storage door handle 1. Take the cold storage door handle out of the box and place it as per the direction shown in the figure (Note: i.e. the direction which both screw holes on the handle are close to the edge) and hang the handle above the set bolt. 2. Use the small hexagon wrench supplied in the box to set the handle screws into both the small screwed holes on the handle. After they are screwed down, gently shake the handle to confirm the handle is tightened. Instructions for installation of cold storage door handle Difference between the chilling and refrigeration handle: Lie them flat, the one with higher chordal height is the refrigeration handle. Refrigeration door handle The assembly steps of the refrigeration door handle are the same as the ones of the cold storage door handle. During the assembly of the handle the direction of tapping hole is downward (to the ground). 9
-
 1
1 -
2
-
3
-
 4
4 -
 5
5 -
 6
6 -
 7
7 -
 8
8 -
 9
9 -
 10
10 -
 11
11 -
 12
12 -
 13
13 -
 14
14 -
15
-
16
-
17
-
18
-
19
-
20
-
21
-
22
-
23
-
24
-
25
-
26
-
27
-
28
-
29
-
30
-
31
-
32
-
33
-
34
-
35
-
36
-
37
-
38
-
39
-
40
-
41
-
42
-
43
-
44
-
45
-
46
-
47
-
48
-
49
-
50
-
51
-
52
-
53
-
54
-
55
-
56
-
57
-
58
-
59
-
60
-
61
-
62
-
63
-
64
-
65
-
66
-
67
-
68
-
69
 |
 |
