Bosch HBL5056AUC Use and Care Manual - Page 15
Self Help, Operating the Oven, Self-Cleaning - parts
 |
UPC - 825225838326
View all Bosch HBL5056AUC manuals
Add to My Manuals
Save this manual to your list of manuals |
Page 15 highlights
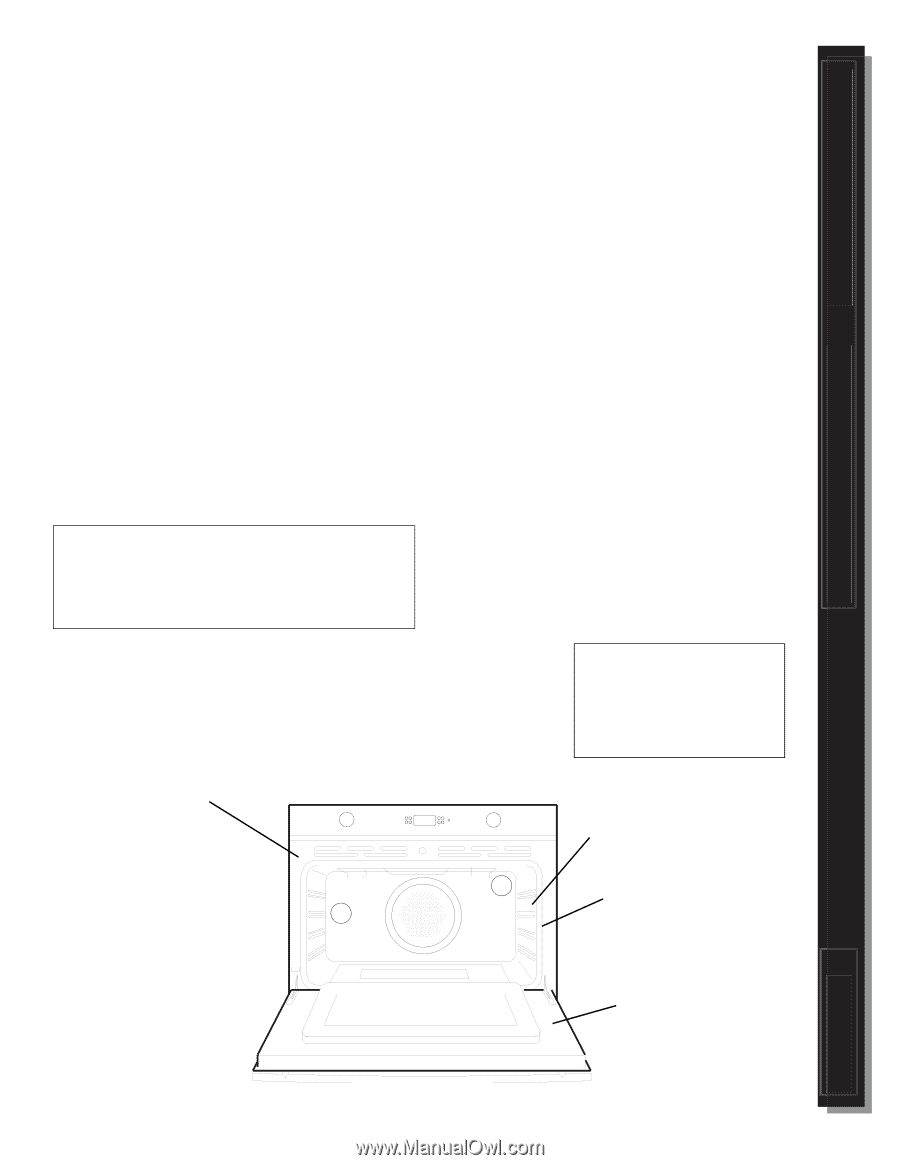
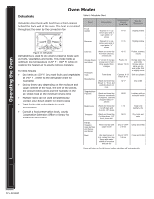
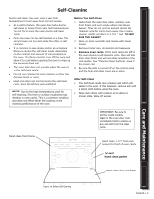
Getting Familiar... Operating the Oven Care and Maintenance Self Help Self-Cleaning During self-clean, the oven uses a very high temperature to burn away food soil and grease. • As a safety feature, the oven door locks during self-clean to protect from very high temperatures. Do not try to open the oven during self-clean mode. • Only one oven can be self-cleaned at a time. The second oven can be used while the other is selfcleaning. • It is common to see smoke and/or an occasional flame-up during the self-clean mode, depending on the content and amount of soil remaining in the oven. If a flame persists, turn off the oven and allow it to cool before opening the door to wipe up the excessive food soil. • The oven light does not operate when the oven is in the self-clean mode. • Do not use commercial oven cleaners as they may damage finish or parts. • Heat and odors are normal during the self-clean cycle. Keep the kitchen well ventilated. NOTE: Due to the high temperatures used for self-cleaning, fine lines or surface roughness may develop in oven cavity. This is a common condition and does not affect either the cooking or the cleaning performance of the oven. Before You Self-Clean 1. Hand clean the oven door edge, window, oven front frame and oven cavity edges (see figures below). They do not get hot enough during the cleaning cycle for soil to burn away. Use a soapy sponge, plastic scrubber or S.O.S.® pad. DO NOT RUB THE GASKET. 2 . Wipe up large overspills and grease with paper towels. 3. Remove broiler pan, all utensils and bakeware. 4. Remove oven racks. If the oven racks are left in the oven during a self-cleaning cycle, they will lose their shiny finish and will not glide smoothly in the rack guides. See "Cleaning Oven Surfaces, page 15 for proper care . 5. Be sure the light is turned off on the control panel and the bulb and glass cover are in place. After Self-Clean • The self-clean mode may produce ash which will settle in the oven. If this happens, remove ash with a damp cloth before using the oven. • Wipe rack edges with cooking oil to allow for proper glide. Wipe off excess. IMPORTANT: Be sure to let the inside window glass in the oven door cool completely before wiping up any ash left from the clean cycle. Hand clean front frame Hand clean 1-1/2" from rack support to front of oven cavity DO NOT hand clean gasket Hand clean door and frame Figure 14: Before Self-Cleaning English • 13
-
 1
1 -
2
-
3
-
4
-
5
-
6
-
7
-
8
-
9
-
 10
10 -
 11
11 -
 12
12 -
 13
13 -
 14
14 -
 15
15 -
 16
16 -
 17
17 -
 18
18 -
 19
19 -
 20
20 -
21
-
22
-
23
-
24
-
25
-
26
-
27
-
28
-
29
-
30
-
31
-
32
-
33
-
34
-
35
-
36
-
37
-
38
-
39
-
40
-
41
-
42
-
43
-
44
-
45
-
46
-
47
-
48
-
49
-
50
-
51
-
52
-
53
-
54
-
55
-
56
-
57
-
58
-
59
-
60
-
61
-
62
-
63
-
64
 |
 |