Bosch HBL5056AUC Use and Care Manual - Page 17
Self Help, Operating the Oven, Cleaning Oven Surfaces, Replacing the Oven Light
 |
UPC - 825225838326
View all Bosch HBL5056AUC manuals
Add to My Manuals
Save this manual to your list of manuals |
Page 17 highlights
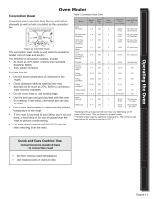
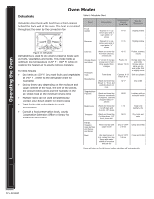
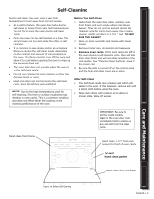
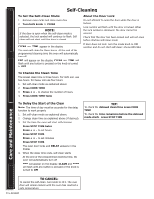
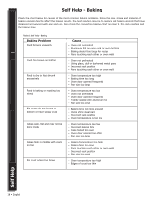
Getting Familiar... Operating the Oven Care and Maintenance Self Help Cleaning Oven Surfaces Table 7: Oven Surface Cleaning Methods Surface Cleaning Method Racks pow(Oven) mode, rack Wash with hot sudsy water. Rinse thoroughly and dry, or gently rub with cleansing der or soap filled pads as directed. If racks are cleaned in the oven during the self-clean they will lose their shiny finish and may not glide smoothly. If this happens, wipe the edges with a small amount of vegetable oil, then wipe off excess. Fiberglass Knit (Gasket) DO NOT HAND CLEAN GASKET. Glass (Window, Display) Wash with soap and water or glass cleaner. Use Fantastik® or Formula 409® to remove grease spatters and stubborn stains. Painted paper (Exterior) Porcelain (Interior) Clean with hot sudsy water or apply Fantastik® or Formula 409® to a clean sponge or towel and wipe clean. Avoid using powdered cleansers, steel wool pads and oven clean ers. Immediately wipe up acid spills like fruit juice, milk and tomatoes with a dry towel. Do not use a moistened sponge/towel on hot porcelain. When cool, clean with hot sudsy water or apply Bon-Ami® or Soft Scrub® to a damp sponge. Rinse and dry. For stubborn stains, gently use soap filled pads. It is normal for porcelain to craze (fine lines) with age due to exposure from heat and food soil. Stainless Steel (Exterior) Always wipe or rub with grain. Clean with a soapy sponge then rinse and dry, or wipe with Fantastik® or Formula 409® sprayed onto a paper towel. Protect and polish with Stainless Steel Magic® and a soft cloth. Remove water spots with a cloth dampened with white vinegar. Use Bar Keeper's Friend® to remove heat discoloration. Plastic (Knobs, Controls) When cool, clean with soapy water, rinse and dry. Replacing the Oven Light • Each oven is equipped with two halogen lights located in the back wall of the oven. • The lights are switched on when the door is opened or when the oven is in a cooking cycle. • The oven lights do not operate during self-clean. • Each light assembly consists of a removable lens, a light bulb and a light socket housing that is fixed in place (see Figure 17, next page). To replace a light bulb (see figure 17, next page): 1. Read WARNING on this page. 2. Turn off power at the main power supply (fuse or breaker box). 3. Unscrew lens and remove. 4. Pull straight out on light bulb to remove from socket. 5. Replace the bulb with a new one. Avoid pressing the bulb with fingers; Oils from hands can damage the bulb when it becomes hot 6. The bulb is halogen 12V - 20W. 7. Screw the lens back on. 8. Replace the fan cover (if applicable). 9. Turn power back on at the main power supply (fuse or breaker box). WARNING • Make sure the oven and lights are cool and power to the oven has been turned off before replacing the light bulb(s). Failure to do so could result in electrical shock or burns. • The lenses must be in place when using the oven. • The lenses serve to protect the light bulb from breaking. • The lenses are made of glass. Handle carefully to avoid breaking. Broken glass could cause an injury. English • 15
-
 1
1 -
2
-
3
-
4
-
5
-
6
-
7
-
8
-
9
-
10
-
11
-
 12
12 -
 13
13 -
 14
14 -
 15
15 -
 16
16 -
 17
17 -
 18
18 -
 19
19 -
 20
20 -
 21
21 -
 22
22 -
23
-
24
-
25
-
26
-
27
-
28
-
29
-
30
-
31
-
32
-
33
-
34
-
35
-
36
-
37
-
38
-
39
-
40
-
41
-
42
-
43
-
44
-
45
-
46
-
47
-
48
-
49
-
50
-
51
-
52
-
53
-
54
-
55
-
56
-
57
-
58
-
59
-
60
-
61
-
62
-
63
-
64
 |
 |
