Bosch HBL8753UC Installation Instructions - Page 14
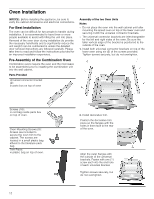
Remove Oven Door Prior to Installation
 |
View all Bosch HBL8753UC manuals
Add to My Manuals
Save this manual to your list of manuals |
Page 14 highlights
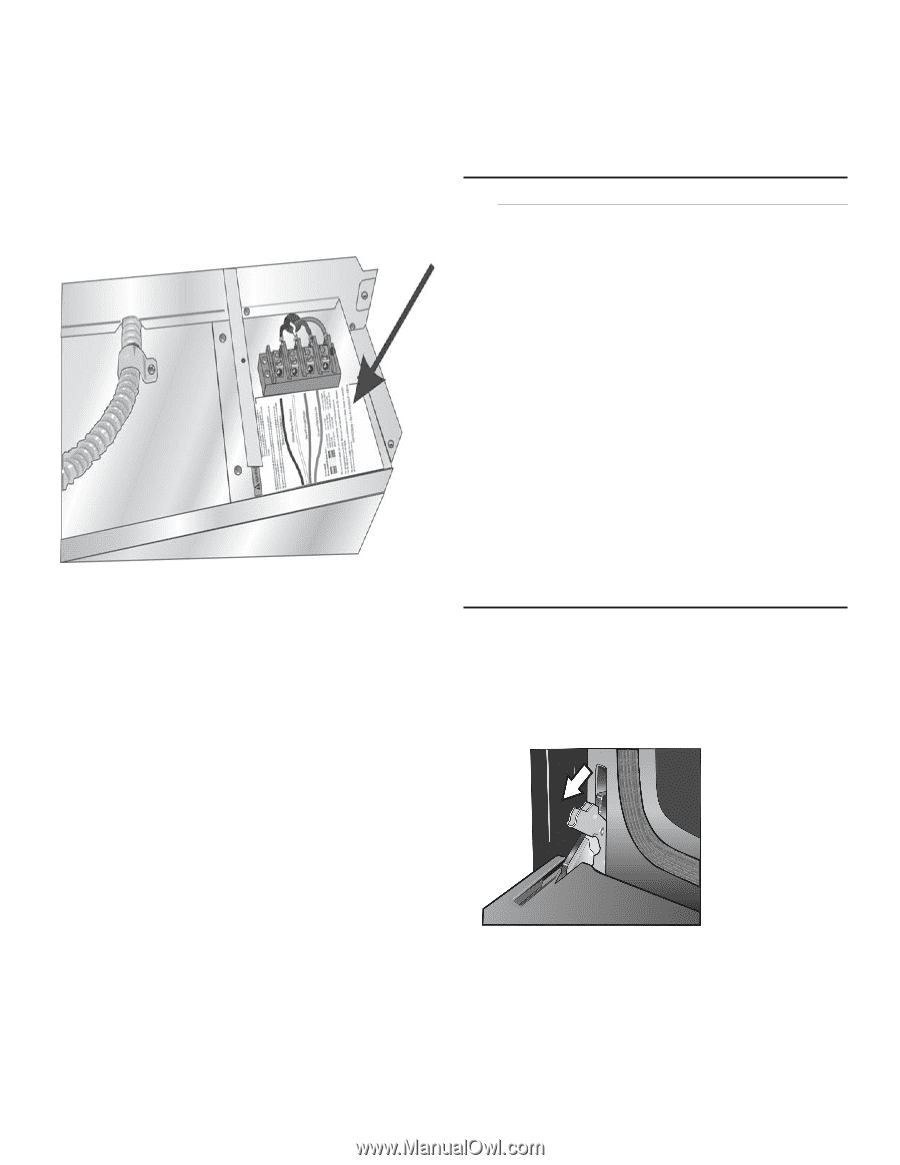
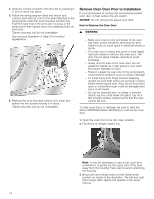
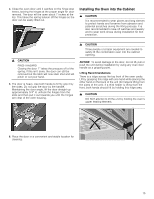
4. Snap the conduit connector into the hole by pressing it in until it clicks into place. 5. Follow the wiring diagram label and match and connect each wire by color to the wires attached to the wiring block inside the oven-mounted junction box. Push the bare end of the wire until it is snug in the wiring block then tighten down the retaining screw on each wire. Tighten securely, but do not overtighten. See previous illustration in Step 3 for finished appearance. 6. Replace the oven-mounted junction box cover and tighten the two screws holding it in place. Tighten securely, but do not overtignten. Remove Oven Door Prior to Installation It is recommended to remove the conventional (lower) oven door to help reduce the unit weight. NOTICE: Do not remove the speed oven door. How to Remove the Oven Door 9 WARNING ▯ Make sure oven is cool and power to the oven has been turned off before removing the door. Failure to do so could result in electrical shock or burns. ▯ The oven door is heavy and parts of it are fragile. Use both hands to remove the oven door. The door front is glass. Handle carefully to avoid breakage. ▯ Grasp only the side of the oven door. Do not grasp the handle as it may swing in your hand and cause damage or injury. ▯ Failure to grasp the oven door firmly and properly could result in personal injury or product damage. ▯ To avoid injury from hinge bracket snapping closed, be sure both levers are securely in place before removing the door. Also, do not force door open or closed-the hinge could be damaged and injury could result. ▯ Do not lay removed door on sharp or pointed objects as this could break the glass. Lay on a flat, smooth surface, positioned so that the door cannot fall over. To help avoid injury or damage, be sure to read the above WARNING before attempting to remove the oven door. 1. Open the oven door to its fully open position. 2. Flip levers on hinges toward you. Note: It may be necessary to use a tool, such as a screwdriver, to gently pry the upper part of the lever away from the housing. Take care to avoid scratching the housing. 3. Bring both door hinge levers to their fullest down position as shown in the illustration. The left and right door hinges differ slightly but operate in the same manner. 14
-
 1
1 -
2
-
3
-
4
-
5
-
6
-
7
-
8
-
 9
9 -
 10
10 -
 11
11 -
 12
12 -
 13
13 -
 14
14 -
 15
15 -
 16
16 -
 17
17 -
 18
18 -
 19
19 -
20
-
21
-
22
-
23
-
24
-
25
-
26
-
27
-
28
-
29
-
30
-
31
-
32
-
33
-
34
-
35
-
36
-
37
-
38
-
39
-
40
-
41
-
42
-
43
-
44
-
45
-
46
-
47
-
48
-
49
-
50
-
51
-
52
 |
 |