Bosch HBL8753UC Installation Instructions - Page 15
Installing the Oven into the Cabinet
 |
View all Bosch HBL8753UC manuals
Add to My Manuals
Save this manual to your list of manuals |
Page 15 highlights
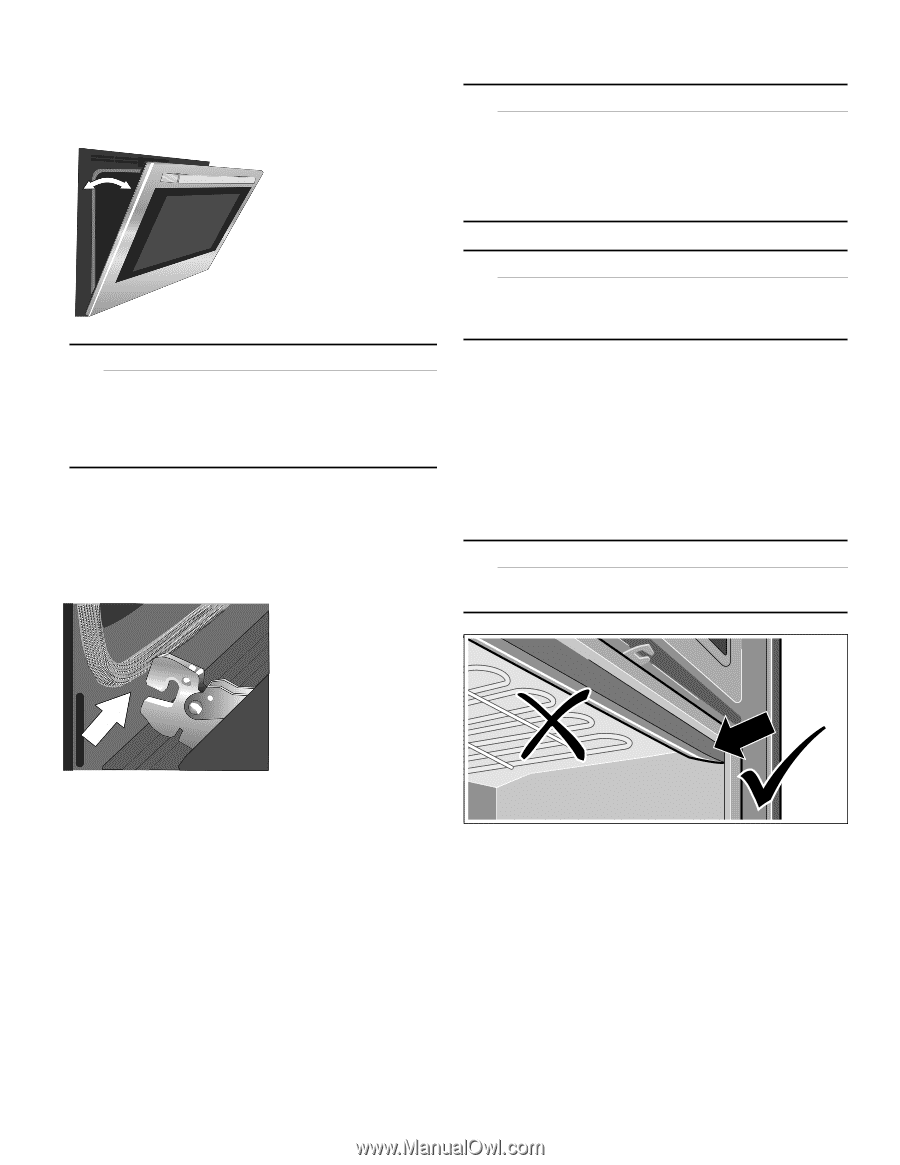
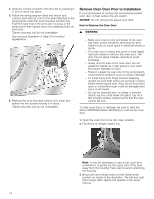
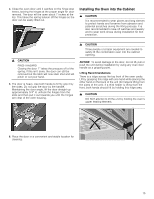
4. Close the oven door until it catches on the hinge stop levers, locking the hinges at the proper angle for door removal. The door will be open about 7 inches at the top. This takes the spring tension off the hinges so the door can be easily lifted out. Installing the Oven into the Cabinet 9 CAUTION It is recommended to wear gloves and long sleeves to protect hands and forearms from abrasion and potential scratches during the lifting process. It is also recommended to take off watches and jewelry and to wear work shoes during installation for foot protection. 9 CAUTION PINCH HAZARD Closing the door 7" takes the pressure off of the spring. If this isn't done, the door can still be removed but the latch will now slam shut and will pinch or cut your hand. 5. The door is heavy. Use both hands to firmly grip it by the sides. Do not grip the door by the handle. Maintaining the door angle, lift the door straight up approximately 3/4" to unhook the hinges from the slots and then pull it out towards you until the hinges are clear of the oven housing. 9 CAUTION Three people or proper equipment are needed to safely lift the combination oven into the cabinet opening. NOTICE: To avoid damage to the door, do not lift, pull or push the unit during installation by using any oven door handle as a gripping point. Lifting Recommendations There is a ridge across the top front of the oven cavity. Lift by grasping this ridge with one hand while placing the other hand on the back of the unit (for helpers lifting from the sides of the unit). If a third helper is lifting from the front, both hands should lift by holding this ridge area. 9 CAUTION DO NOT attempt to lift the unit by holding the oven's upper heating element. 6. Place the door in a convenient and stable location for cleaning. 15
-
 1
1 -
2
-
3
-
4
-
5
-
6
-
7
-
8
-
9
-
 10
10 -
 11
11 -
 12
12 -
 13
13 -
 14
14 -
 15
15 -
 16
16 -
 17
17 -
 18
18 -
 19
19 -
 20
20 -
21
-
22
-
23
-
24
-
25
-
26
-
27
-
28
-
29
-
30
-
31
-
32
-
33
-
34
-
35
-
36
-
37
-
38
-
39
-
40
-
41
-
42
-
43
-
44
-
45
-
46
-
47
-
48
-
49
-
50
-
51
-
52
 |
 |