Bose Aviation Headset X Owner's guide - Page 11
Removing an attached boom microphone cable, Attaching the boom microphone cable, CAUTION - how to earcups
 |
View all Bose Aviation Headset X manuals
Add to My Manuals
Save this manual to your list of manuals |
Page 11 highlights
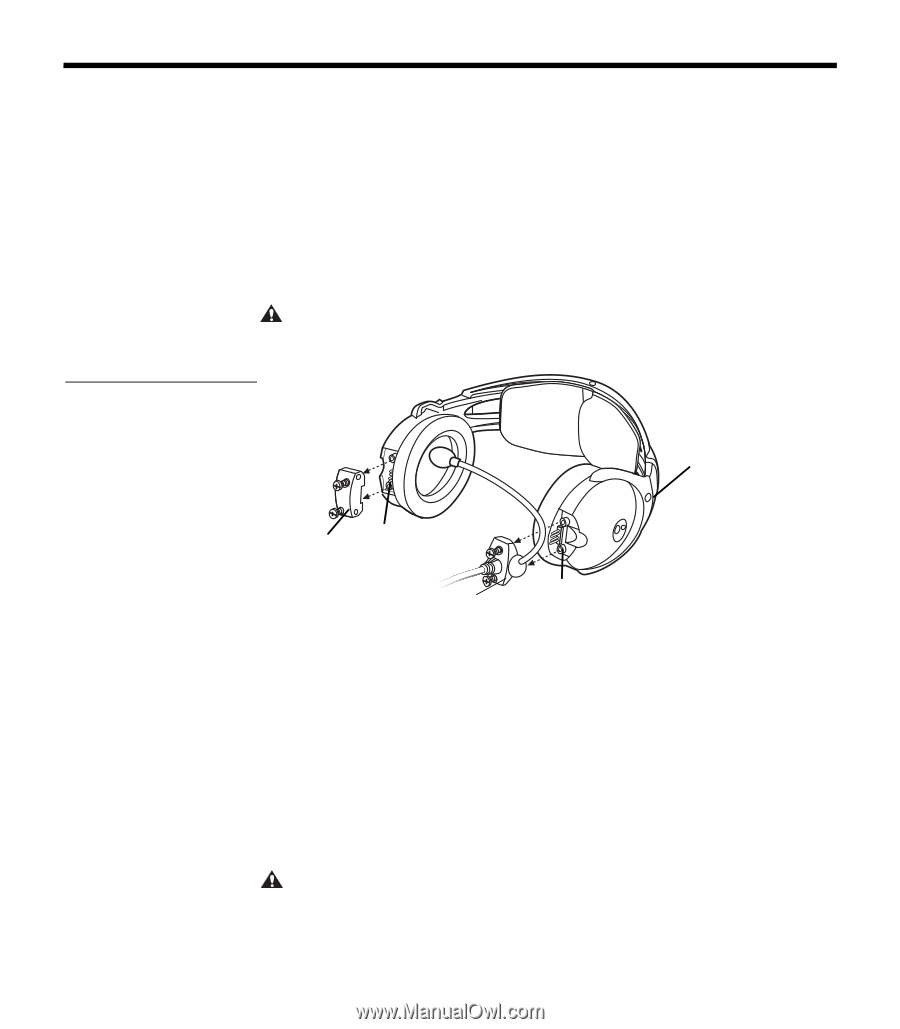
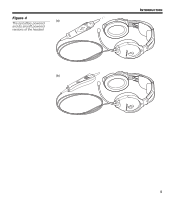
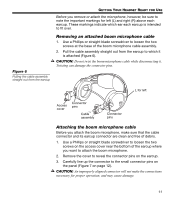
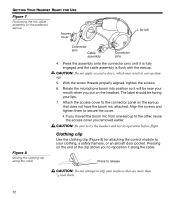
Figure 6 Pulling the cable assembly straight out from the earcup GETTING YOUR HEADSET READY FOR USE Before you remove or attach the microphone, however, be sure to note the important markings for left (L) and right (R) above each earcup. These markings indicate which ear each earcup is intended to fit over. Removing an attached boom microphone cable 1. Use a Phillips or straight blade screwdriver to loosen the two screws at the base of the boom microphone cable assembly. 2. Pull the cable assembly straight out from the earcup to which it is attached (Figure 6). CAUTION: Do not twist the boom microphone cable while disconnecting it. Twisting can damage the connector pins. L for left Access cover Connector pins Cable assembly Connector pins Attaching the boom microphone cable Before you attach the boom microphone, make sure that the cable connector and its earcup connector are clean and free of debris. 1. Use a Phillips or straight blade screwdriver to loosen the two screws on the access cover near the bottom of the earcup where you want to attach the boom microphone. 2. Remove the cover to reveal the connector pins on the earcup. 3. Carefully line up the connector to the small connector pins on the panel (Figure 7 on page 12). CAUTION: An improperly aligned connector will not make the connections necessary for proper operation, and may cause damage. 11
-
 1
1 -
2
-
3
-
4
-
5
-
 6
6 -
 7
7 -
 8
8 -
 9
9 -
 10
10 -
 11
11 -
 12
12 -
 13
13 -
 14
14 -
 15
15 -
 16
16 -
17
-
18
-
19
-
20
-
21
-
22
-
23
-
24
-
25
-
26
-
27
-
28
-
29
-
30
-
31
-
32
-
33
-
34
-
35
-
36
 |
 |