Bose Aviation Headset X Owner's guide - Page 28
Battery replacement, Turn off ANR. - old
 |
View all Bose Aviation Headset X manuals
Add to My Manuals
Save this manual to your list of manuals |
Page 28 highlights
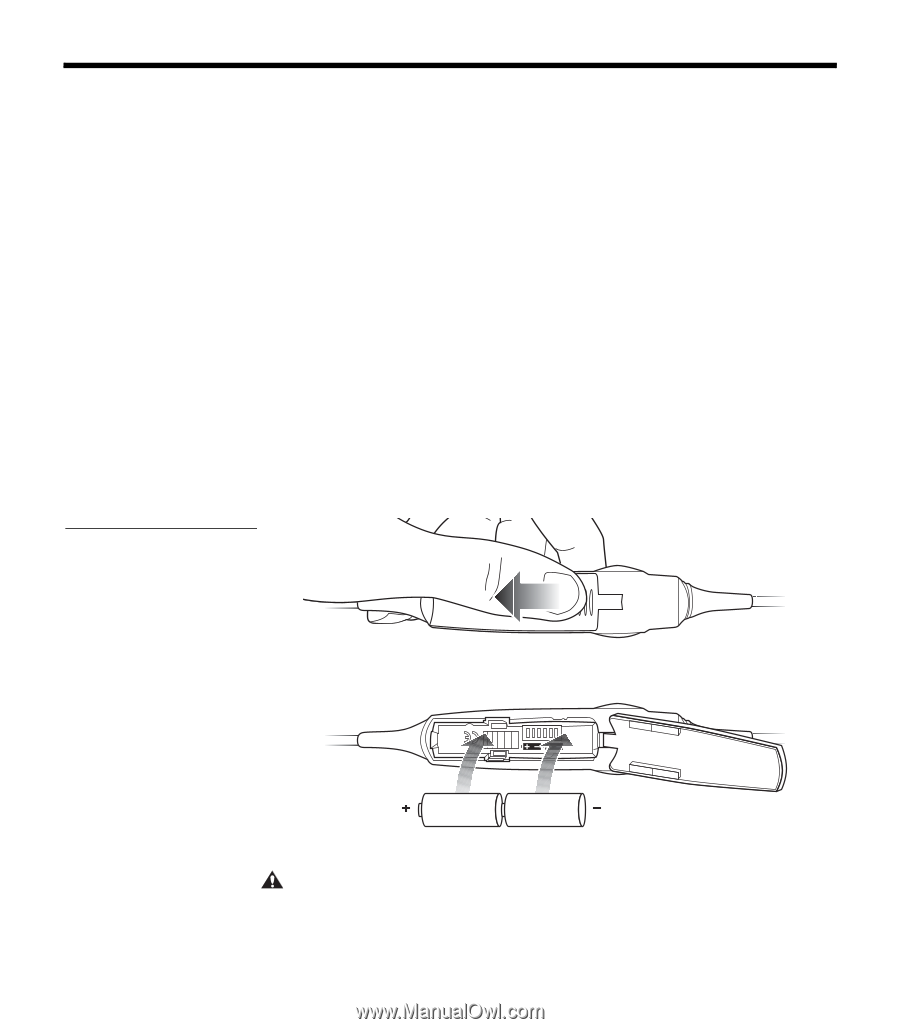
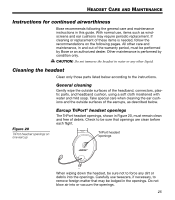
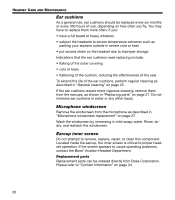
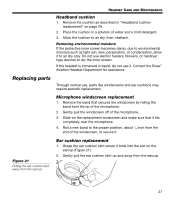
HEADSET CARE AND MAINTENANCE 3. Properly position the replacement ear cushion against the earcup. 4. Tuck an edge of the ear cushion skirt into the slot behind the ear cushion flange. Be careful not to fold the skirt over. 5. Work the remainder of the skirt into the slot completely around the earcup. 6. Grasp the ear cushion and adjust its position to remove any folds in the skirt and wrinkles in the cushion. Figure 22 a) Sliding open the battery compartment door b) Inserting new batteries into the control module battery compartment Battery replacement 1. Turn off ANR. 2. While pushing down, slide the battery door using the finger indent and lift open as shown in Figure 22a. 3. Remove the old batteries. 4. Make sure that the battery compartment contacts are clean. 5. Install two AA alkaline batteries (IEC LR6), as shown in Figure 22b. Use of rechargeable batteries, while possible, will alter the accuracy of the battery power indicator. a) b) 6. Close the battery door. CAUTION: The battery compartment is designed to prevent inadvertent reverse polarity from installing the batteries incorrectly. If the batteries do not seem to fit correctly, do not force them in. Forcing an improper connection will cause permanent damage to the control module. 28
-
 1
1 -
2
-
3
-
4
-
5
-
6
-
7
-
8
-
9
-
10
-
11
-
12
-
13
-
14
-
15
-
16
-
17
-
18
-
19
-
20
-
21
-
22
-
 23
23 -
 24
24 -
 25
25 -
 26
26 -
 27
27 -
 28
28 -
 29
29 -
 30
30 -
 31
31 -
 32
32 -
 33
33 -
34
-
35
-
36
 |
 |