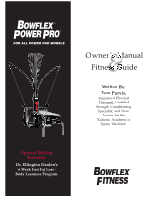
Bowflex Power Pro Owners Manual - Page 5
THE WORKOUT BENCH, Quick Release Bench, Flat Position 1 & 2, Incline Position, Free Sliding - workouts
 |
View all Bowflex Power Pro manuals
Add to My Manuals
Save this manual to your list of manuals |
Page 5 highlights
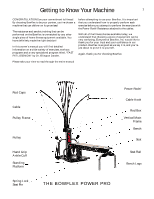
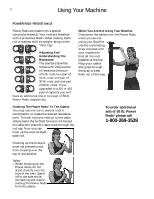
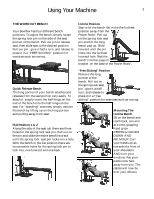
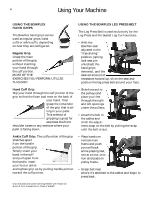
Using Your Machine 3 THE WORKOUT BENCH Your Bowflex has four different bench positions. To adjust the bench, simply locate the spring lock pin on the side of the seat portion of the bench. Pull out pin to release seat, then slide seat to the desired position. Pull out pin , give it half a turn, and release to place it in a "FREE SLIDING" position for exercises such as rowing. Incline Position Start with the bench flat in the the furthest position away from the Power Rods®. Pull out on the spring lock seat pin and lift the long bench pad up. Slide forward until the pin locks into the furthest forward hole. Rest the bench's incline support bracket on the base of the Power Rods®. Quick Release Bench The long portion of your bench attaches and releases from the seat portion very easily. To attach it, simply insert the half hinge on the end of the bench into the half hinge on the seat. For "standing" exercises, simply remove the bench by lifting up on the long portion and pulling away from seat. Flat Position 1 & 2 Along the side of the seat rail there are three holes for the spring lock seat pin. Pull out on the pin and slide the entire bench forward until the spring lock seat pin locks into a hole. With the bench in the flat position there are two possible holes for the spring lock pin to lock into, one forward and one back. "Free Sliding" Position Remove the long portion of the bench. Pull out on the spring lock seat pin , give it a half turn, and release to place it in a "free sliding" position for exercises such as rowing. Mounting The Incline Bench Sit on the bench and reach back, one arm at a time, grasping hand grips KEEPING HANDS DOWN AND PALMS UP. Curl your hands up as towards the front of your shoulders AND turn your wrists so that your palms now face away from you. The cables will now be over your elbows.
-
 1
1 -
 2
2 -
 3
3 -
 4
4 -
 5
5 -
 6
6 -
 7
7 -
 8
8 -
 9
9 -
 10
10 -
 11
11 -
12
-
13
-
14
-
15
-
16
-
17
-
18
-
19
-
20
-
21
-
22
-
23
-
24
-
25
-
26
-
27
-
28
-
29
-
30
-
31
-
32
-
33
-
34
-
35
-
36
-
37
-
38
-
39
-
40
-
41
-
42
-
43
-
44
-
45
-
46
-
47
-
48
-
49
-
50
-
51
-
52
-
53
-
54
-
55
-
56
-
57
-
58
-
59
-
60
-
61
-
62
-
63
-
64
-
65
-
66
-
67
-
68
-
69
-
70
-
71
-
72
-
73
-
74
-
75
-
76
-
77
-
78
-
79
-
80
 |
 |
