Brother International 5234PRW Users Manual - English and Spanish - Page 29
Narrow overlock/ Rolled hemming stitch
 |
View all Brother International 5234PRW manuals
Add to My Manuals
Save this manual to your list of manuals |
Page 29 highlights
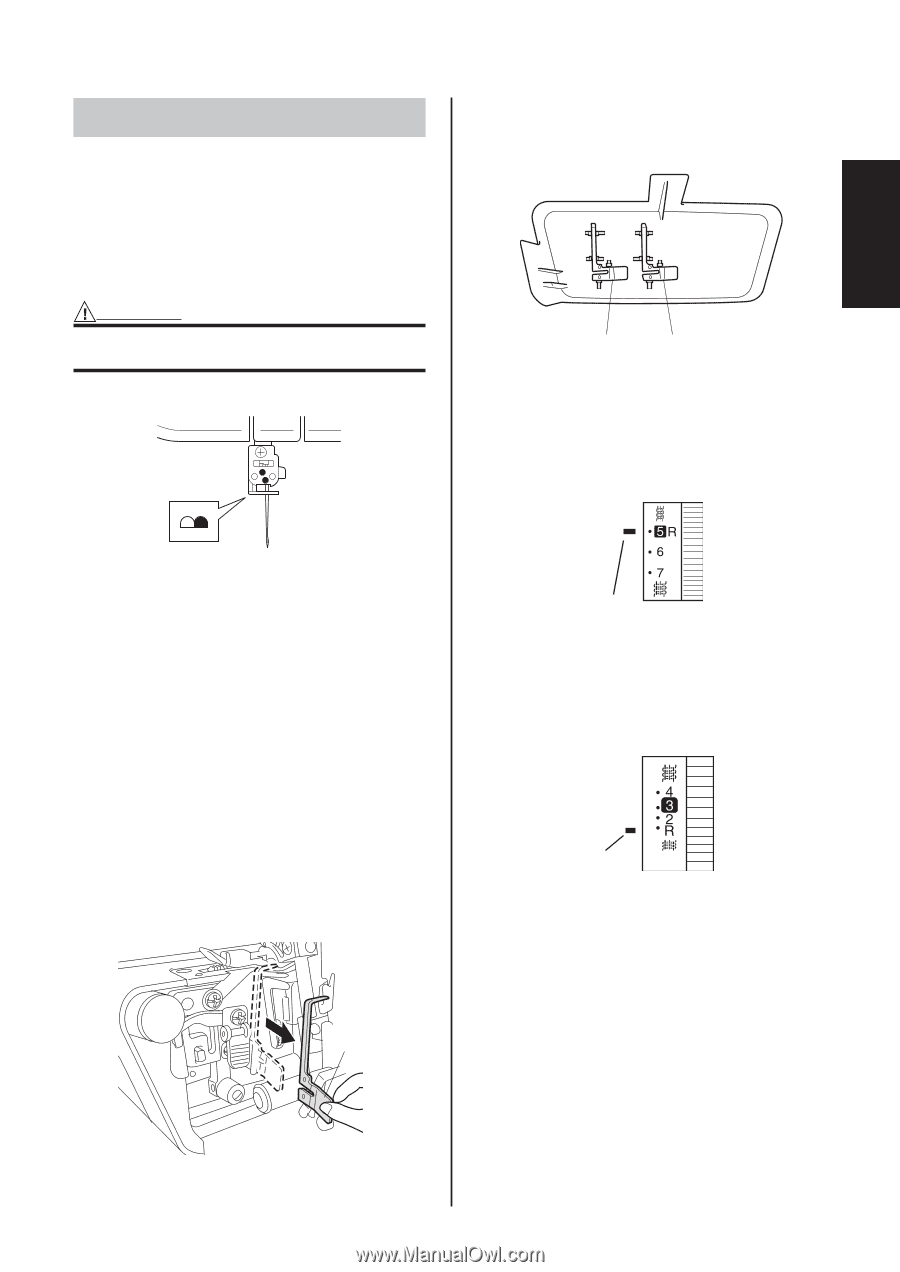
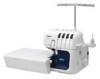
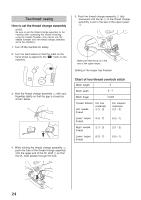
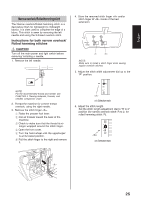
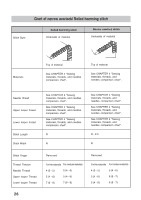
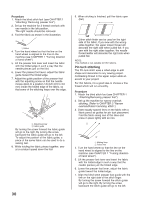
English Narrow overlock/ Rolled hemming stitch The Narrow overlock/Rolled hemming stitch is a decorative finish for lightweight to midweight fabrics. It is often used to complete the edge of a fabric. This stitch is sewn by removing the left needle and using the 3-thread overlock stitch. Instructions for both narrow overlock/ Rolled hemming stitches CAUTION Turn off the main power and light switch before removing/ installing a needle. 1. Remove the left needle. 4. Store the removed stitch finger and/or stitch finger W inside of the bed extension. NOTE: Make sure to install a stitch finger when sewing regular overlock stitches. 5. Adjust the stitch width adjustment dial up to the "R" position. NOTE: For the recommended thread and needle, see CHAPTER 4 "Sewing materials, threads, and needles comparison chart". 2. Thread the machine for a three thread overlock, using the right needle. 3. Remove the stitch finger . 1 Raise the presser foot lever. 2 Pull all threads toward the back of the machine. 3 Check to make sure that the thread is no longer wrapped around the stitch finger. 4 Open the front cover. 5 Turn the hand wheel until the upperlooper is at its lowest position. 6 Pull the stitch finger to the right and remove it. Selection mark 6. Adjust the stitch length. Set the stitch length adjustment dial to "R to 2" position (for narrow overlock stitch: R to 2, for rolled hemming stitch: R). 3 Selection mark 25
-
 1
1 -
2
-
3
-
4
-
5
-
6
-
7
-
8
-
9
-
10
-
11
-
12
-
13
-
14
-
15
-
16
-
17
-
18
-
19
-
20
-
21
-
22
-
23
-
 24
24 -
 25
25 -
 26
26 -
 27
27 -
 28
28 -
 29
29 -
 30
30 -
 31
31 -
 32
32 -
 33
33 -
 34
34 -
35
-
36
-
37
-
38
-
39
-
40
-
41
-
42
-
43
-
44
-
45
-
46
-
47
-
48
-
49
-
50
-
51
-
52
-
53
-
54
-
55
-
56
-
57
-
58
-
59
-
60
-
61
-
62
-
63
-
64
-
65
-
66
-
67
-
68
-
69
-
70
-
71
-
72
-
73
-
74
-
75
-
76
-
77
-
78
-
79
-
80
 |
 |