Brother International 5234PRW Users Manual - English and Spanish - Page 35
Taping foot
 |
View all Brother International 5234PRW manuals
Add to My Manuals
Save this manual to your list of manuals |
Page 35 highlights
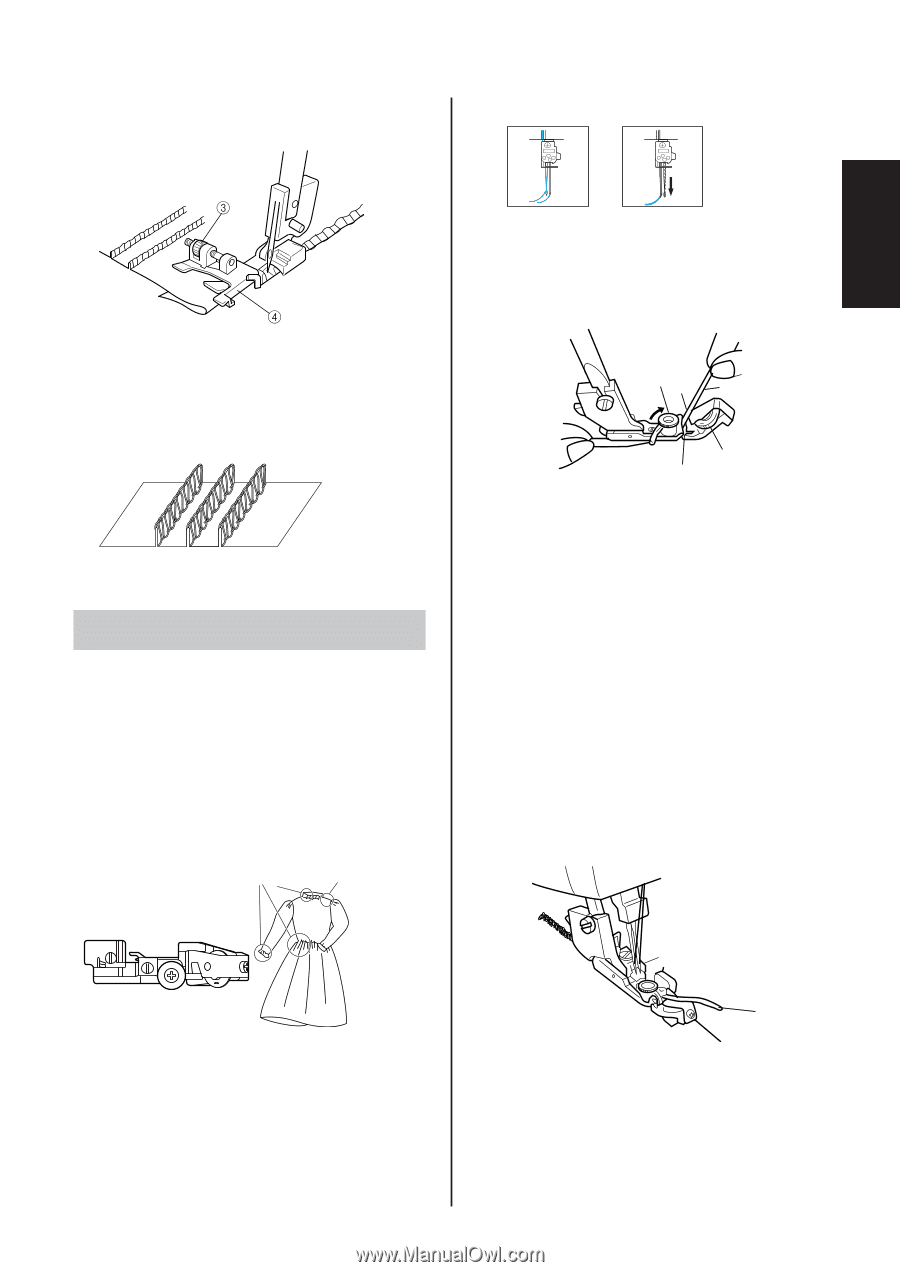
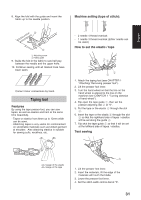
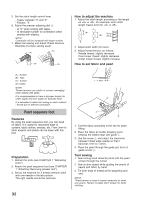
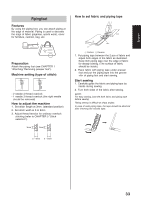
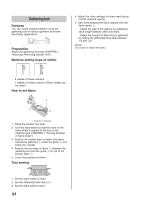
English 8. Align the fold with the guide and insert the fabric up to the needle position. Machine setting (type of stitch): ! " 3 Adjusting screw 4 Fabric guide 9. Guide the fold in the fabric to sew half way between the needle and the upper knife. 10. Continue sewing until all marked lines have been sewn. Correct minor contractions by hand. Taping foot Features By using the tape presser foot, you can sew tapes, as well as elastics and hem at the same time beautifully. - Tapes or elastics from 6mm up to 12mm width can be sewn. - Attatching tapes is very useful for reinforcement on stretchable materials sucn as knitted garment at shoulder. Also attaching elastics is suitable for sewing cuffs, necklines, etc. - 2 needle 4 thread overlock - 1 needle 3 thread overlock (Either needle can be used.) How to set the elastic / tape 14 5 2 3 1. Attach the taping foot (see CHAPTER 1 "Attaching/ Removing presser foot"). 2. Lift the presser foot lever. 3. Turn the hand wheel so that the line on the hand wheel is aligned to the line on the machine (see CHAPTER 1 "Turning direction of hand wheel"). 4. Flip open the tape guide 1, then set the presser adjusting dial 2 at "0". 5. Put the tape or the elastic 5 through the slot 3. 6. Insert the tape or the elastic 5 through the slot 3 so that the righthand side of tapes / elastics will be set along the guide 4. 7. Flip shut the tape guide 1 so that it will be set at the lefthand side of tapes / elastics. Test sewing Usage of the elastic Usage of the tape 5 1. Lift the presser foot lever. 2. Insert the materials, till the edge of the materials will touch the blade. 3. Lower the presser foot lever. 4. Set the stitch width control dial at "5". 31
-
 1
1 -
2
-
3
-
4
-
5
-
6
-
7
-
8
-
9
-
10
-
11
-
12
-
13
-
14
-
15
-
16
-
17
-
18
-
19
-
20
-
21
-
22
-
23
-
24
-
25
-
26
-
27
-
28
-
29
-
 30
30 -
 31
31 -
 32
32 -
 33
33 -
 34
34 -
 35
35 -
 36
36 -
 37
37 -
 38
38 -
 39
39 -
 40
40 -
41
-
42
-
43
-
44
-
45
-
46
-
47
-
48
-
49
-
50
-
51
-
52
-
53
-
54
-
55
-
56
-
57
-
58
-
59
-
60
-
61
-
62
-
63
-
64
-
65
-
66
-
67
-
68
-
69
-
70
-
71
-
72
-
73
-
74
-
75
-
76
-
77
-
78
-
79
-
80
 |
 |