Brother International DCP-9045CDN Users Manual - English - Page 161
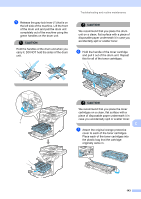
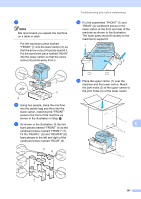
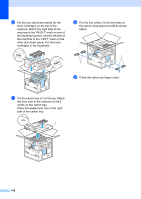
Fit the REAR/L 5 and REAR/R 6, Put the assembled FRONT 1
 |
UPC - 012502618751
View all Brother International DCP-9045CDN manuals
Add to My Manuals
Save this manual to your list of manuals |
Page 161 highlights
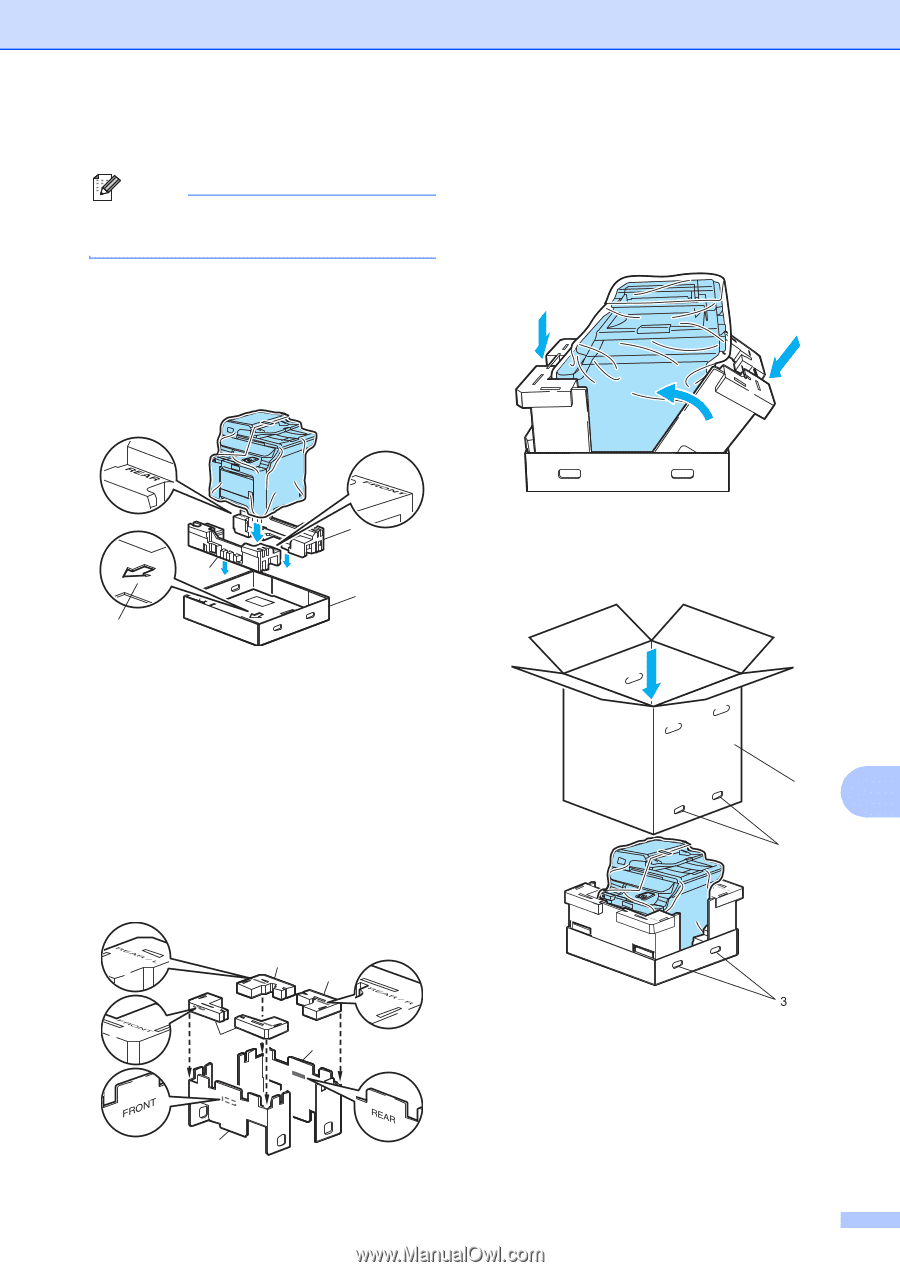
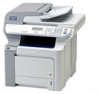
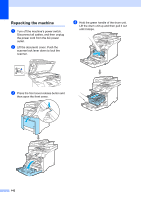
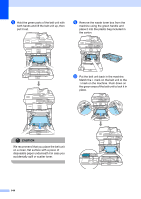
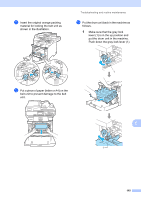
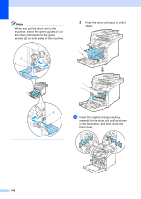
o Note We recommend you repack the machine on a table or desk. Put the styrofoam piece marked "FRONT" (1) into the lower carton (3), so that the arrow cutout (4) points toward it. Put the styrofoam piece marked "REAR" into the lower carton so that the arrow cutout (4) points away from it. Troubleshooting and routine maintenance r Put the assembled "FRONT" (1) and "REAR" (2) cardboard pieces in the lower carton at the front and rear of the machine as shown in the illustration. The foam pads should fit closely to the machine to support it. 1 2 2 1 3 4 p Using two people, place the machine into the plastic bag and then into the lower carton, matching the "FRONT" piece to the front of the machine as shown in the illustration in Step o. q As shown in the illustration, fit the two foam pieces marked "FRONT" (4) to the cardboard piece marked "FRONT" (7). Fit the "REAR/L" (5) and "REAR/R" (6) foam pieces to the left and right of the cardboard piece marked "REAR" (8). 5 6 s Place the upper carton (1) over the machine and the lower carton. Match the joint holes (2) of the upper carton to the joint holes (3) of the lower carton. 1 C 2 4 8 7 147
-
 1
1 -
2
-
3
-
4
-
5
-
6
-
7
-
8
-
9
-
10
-
11
-
12
-
13
-
14
-
15
-
16
-
17
-
18
-
19
-
20
-
21
-
22
-
23
-
24
-
25
-
26
-
27
-
28
-
29
-
30
-
31
-
32
-
33
-
34
-
35
-
36
-
37
-
38
-
39
-
40
-
41
-
42
-
43
-
44
-
45
-
46
-
47
-
48
-
49
-
50
-
51
-
52
-
53
-
54
-
55
-
56
-
57
-
58
-
59
-
60
-
61
-
62
-
63
-
64
-
65
-
66
-
67
-
68
-
69
-
70
-
71
-
72
-
73
-
74
-
75
-
76
-
77
-
78
-
79
-
80
-
81
-
82
-
83
-
84
-
85
-
86
-
87
-
88
-
89
-
90
-
91
-
92
-
93
-
94
-
95
-
96
-
97
-
98
-
99
-
100
-
101
-
102
-
103
-
104
-
105
-
106
-
107
-
108
-
109
-
110
-
111
-
112
-
113
-
114
-
115
-
116
-
117
-
118
-
119
-
120
-
121
-
122
-
123
-
124
-
125
-
126
-
127
-
128
-
129
-
130
-
131
-
132
-
133
-
134
-
135
-
136
-
137
-
138
-
139
-
140
-
141
-
142
-
143
-
144
-
145
-
146
-
147
-
148
-
149
-
150
-
151
-
152
-
153
-
154
-
155
-
 156
156 -
 157
157 -
 158
158 -
 159
159 -
 160
160 -
 161
161 -
 162
162 -
 163
163 -
 164
164 -
 165
165 -
 166
166 -
167
-
168
-
169
-
170
-
171
-
172
-
173
-
174
-
175
-
176
-
177
-
178
-
179
-
180
-
181
-
182
-
183
-
184
-
185
-
186
-
187
-
188
-
189
-
190
-
191
-
192
 |
 |