Brother International DreamMaker„ XE VE2200 Users Manual - English - Page 172
Error Messages
 |
View all Brother International DreamMaker„ XE VE2200 manuals
Add to My Manuals
Save this manual to your list of manuals |
Page 172 highlights
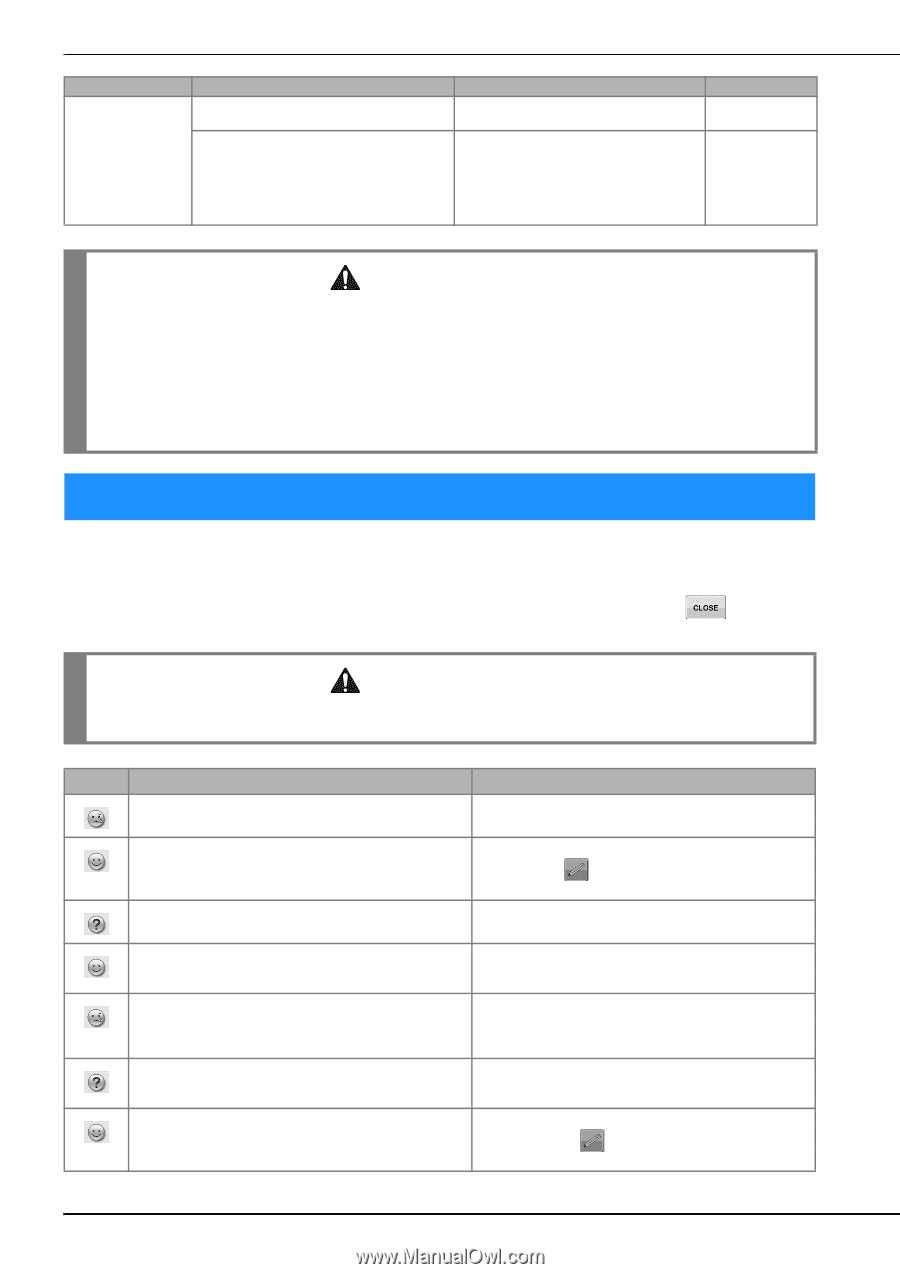
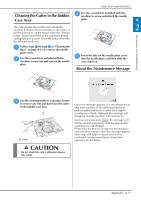
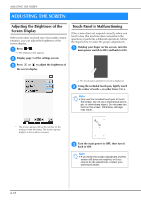
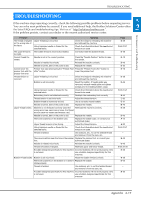
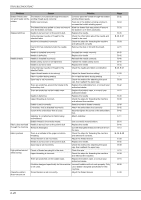
ERROR MESSAGES Problem Cause Specifying with sensor pen cannot be done accurately The sensor pen has not been calibrated. The pen is being held differently than when it was calibrated. Solution Before using the sensor pen for the first time, be sure to calibrate it. When using the sensor pen, be sure to hold it at the same angle as when it was calibrated. The specification location may be misaligned if the pen is held at a slightly different angle. In this case, make fine adjustments after making the selection. Page B-56 B-56 CAUTION • This machine is equipped with a thread detection device. If the "Start/Stop" button is pushed before the upper threading is done, the machine will not operate properly. Also, depending on the pattern selected, the machine may feed the fabric even if the needle is raised. This is due to the needle bar release mechanism. At these times, the machine will make a sound different from what is made during normal sewing. This is not the sign of a malfunction. • If the power is disconnected during sewing: Turn the main power to OFF and unplug the machine. If you restart the machine, follow the instructions for operating the machine correctly. ERROR MESSAGES If the machine is not properly set and the "Start/Stop" button is pressed, or if the operation procedure is incorrect, the machine does not start. An alarm sounds and an error message is displayed on the LCD. If an error message displays, follow the instructions in the message. Below is an explanation of error messages. Refer to these when necessary (if you press operation correctly while the error message is displayed, the message disappears). or do the CAUTION • Be sure to rethread the machine. If you press the "Start/Stop" button without rethreading the machine, the thread tension may be wrong or the needle may break and cause injury. Marks Error Messages A malfunction occurred.Turn the machine off, then on again. Cause/Solution This message is displayed if some malfunction occurs. Attach the embroidery frame. Check and rethread the upper thread. This message appears if the embroidery frame is not attached when you press in the embroidery screen. (see page B-58) This message is displayed when the upper thread is broken or not threaded correctly, and the "Start/Stop" button is pressed. Data volume is too large for this pattern. This message is displayed when the patterns you are editing take up too much memory, or if you are editing too many patterns for the memory. Failed to save file. This message appears when you try to save more than 100 settings screen image files in the USB media. In this case, delete a file from the USB media or use different USB media. (see page B-28) Lower the presser foot lever. This message is displayed when the "Presser Foot Lifter" button is pushed while the presser foot lever is raised/the needle is lowered. Move the sensor pen away from the currently marked position. This message appears when you press down the sensor pen tip before pressing and keep pressing for the certain period. Move the sensor pen away from the current position. A-22
-
 1
1 -
2
-
3
-
4
-
5
-
6
-
7
-
8
-
9
-
10
-
11
-
12
-
13
-
14
-
15
-
16
-
17
-
18
-
19
-
20
-
21
-
22
-
23
-
24
-
25
-
26
-
27
-
28
-
29
-
30
-
31
-
32
-
33
-
34
-
35
-
36
-
37
-
38
-
39
-
40
-
41
-
42
-
43
-
44
-
45
-
46
-
47
-
48
-
49
-
50
-
51
-
52
-
53
-
54
-
55
-
56
-
57
-
58
-
59
-
60
-
61
-
62
-
63
-
64
-
65
-
66
-
67
-
68
-
69
-
70
-
71
-
72
-
73
-
74
-
75
-
76
-
77
-
78
-
79
-
80
-
81
-
82
-
83
-
84
-
85
-
86
-
87
-
88
-
89
-
90
-
91
-
92
-
93
-
94
-
95
-
96
-
97
-
98
-
99
-
100
-
101
-
102
-
103
-
104
-
105
-
106
-
107
-
108
-
109
-
110
-
111
-
112
-
113
-
114
-
115
-
116
-
117
-
118
-
119
-
120
-
121
-
122
-
123
-
124
-
125
-
126
-
127
-
128
-
129
-
130
-
131
-
132
-
133
-
134
-
135
-
136
-
137
-
138
-
139
-
140
-
141
-
142
-
143
-
144
-
145
-
146
-
147
-
148
-
149
-
150
-
151
-
152
-
153
-
154
-
155
-
156
-
157
-
158
-
159
-
160
-
161
-
162
-
163
-
164
-
165
-
166
-
 167
167 -
 168
168 -
 169
169 -
 170
170 -
 171
171 -
 172
172 -
 173
173 -
 174
174 -
 175
175 -
 176
176 -
 177
177 -
178
-
179
-
180
 |
 |