Brother International DreamMaker„ XE VE2200 Users Manual - English - Page 48
Before Embroidering
 |
View all Brother International DreamMaker„ XE VE2200 manuals
Add to My Manuals
Save this manual to your list of manuals |
Page 48 highlights
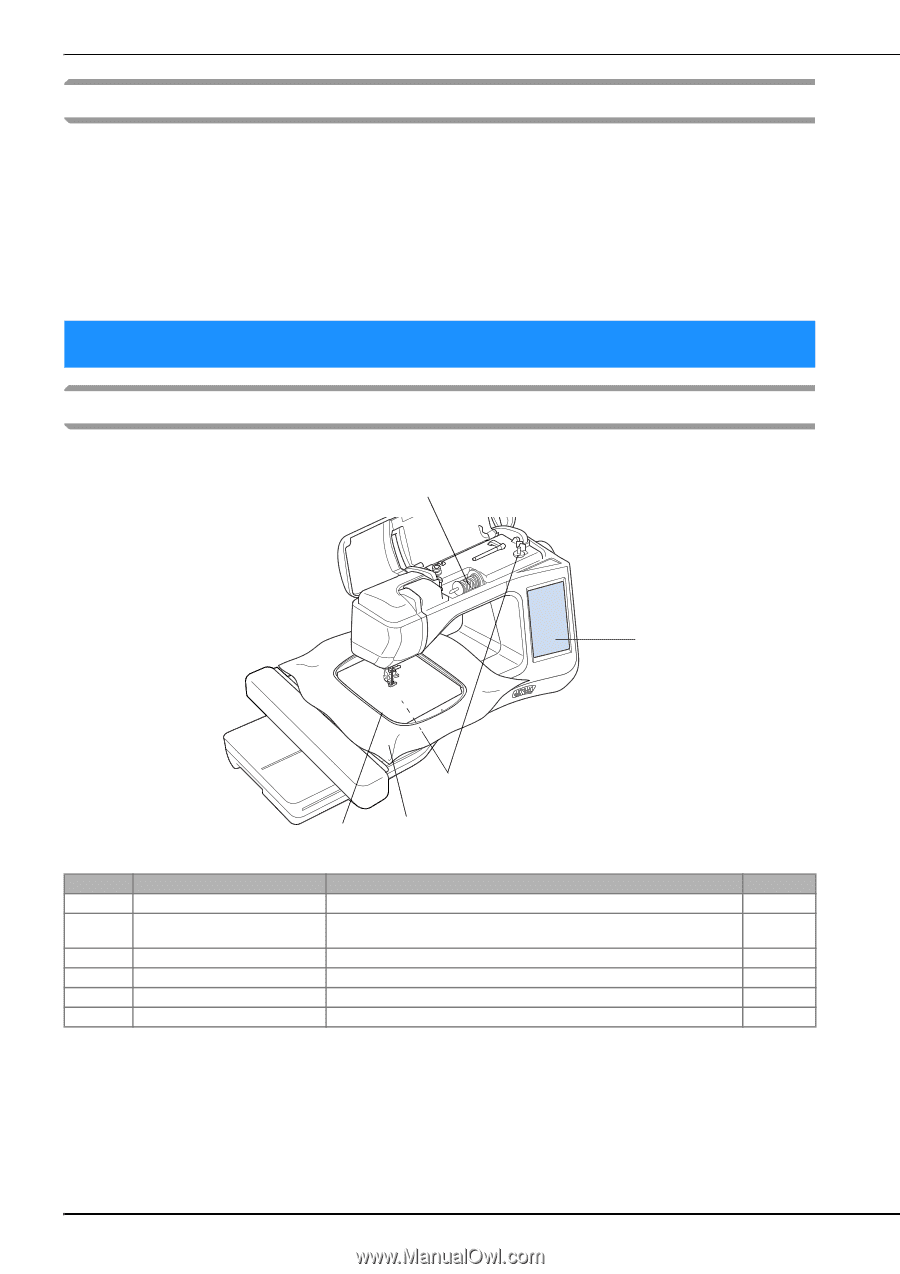
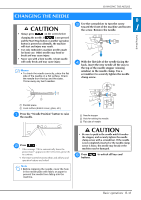
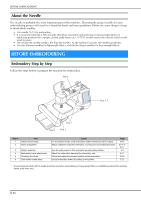
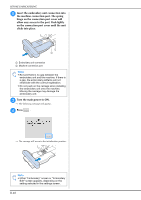
BEFORE EMBROIDERING About the Needle The needle is probably the most important part of the machine. Choosing the proper needle for your embroidering project will result in a beautiful finish and fewer problems. Below are some things to keep in mind about needles. • Use needle 75/11 for embroidery. • It is recommended that a 90/14 needle should be used when embroidering on heavyweight fabrics or stabilizing products (for example, denim, puffy foam, etc.). A 75/11 needle may bend or break, which could result in injury. • The smaller the needle number, the finer the needles. As the numbers increase, the needles get thicker. • Use fine (thinner) needles for lightweight fabrics, and thicker (larger) needles for heavyweight fabrics. BEFORE EMBROIDERING Embroidery Step by Step Follow the steps below to prepare the machine for embroidery. Step 6 Step 3, 5 Step 1 Step 4 Step 2 Step # 1 2 Aim Bobbin thread setup Fabric preparation 3 Pattern selection 4 Embroidery frame attachment 5 Checking the layout 6 Embroidery thread setup Action For the bobbin thread, wind embroidery bobbin thread and set it in place. Attach a stabilizer material to the fabric, and hoop it in the embroidery frame. Turn the main power to ON, and select an embroidery pattern. Attach the embroidery frame to the embroidery unit. Check and adjust the size and position of the embroidery. Set up embroidery thread according to the pattern. Page B-31 E-11 to E-17 E-3 E-17 E-19 E-21 * It is recommended that a 90/14 needle should be used when embroidering on heavy weight fabrics or stabilizing products (for example; denim, puffy foam, etc.). B-46
-
 1
1 -
2
-
3
-
4
-
5
-
6
-
7
-
8
-
9
-
10
-
11
-
12
-
13
-
14
-
15
-
16
-
17
-
18
-
19
-
20
-
21
-
22
-
23
-
24
-
25
-
26
-
27
-
28
-
29
-
30
-
31
-
32
-
33
-
34
-
35
-
36
-
37
-
38
-
39
-
40
-
41
-
42
-
 43
43 -
 44
44 -
 45
45 -
 46
46 -
 47
47 -
 48
48 -
 49
49 -
 50
50 -
 51
51 -
 52
52 -
 53
53 -
54
-
55
-
56
-
57
-
58
-
59
-
60
-
61
-
62
-
63
-
64
-
65
-
66
-
67
-
68
-
69
-
70
-
71
-
72
-
73
-
74
-
75
-
76
-
77
-
78
-
79
-
80
-
81
-
82
-
83
-
84
-
85
-
86
-
87
-
88
-
89
-
90
-
91
-
92
-
93
-
94
-
95
-
96
-
97
-
98
-
99
-
100
-
101
-
102
-
103
-
104
-
105
-
106
-
107
-
108
-
109
-
110
-
111
-
112
-
113
-
114
-
115
-
116
-
117
-
118
-
119
-
120
-
121
-
122
-
123
-
124
-
125
-
126
-
127
-
128
-
129
-
130
-
131
-
132
-
133
-
134
-
135
-
136
-
137
-
138
-
139
-
140
-
141
-
142
-
143
-
144
-
145
-
146
-
147
-
148
-
149
-
150
-
151
-
152
-
153
-
154
-
155
-
156
-
157
-
158
-
159
-
160
-
161
-
162
-
163
-
164
-
165
-
166
-
167
-
168
-
169
-
170
-
171
-
172
-
173
-
174
-
175
-
176
-
177
-
178
-
179
-
180
 |
 |