Brother International DreamMaker„ XE VE2200 Users Manual - English - Page 39
through the slit
 |
View all Brother International DreamMaker„ XE VE2200 manuals
Add to My Manuals
Save this manual to your list of manuals |
Page 39 highlights
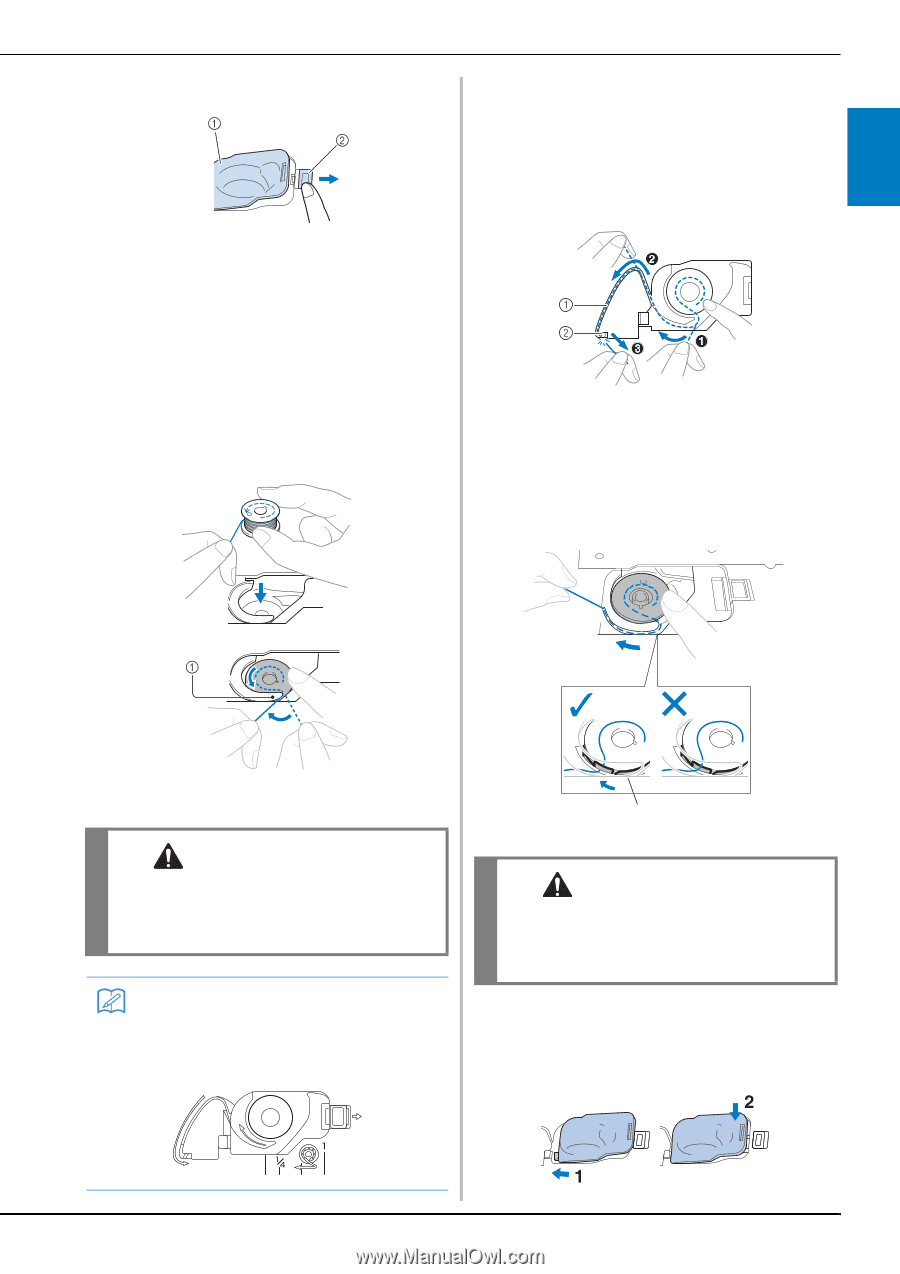
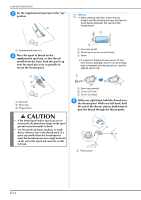
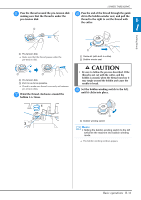
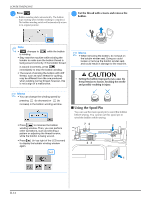
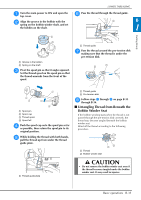
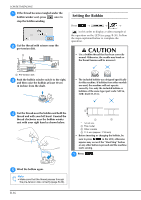
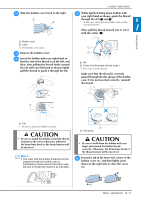
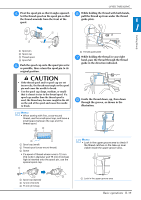
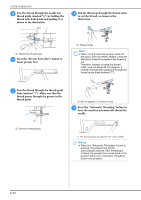
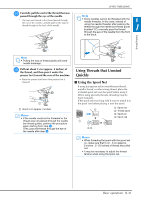
b Slide the bobbin cover latch to the right. LOWER THREADING e While lightly holding down bobbin with your right hand as shown, guide the thread through the slit (a and b). * At this time, check that the bobbin easily rotates counterclockwise. B 1 Then, pull the thread toward you to cut it with the cutter (c). Getting Ready a Bobbin cover b Latch → The bobbin cover opens. c Remove the bobbin cover. d Insert the bobbin with your that the end of the thread is right hand so on the left, and then, after pulling the thread firmly around the tab with your left hand as shown, lightly pull the thread to guide it through the slit. a Slit b Cutter (Cut the thread with the cutter.) → The cutter cuts the thread. Make sure that the thread is correctly passed through the flat spring of the bobbin case. If it is not inserted correctly, reinstall the thread. a Tab * Be sure to insert the bobbin correctly. CAUTION • Be sure to install the bobbin so that the thread unwinds in the correct direction, otherwise the thread may break or the thread tension will be incorrect. Memo • The order that the bobbin thread should be passed through the bobbin case is indicated by marks around the bobbin case. Be sure to thread the machine as indicated. 1 a Flat spring CAUTION • Be sure to hold down the bobbin with your finger and unwind the bobbin thread correctly. Otherwise, the thread may break or the thread tension will be incorrect. f Insert the tab bobbin cover in the lower-left corner of (1), and then lightly press the down on the right side to close the cover (2). Basic operations B-37
-
 1
1 -
2
-
3
-
4
-
5
-
6
-
7
-
8
-
9
-
10
-
11
-
12
-
13
-
14
-
15
-
16
-
17
-
18
-
19
-
20
-
21
-
22
-
23
-
24
-
25
-
26
-
27
-
28
-
29
-
30
-
31
-
32
-
33
-
 34
34 -
 35
35 -
 36
36 -
 37
37 -
 38
38 -
 39
39 -
 40
40 -
 41
41 -
 42
42 -
 43
43 -
 44
44 -
45
-
46
-
47
-
48
-
49
-
50
-
51
-
52
-
53
-
54
-
55
-
56
-
57
-
58
-
59
-
60
-
61
-
62
-
63
-
64
-
65
-
66
-
67
-
68
-
69
-
70
-
71
-
72
-
73
-
74
-
75
-
76
-
77
-
78
-
79
-
80
-
81
-
82
-
83
-
84
-
85
-
86
-
87
-
88
-
89
-
90
-
91
-
92
-
93
-
94
-
95
-
96
-
97
-
98
-
99
-
100
-
101
-
102
-
103
-
104
-
105
-
106
-
107
-
108
-
109
-
110
-
111
-
112
-
113
-
114
-
115
-
116
-
117
-
118
-
119
-
120
-
121
-
122
-
123
-
124
-
125
-
126
-
127
-
128
-
129
-
130
-
131
-
132
-
133
-
134
-
135
-
136
-
137
-
138
-
139
-
140
-
141
-
142
-
143
-
144
-
145
-
146
-
147
-
148
-
149
-
150
-
151
-
152
-
153
-
154
-
155
-
156
-
157
-
158
-
159
-
160
-
161
-
162
-
163
-
164
-
165
-
166
-
167
-
168
-
169
-
170
-
171
-
172
-
173
-
174
-
175
-
176
-
177
-
178
-
179
-
180
 |
 |