Brother International HE-120 Users Manual - English - Page 19
Turning on the machine, Turning off the machine
 |
View all Brother International HE-120 manuals
Add to My Manuals
Save this manual to your list of manuals |
Page 19 highlights
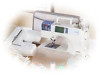
SE-BrotherE_sgml.book Page 13 Monday, June 30, 2003 3:44 PM Turning on the machine Turning off the machine Prepare the included power cord. When you are finished using the sewing machine, Make sure that the sewing machine is turned turn it off. In addition, before transporting the sewing machine to another location, be sure to turn it off. 1 a off (the main power switch is set to " "), and then plug the power supply cord into the power supply jack on the right side of the Make sure that the machine is not sewing. a machine. Press the left side of the main power switch on b the right side of the machine (set it to " "). Insert the plug of the power supply cord into a b household electrical outlet. 1 a Power supply jack Press the right side of the main power switch c on the right side of the machine (set it to "|"). X The sewing lamp comes on when the machine is turned on. Fold the flap at the front of the sewing d machine down toward you. X The sewing lamp goes off when the machine is turned off. Unplug the power supply cord from the c electrical outlet. Grasp the plug when unplugging the power supply cord. Unplug the power supply cord from the power d supply jack. Note z If a power outage occurs while the sewing machine is being operated, turn off the sewing machine and unplug the power supply cord. When restarting the sewing machine, follow the necessary procedure to correctly operate the machine. (For U.S.A. only) z This appliance has a polarized plug (one blade wider than the other). To reduce the risk of electrical shock, this plug is intended to fit in a polarized outlet only one way. If the plug does not fit fully in the outlet, reverse the plug. If it still does not fit, contact a qualified electrician to install the proper outlet. Do not modify the plug in any way. Turning the Machine On/Off 13
-
 1
1 -
2
-
3
-
4
-
5
-
6
-
7
-
8
-
9
-
10
-
11
-
12
-
13
-
 14
14 -
 15
15 -
 16
16 -
 17
17 -
 18
18 -
 19
19 -
 20
20 -
 21
21 -
 22
22 -
 23
23 -
 24
24 -
25
-
26
-
27
-
28
-
29
-
30
-
31
-
32
-
33
-
34
-
35
-
36
-
37
-
38
-
39
-
40
-
41
-
42
-
43
-
44
-
45
-
46
-
47
-
48
-
49
-
50
-
51
-
52
-
53
-
54
-
55
-
56
-
57
-
58
-
59
-
60
-
61
-
62
-
63
-
64
-
65
-
66
-
67
-
68
-
69
-
70
-
71
-
72
-
73
-
74
-
75
-
76
-
77
-
78
-
79
-
80
-
81
-
82
-
83
-
84
-
85
-
86
-
87
-
88
-
89
-
90
-
91
-
92
-
93
-
94
-
95
-
96
-
97
-
98
-
99
-
100
-
101
-
102
-
103
-
104
-
105
-
106
-
107
-
108
-
109
-
110
-
111
-
112
-
113
-
114
-
115
-
116
-
117
-
118
-
119
-
120
-
121
-
122
-
123
-
124
-
125
-
126
-
127
-
128
-
129
-
130
-
131
-
132
-
133
-
134
-
135
-
136
-
137
-
138
-
139
-
140
-
141
-
142
-
143
-
144
-
145
-
146
-
147
-
148
-
149
-
150
-
151
-
152
-
153
-
154
-
155
-
156
-
157
-
158
-
159
-
160
-
161
-
162
-
163
-
164
-
165
-
166
-
167
-
168
-
169
-
170
-
171
-
172
-
173
-
174
-
175
-
176
-
177
-
178
-
179
-
180
-
181
-
182
-
183
 |
 |
