Brother International Innov-is 40 Operation Manual - Page 11
Needle and presser foot Operation buttons
 |
View all Brother International Innov-is 40 manuals
Add to My Manuals
Save this manual to your list of manuals |
Page 11 highlights
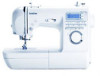
Needle and presser foot section a Needle threader lever Use the needle threader to thread the needle. b Buttonhole lever Lower the buttonhole lever when sewing buttonholes and bar tacks. c Presser foot holder The presser foot is attached to the presser foot holder. d Presser foot holder screw Use the presser foot holder screw to hold the presser foot holder in place. e Presser foot The presser foot applies pressure to the fabric during sewing. Attach the appropriate presser foot for the selected stitch. f Needle plate cover Remove the needle plate cover to clean the bobbin case and race. g Feed dogs The feed dogs feed the fabric. h Quick-set bobbin Begin sewing without pulling up the bobbin thread. i Bobbin cover Remove the bobbin cover and then insert the bobbin into the bobbin case. j Needle plate The needle plate is marked with guides to help sew straight seams. k Needle bar thread guide Pass the upper thread through the needle bar thread guide. l Presser foot lever Raise and lower this lever to raise and lower the presser foot. m Needle clamp screw Use the needle clamp screw to hold the needle in place. Operation buttons The operation buttons help you to easily perform various basic sewing machine operations. a Start/stop button Press the start/stop button to start or stop sewing. The machine sews at a low speed at the beginning of sewing while the button is continuously pressed. When sewing is stopped, the needle is lowered into the fabric. For details, refer to "Starting to sew" (page 42). b Reverse/reinforcement stitch button Press the reverse/reinforcement stitch button to sew reverse stitches or reinforcement stitches. Reverse stitches are sewn by keeping the button pressed down to sew in the opposite direction. Reinforcement stitches are sewn by sewing 3 to 5 stitches on top of each other. For details, refer to"Securing the stitching" (page 44). c Needle position button Press the needle position button to raise or lower the needle. Pressing the button twice sews one stitch. d Sewing speed controller Slide the sewing speed controller to the left or right to adjust the sewing speed. Slide the sewing speed controller to the left to reduce the sewing speed, or slide the speed controller to the right to increase the sewing speed. 9
-
 1
1 -
2
-
3
-
4
-
5
-
 6
6 -
 7
7 -
 8
8 -
 9
9 -
 10
10 -
 11
11 -
 12
12 -
 13
13 -
 14
14 -
 15
15 -
 16
16 -
17
-
18
-
19
-
20
-
21
-
22
-
23
-
24
-
25
-
26
-
27
-
28
-
29
-
30
-
31
-
32
-
33
-
34
-
35
-
36
-
37
-
38
-
39
-
40
-
41
-
42
-
43
-
44
-
45
-
46
-
47
-
48
-
49
-
50
-
51
-
52
-
53
-
54
-
55
-
56
-
57
-
58
-
59
-
60
-
61
-
62
-
63
-
64
-
65
-
66
-
67
-
68
-
69
-
70
-
71
-
72
-
73
-
74
-
75
-
76
-
77
-
78
-
79
-
80
-
81
-
82
-
83
-
84
-
85
-
86
-
87
-
88
-
89
-
90
-
91
-
92
-
93
-
94
-
95
-
96
-
97
-
98
-
99
-
100
-
101
-
102
-
103
-
104
 |
 |
