Brother International KE-430D Instruction Manual - English - Page 22
Installing the cotton stand, 3-8. Installing the button tray (BE-438D)
 |
View all Brother International KE-430D manuals
Add to My Manuals
Save this manual to your list of manuals |
Page 22 highlights
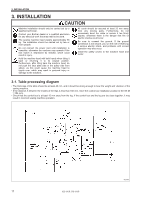
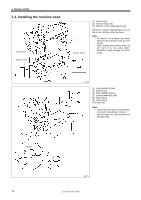
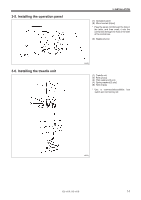
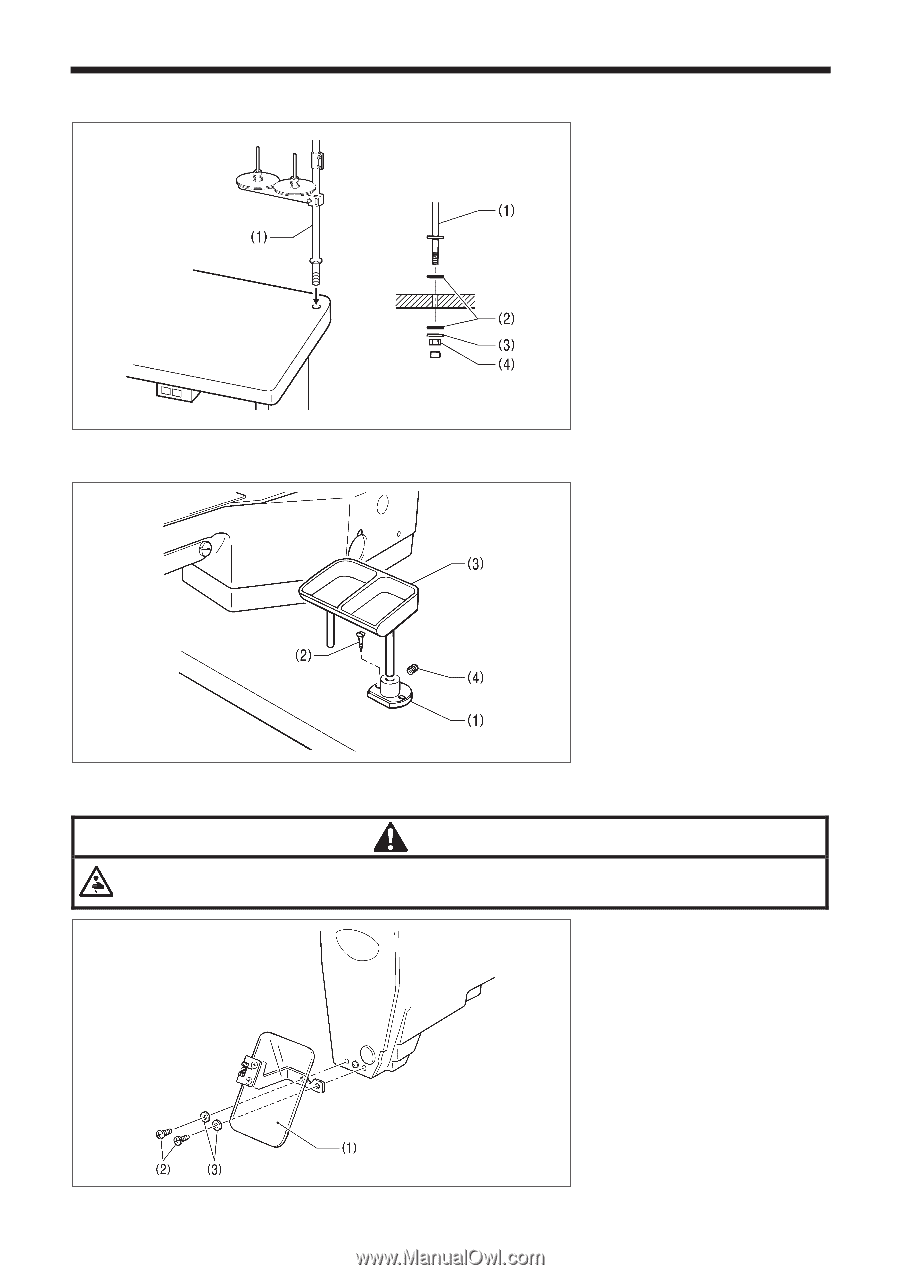
3. INSTALLATION 3-7. Installing the cotton stand (1) Cotton stand Note: Securely tighten the nut (4) so that the two rubber cushions (2) and the washer (3) are securely clamped and so that the cotton stand (1) does not move. 3-8. Installing the button tray (BE-438D) 3636M Install the button tray at a place convenient for operation. (1) Button tray holder (2) Wood screws [2 pcs] (3) Button tray (4) Set screw 4410Q 3-9. Installing the eye guard CAUTION Attach all safety devices before using the sewing machine. If the machine is used without these devices attached, injury may result. (1) Eye guard assembly (2) Screws [2 pcs] (3) Plain washers [2 pcs] 4411Q 15 KE-430D, BE-438D
-
 1
1 -
2
-
3
-
4
-
5
-
6
-
7
-
8
-
9
-
10
-
11
-
12
-
13
-
14
-
15
-
16
-
 17
17 -
 18
18 -
 19
19 -
 20
20 -
 21
21 -
 22
22 -
 23
23 -
 24
24 -
 25
25 -
 26
26 -
 27
27 -
28
-
29
-
30
-
31
-
32
-
33
-
34
-
35
-
36
-
37
-
38
-
39
-
40
-
41
-
42
-
43
-
44
-
45
-
46
-
47
-
48
-
49
-
50
-
51
-
52
-
53
-
54
-
55
-
56
-
57
-
58
-
59
-
60
-
61
-
62
-
63
-
64
-
65
-
66
 |
 |
3. INSTALLATION
15
KE-430D, BE-438D
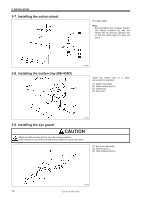
3-7. Installing the cotton stand
(1) Cotton stand
Note:
Securely tighten the nut (4) so that the
two rubber cushions (2) and the
washer (3) are securely clamped and
so that the cotton stand (1) does not
move.
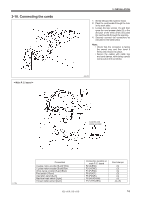
3-8. Installing the button tray (BE-438D)
Install the
button
tray
at
a
place
convenient for operation.
(1) Button tray holder
(2) Wood screws [2 pcs]
(3) Button tray
(4) Set screw
3-9. Installing the eye guard
CAUTION
Attach all safety devices before using the sewing machine.
If the machine is used without these devices attached, injury may result.
(1) Eye guard assembly
(2) Screws [2 pcs]
(3) Plain washers [2 pcs]
4411Q
4410Q
3636M