Brother International PC-3000 Users Manual - English - Page 97
Mechanical trouble
 |
View all Brother International PC-3000 manuals
Add to My Manuals
Save this manual to your list of manuals |
Page 97 highlights
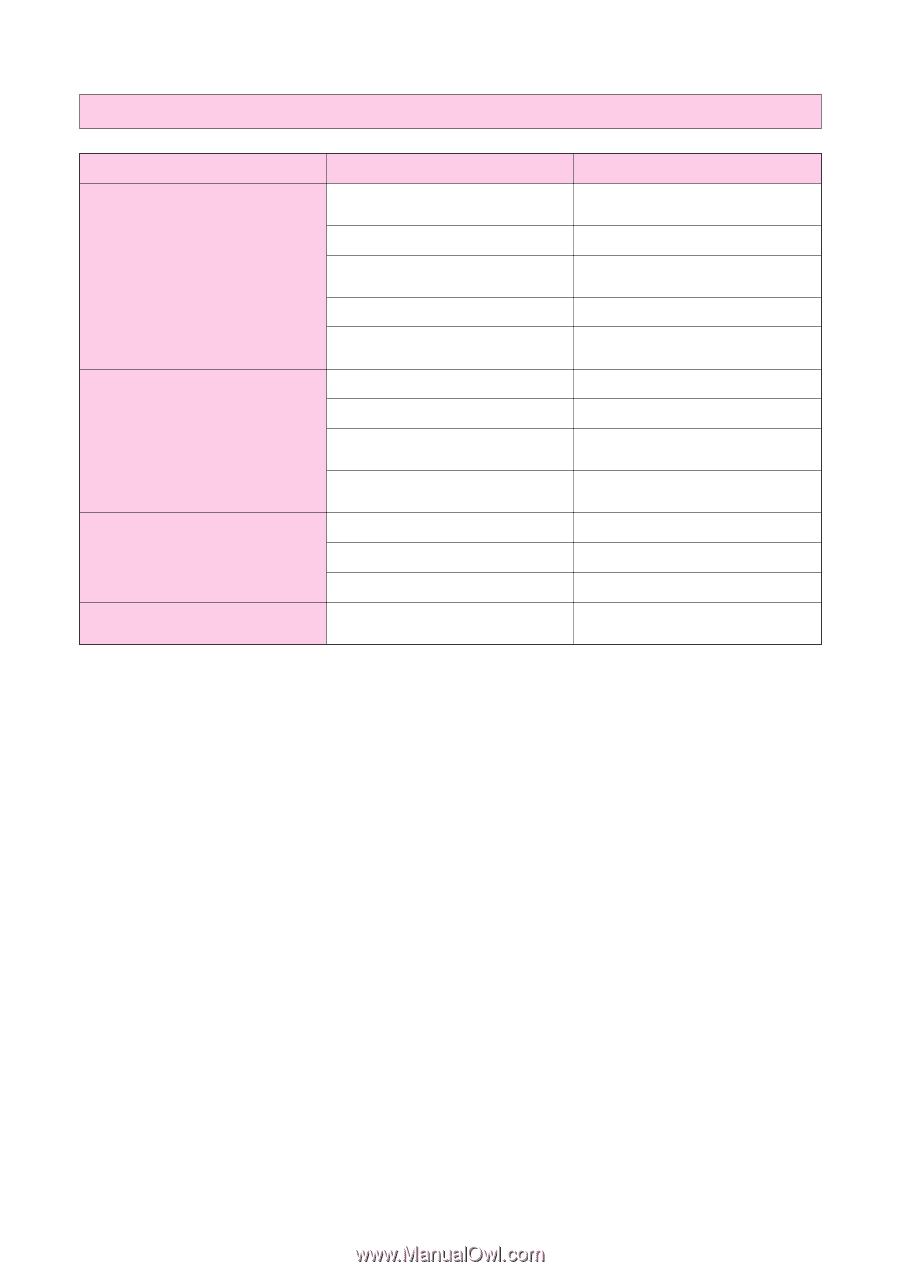
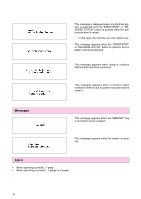
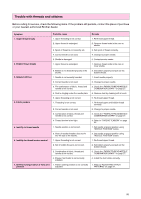
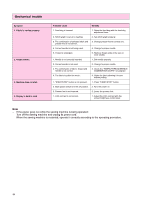
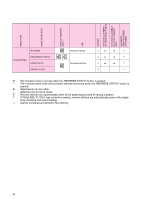
Mechanical trouble Symptom 1. Fabric is not fed properly 2. Needle breaks 3. Machine does not start 4. Display is hard to read Probable cause Remedy 1. Feed dog is lowered. 1. Raise the feed dog with the feed dog adjustment lever. 2. Stitch length is set at no feeding. 2. Set stitch length properly. 3. The combination of selected stitch and 3. Change presser foot to correct one. presser foot is not correct. 4. Correct needle is not being used. 4. Change to proper needle. 5. Thread is entangled. 5. Remove thread-ends in the race or inner shuttle. 1. Needle is not correctly inserted. 1. Set needle properly. 2. Correct needle is not used. 2. Change to proper needle. 3. The combination of fabric, thread and needle is not correct. 3. Check the "FABRIC/THREAD/NEEDLE COMBINATION CHART" on page 27. 4. The fabric is pulled too much. 4. Guide the fabric allowing it to sew without pulling. 1. "START/STOP" button is not pressed. 1. Press "START/STOP" button. 2. Main power switch is in the off position. 2. Turn the power on. 3. Presser foot is not lowered. 3. Lower the presser foot. 1. LCD contrast is not correct. 1. Adjust the LCD contrast with the screen brightness control lever. Note - If the power goes out while the sewing machine is being operated: Turn off the sewing machine and unplug its power cord. When the sewing machine is restarted, operate it correctly according to the operating procedure. 94
-
 1
1 -
2
-
3
-
4
-
5
-
6
-
7
-
8
-
9
-
10
-
11
-
12
-
13
-
14
-
15
-
16
-
17
-
18
-
19
-
20
-
21
-
22
-
23
-
24
-
25
-
26
-
27
-
28
-
29
-
30
-
31
-
32
-
33
-
34
-
35
-
36
-
37
-
38
-
39
-
40
-
41
-
42
-
43
-
44
-
45
-
46
-
47
-
48
-
49
-
50
-
51
-
52
-
53
-
54
-
55
-
56
-
57
-
58
-
59
-
60
-
61
-
62
-
63
-
64
-
65
-
66
-
67
-
68
-
69
-
70
-
71
-
72
-
73
-
74
-
75
-
76
-
77
-
78
-
79
-
80
-
81
-
82
-
83
-
84
-
85
-
86
-
87
-
88
-
89
-
90
-
91
-
 92
92 -
 93
93 -
 94
94 -
 95
95 -
 96
96 -
 97
97 -
 98
98 -
 99
99 -
 100
100 -
 101
101 -
 102
102 -
103
-
104
 |
 |