Brother International XL-3200 Users Manual - English - Page 15
Straight, Stitching
 |
View all Brother International XL-3200 manuals
Add to My Manuals
Save this manual to your list of manuals |
Page 15 highlights
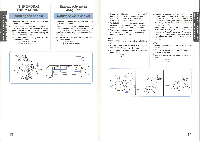
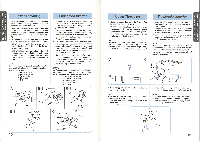
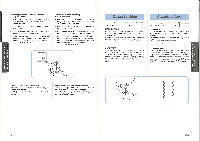
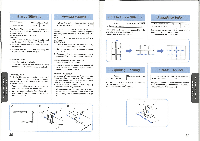
DVZOIZA 5111.93k1 SVUViNfld ONIHaLlIS DVZOIZ aNv 1HDIVELLS STRAIGHT AND ZIGZAG STITCHING PUNTADAS RECTAS Y ZIGZAG Straight Stitching Pattern 2 (Straight Stitch) 15 (Triple Stretch Stitch) Stitch Length Stitch Width 1-4 5 Fixed 2.5 Starting Sewing 1. Turn the Pattern Selection Dial to show your desired stitch on the Pattern Indication Window. Set the Pattern Selection Dial to 2 or 15 for the type of Straight Stitch required. 2. Raise the needle to its highest position and lift the presser foot lever. 3. Pull up the lower thread by turning the balance wheel toward you (counterclockwise) and place both the upper and lower threads toward the back of the presser foot. 4. Place the fabric under the presser foot and position the needle 1 cm (3/8") from the edge of the fabric. 5. Lower the presser foot. 6. To backtack, push the Reverse Sewing Button in as far as possible and lightly touch the foot controller. Reverse sewing is used for locking the end of seams and where reinforcement is needed. 7. Release the Reverse Sewing Button and start sewing in the forward direction by applying pressure to the foot controller. Puntadas rectas Mimero de puntada Largo de puntada Ancho de puntada 2 (Puntada recta) 1-4 5 15 (Triple Puntada Pespunto) Fija 2,5 Para empezar a coser 1. Gire el selector de puntadas para ver la puntada deseada en la ventana de indicaci6n correspondiente. Ponga dicho selector de puntadas en2615segan eltipo depuntada recta deseado. 2. Levante la aguja a suposici6n mas alta ylevante la palanca delprensatelas. 3. Saque el hilo inferior girando la ruedecilla hacia usted(en elsentido contrario alde las manecillas de un reloi)y tire los hilos superior e inferiorhacia la parte atras delprensatelas. 4. Coloque el tejido debajo del prensatelas y posicione la aguja a 1 cm (3/8") de la orilla del tejido. 5. Baje elprensatelas. 6. Para retroceder, apriete a fondo el pulsador de retroceso y presione ligeramente el pedal. El retroceso sirve para finalizar una costura o reforzarla, tal como aparece a continuaci6n. 7. Suelte elpulsador de retroceso y vuelva a coser hacia adelante, presionando el pedal. Changing Sewing Direction 1. Stop the machine at the point where you wish to change directions with the needle still in the fabric. 2. Raise the presser foot and turn the fabric to line up its new direction using the needle as a turning point. 3. Lower the presser foot and start sewing in the new direction. Cambio de sentido de costura 1. Pare la maquina en donde quiera cambiar de direcciOn, con la aguja picada en el tejido. 2. Levante el prensatelas y gire el tejido en la direccion que debe seguir, usando la aguja como placa giratoria. 3. Bajeelprensatelasyempiecea coserenla nueva direcci6n tal como ilustrado. Finishing Sewing Reverse stitching is used to lock the threads at the end of the seam or wherever reinforcement is needed. 1. Stitch to the end of the seam and stop. 2. Push the Reverse Sewing Button and lightly touch the foot controller to stitch backwards for 1 cm (3/8") from the end of the fabric. Para terminar las costuras La puntada de retroceso se usa para trabar los hilos al final de una costura o en cualquier punto donde sea necesario reforzar la costura. 1. Cosa hasta el final de la costura y pare. 2. Apriete el pulsador de retroceso y presione suavemente elpedalpara coserhacia atrashasta 1 cm (3/8") de la orilla del tejido. 23 24
-
 1
1 -
2
-
3
-
4
-
5
-
6
-
7
-
8
-
9
-
 10
10 -
 11
11 -
 12
12 -
 13
13 -
 14
14 -
 15
15 -
 16
16 -
 17
17 -
 18
18 -
 19
19 -
 20
20 -
21
-
22
-
23
-
24
-
25
-
26
-
27
-
28
-
29
-
30
-
31
 |
 |
