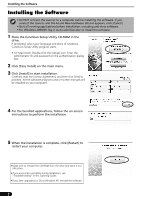
Canon CanoScan 8600F CanoScan 8600F Quick Start Guide - Page 4
Preparing the Scanner - attachments
 |
View all Canon CanoScan 8600F manuals
Add to My Manuals
Save this manual to your list of manuals |
Page 4 highlights
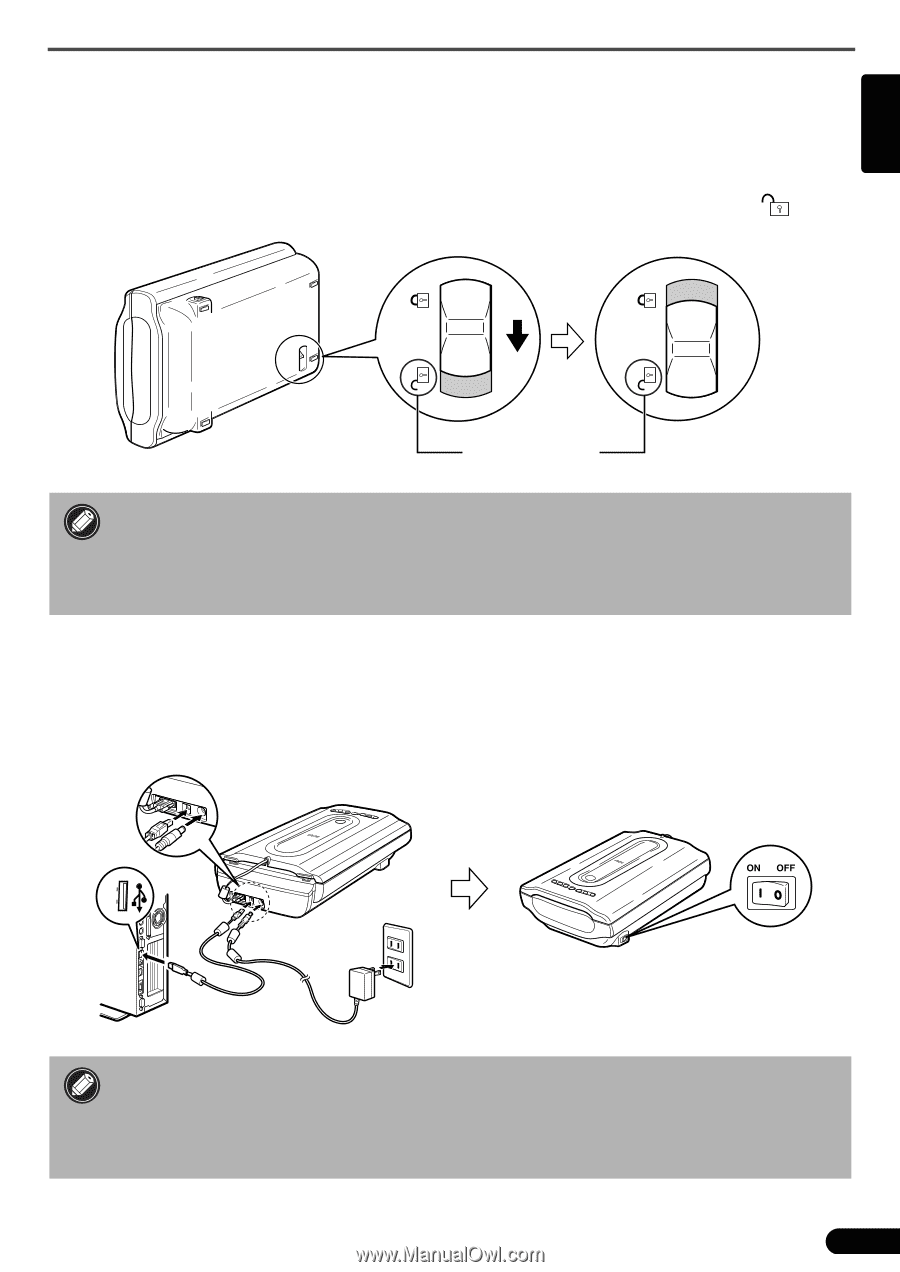
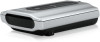
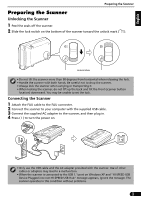
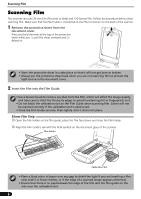
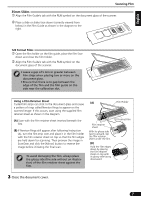
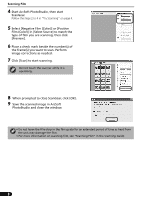
English Preparing the Scanner Preparing the Scanner Unlocking the Scanner 1 Peel the seals off the scanner. 2 Slide the lock switch on the bottom of the scanner toward the unlock mark ( ). Unlock Mark • Do not tilt the scanner more than 90 degrees from horizontal when releasing the lock. • Handle the scanner with both hands. Be careful not to drop the scanner. • Always lock the scanner when carrying or transporting it. • When locking the scanner, do not lift up the back and tilt the front (scanner button location) downward. You may be unable to set the lock. Connecting the Scanner 1 Attach the FAU cable to the FAU connecter. 2 Connect the scanner to your computer with the supplied USB cable. 3 Connect the supplied AC adapter to the scanner, and then plug in. 4 Press ( I ) to turn the power on. • Only use the USB cable and the AC adapter provided with the scanner. Use of other cables or adapters may lead to a malfunction. • When the scanner is connected to the USB 1.1 port on Windows XP and "HI-SPEED USB Device Plugged into non-HI-SPEED USB Hub" message appears, ignore the message. The scanner operates in this condition without problems. 3
-
 1
1 -
 2
2 -
 3
3 -
 4
4 -
 5
5 -
 6
6 -
 7
7 -
 8
8 -
 9
9 -
 10
10 -
11
-
12
-
13
-
14
-
15
-
16
-
17
-
18
-
19
-
20
-
21
-
22
-
23
-
24
-
25
-
26
-
27
-
28
-
29
-
30
-
31
-
32
-
33
-
34
-
35
-
36
-
37
-
38
-
39
-
40
-
41
-
42
-
43
-
44
-
45
-
46
-
47
-
48
-
49
-
50
-
51
-
52
-
53
-
54
-
55
-
56
-
57
-
58
-
59
-
60
-
61
-
62
-
63
-
64
-
65
-
66
-
67
-
68
-
69
-
70
-
71
-
72
-
73
 |
 |