Canon CanoScan 8600F CanoScan 8600F Quick Start Guide - Page 7
Scanning Film - film and slide scanner
 |
View all Canon CanoScan 8600F manuals
Add to My Manuals
Save this manual to your list of manuals |
Page 7 highlights
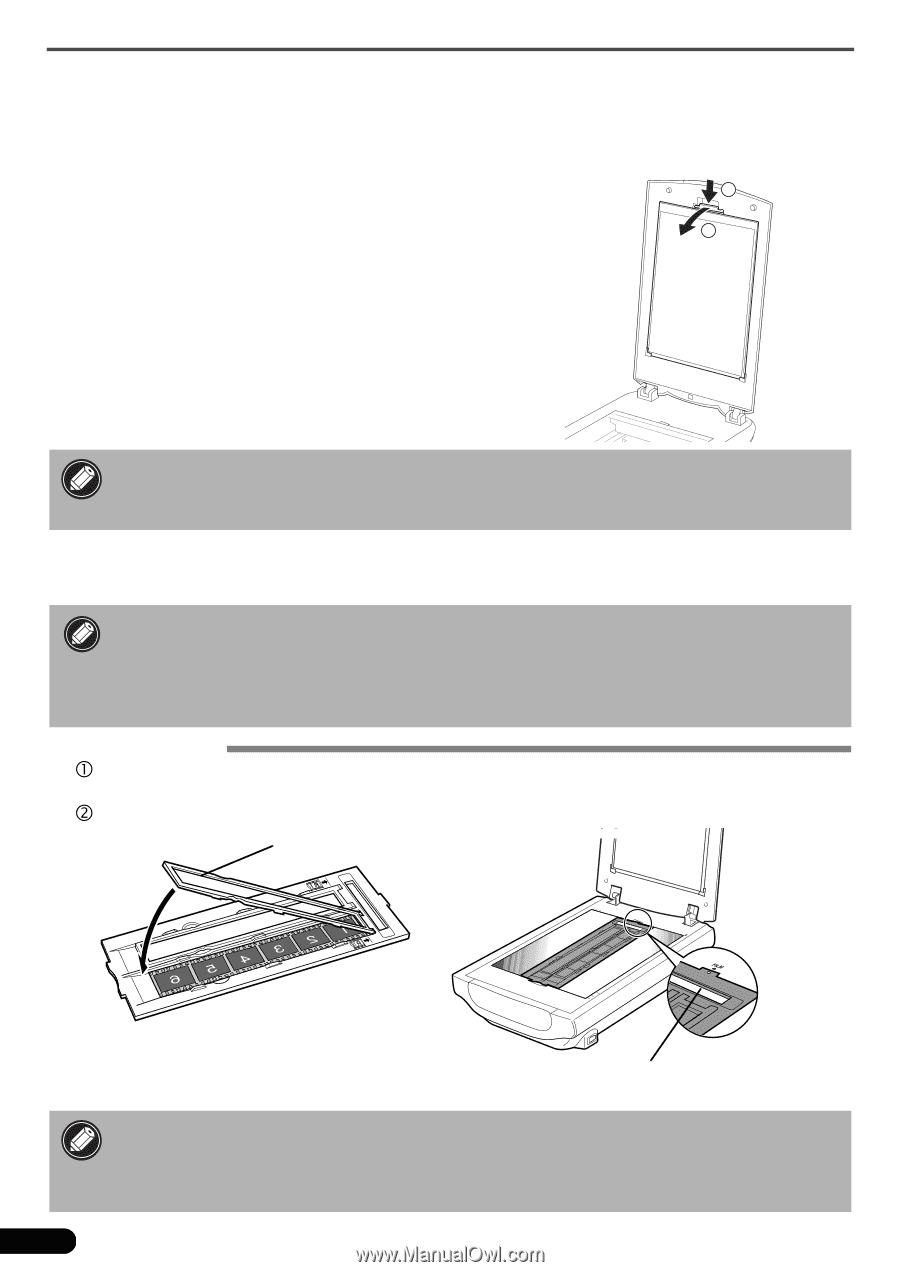
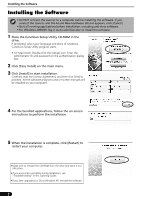
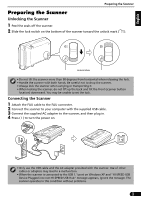
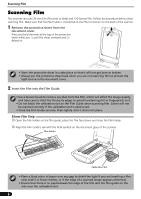
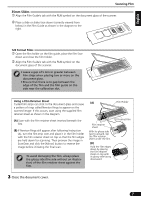
Scanning Film Scanning Film This scanner can scan 35 mm film (film strip or slide) and 120 format film. Follow the procedure below when scanning film. Make sure that the FAU Cable is connected to the FAU connector on the back of the scanner. 1 Remove the protective sheet from the 1 document cover. Press and hold the lever at the top of the protective 2 sheet while you a pull the sheet outward and b detach it. • Store the protective sheet in a safe place so that it will not get bent or broken. • Always put the protective sheet back when you are not scanning film to protect the light source in the document cover. 2 Insert the film into the Film Guide. • Use a blower brush to remove any dust from the film, which will affect the image quality, and take care to hold the film by its edges to avoid transferring dirt or fingerprints to it. • Do not block the calibration slot on the Film Guide when scanning film. Colors will not be scanned correctly if the calibration slot is obstructed. • Close the Film Guide securely. Press lightly until it clicks into place. 35mm Film Strip c Open the film holder on the film guide, place the film face down and close the film holder. d Align the Film Guide's tab with the FILM symbol on the document glass of the scanner. Film Holder Calibration Slot • Place a black piece of paper over any gap to shield the light if you are inserting a film strip with 5 or fewer frames, or if the edge of a scanned image appears whitened. • Ensure that there is no gap between the edge of the film and the film guide on the side near the calibration slot. 6
-
 1
1 -
 2
2 -
 3
3 -
 4
4 -
 5
5 -
 6
6 -
 7
7 -
 8
8 -
 9
9 -
 10
10 -
 11
11 -
 12
12 -
13
-
14
-
15
-
16
-
17
-
18
-
19
-
20
-
21
-
22
-
23
-
24
-
25
-
26
-
27
-
28
-
29
-
30
-
31
-
32
-
33
-
34
-
35
-
36
-
37
-
38
-
39
-
40
-
41
-
42
-
43
-
44
-
45
-
46
-
47
-
48
-
49
-
50
-
51
-
52
-
53
-
54
-
55
-
56
-
57
-
58
-
59
-
60
-
61
-
62
-
63
-
64
-
65
-
66
-
67
-
68
-
69
-
70
-
71
-
72
-
73
 |
 |