Canon CanoScan D646U CanoScan D646U Product Guide - Page 14
ScanGear Toolbox CS Settings
 |
View all Canon CanoScan D646U manuals
Add to My Manuals
Save this manual to your list of manuals |
Page 14 highlights
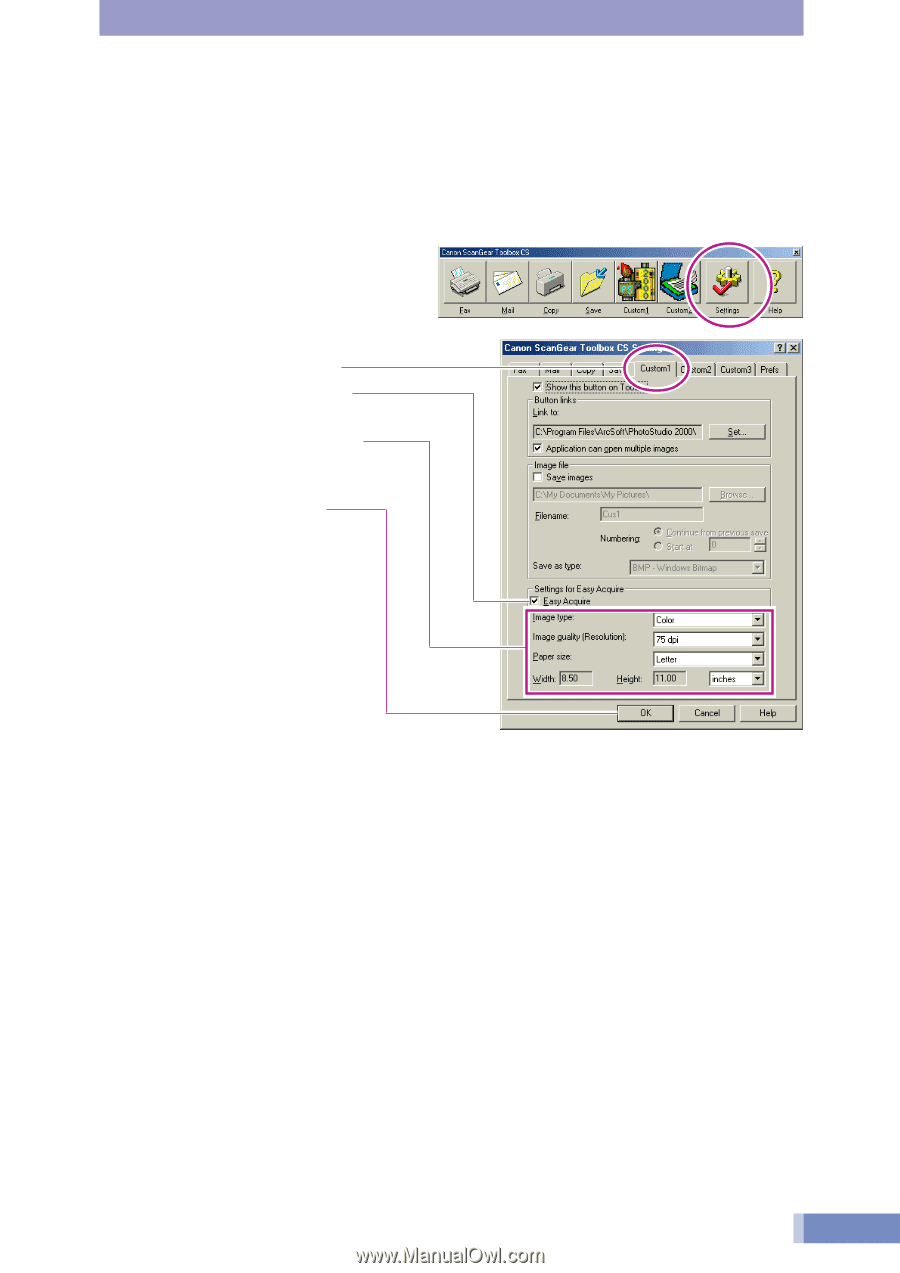
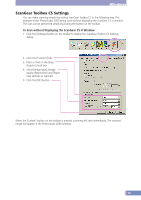
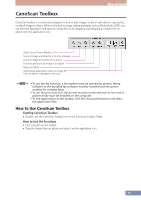
Windows ScanGear Toolbox CS Settings You can make scanning simpler by setting ScanGear Toolbox CS in the following way. This example shows PhotoStudio 2000 being used without displaying the ScanGear CS-U window. The scan can be performed simply by clicking the button on the toolbar. To Scan without Displaying the ScanGear CS-U Window 1. Click the [Settings] button on the toolbar to display the ScanGear Toolbox CS Settings dialog. 2. Click the [Custom1] tab. 3. Place a check in the [Easy Acquire] check box. 4. Select [Image type], [Image quality (Resolution)] and [Paper size] settings as required. 5. Click the [OK] button. When the Custom1 button on the toolbar is pressed, scanning will start immediately. The scanned image will appear in the PhotoStudio 2000 window. 14
-
 1
1 -
2
-
3
-
4
-
5
-
6
-
7
-
8
-
 9
9 -
 10
10 -
 11
11 -
 12
12 -
 13
13 -
 14
14 -
 15
15 -
 16
16 -
 17
17 -
 18
18 -
 19
19 -
20
-
21
 |
 |