Canon CanoScan D646U CanoScan D646U Product Guide - Page 19
ScanSoft Omni Starting Omni and the Driver Software
 |
View all Canon CanoScan D646U manuals
Add to My Manuals
Save this manual to your list of manuals |
Page 19 highlights
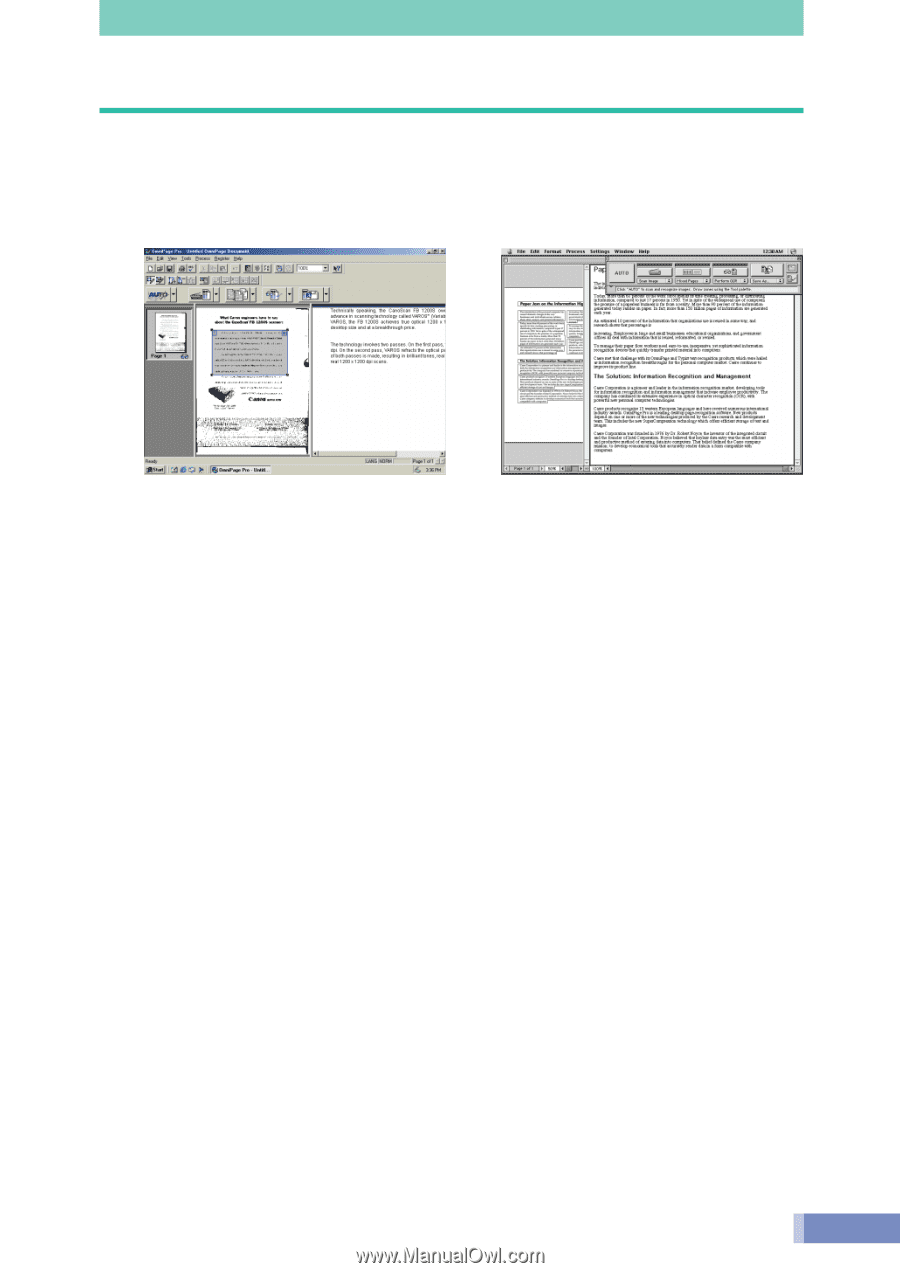
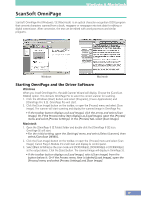
Windows & Macintosh ScanSoft OmniPage ScanSoft OmniPage Pro (Windows) / SE (Macintosh) is an optical character recognition (OCR) program that converts characters scanned from a book, magazine or newspaper into text data for editing or digital transmission. After conversion, the text can be edited with word processors and similar programs. Windows Macintosh Starting OmniPage and the Driver Software Windows When you install OmniPage Pro, the Add Scanner Wizard will display. Choose the [CanoScan D646U] option. This instructs OmniPage Pro to select the correct scanner for scanning. 1. Click the Windows [Start] button and select [Programs], [Caere Applications] and [OmniPage Pro 9.0]. OmniPage Pro will start. 2. Click the [Scan Image] button on the toolbar, or open the [Process] menu and select [Scan Image]. The scanner will start scanning and display the scanned image in OmniPage Pro. • If the toolbar button displays as [Load Image], click the arrow and select [Scan Image]. Or if the Process menu item displays as [Load Image], open the [Process] menu and select [Process Settings]. In the [Process] tab, select [Scan Image]. Macintosh 1. Open the [OmniPage 8 SE Folder] folder and double-click the [OmniPage 8 SE] icon. OmniPage SE will start. • For the initial setting, open the [Settings] menu and select [Select Scanner], then select [CanoScan D646U]. 2. Click the [Scan Image] button on the toolbar, or open the [Process] menu and select [Scan Image]. Canon Plug-in Module CS-U will start and display its control panel. 3. Select [Black & White] as the scan mode and [OCR(300dpi)], [OCR(400dpi)] or [OCR(600dpi)] as the output device. Click the [Scan] button. The scanned image will display in OmniPage SE. • If the toolbar button displays as [Load Image], select [Scan Image] from the button below it. Or if the Process menu item is labeled [Load Image], open the [Process] menu and select [Process Settings] and [Scan Image]. 19
-
 1
1 -
2
-
3
-
4
-
5
-
6
-
7
-
8
-
9
-
10
-
11
-
12
-
13
-
 14
14 -
 15
15 -
 16
16 -
 17
17 -
 18
18 -
 19
19 -
 20
20 -
 21
21
 |
 |