Canon CanoScan D646U CanoScan D646U Product Guide - Page 8
Before Transporting the Scanner
 |
View all Canon CanoScan D646U manuals
Add to My Manuals
Save this manual to your list of manuals |
Page 8 highlights
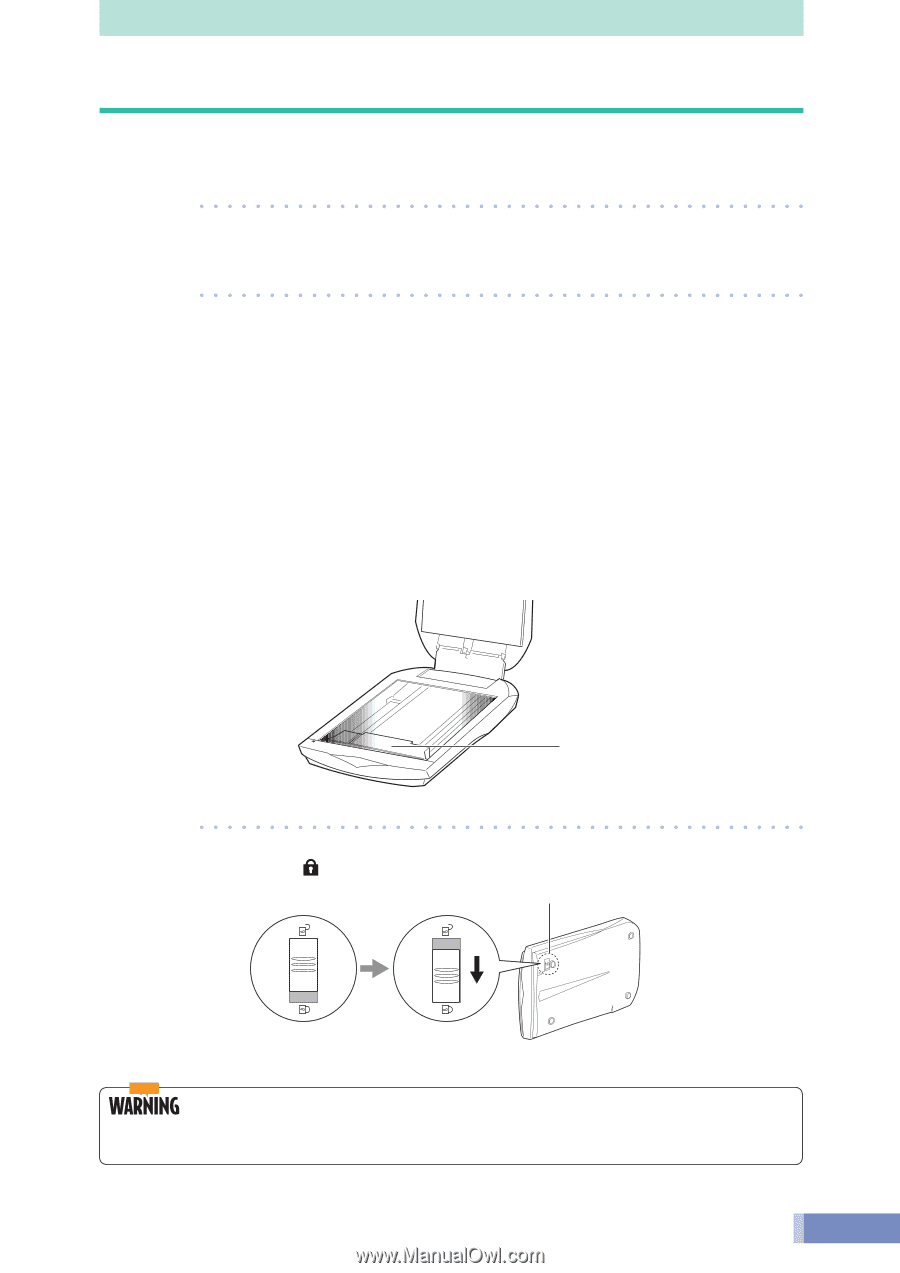
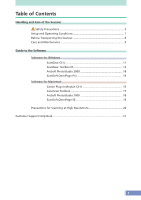
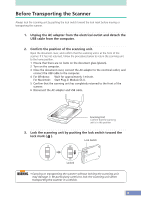
Before Transporting the Scanner Always lock the scanning unit by pushing the lock switch toward the lock mark before moving or transporting the scanner. 1. Unplug the AC adapter from the electrical outlet and detach the USB cable from the computer. 2. Confirm the position of the scanning unit. Open the document cover, and confirm that the scanning unit is at the front of the scanner. If it has not returned, follow the procedures below to return the scanning unit to the home position. 1 Ensure that there are no items on the document glass (platen). 2 Turn on the computer. 3 Close the document cover, connect the AC adapter to the electrical outlet, and connect the USB cable to the computer. 4 For Windows: Wait for approximately 1 minute. For Macintosh: Start Plug-in Module CS-U. 5 Confirm that the scanning unit has completely returned to the front of the scanner. 6 Disconnect the AC adapter and USB cable. Scanning Unit Confirm that the scanning unit is in this position 3. Lock the scanning unit by pushing the lock switch toward the lock mark ( ). Lock Switch Locked • Carrying or transporting the scanner without locking the scanning unit may damage it. Be particularly careful to lock the scanning unit when transporting the scanner in a vehicle. 8
-
 1
1 -
2
-
 3
3 -
 4
4 -
 5
5 -
 6
6 -
 7
7 -
 8
8 -
 9
9 -
 10
10 -
 11
11 -
 12
12 -
 13
13 -
14
-
15
-
16
-
17
-
18
-
19
-
20
-
21
 |
 |