Canon CanoScan N670U CanoScan N670U/N676U/N1240U Quick Start Guide - Page 12
Using the Scanner Buttons - driver windows 7
 |
View all Canon CanoScan N670U manuals
Add to My Manuals
Save this manual to your list of manuals |
Page 12 highlights
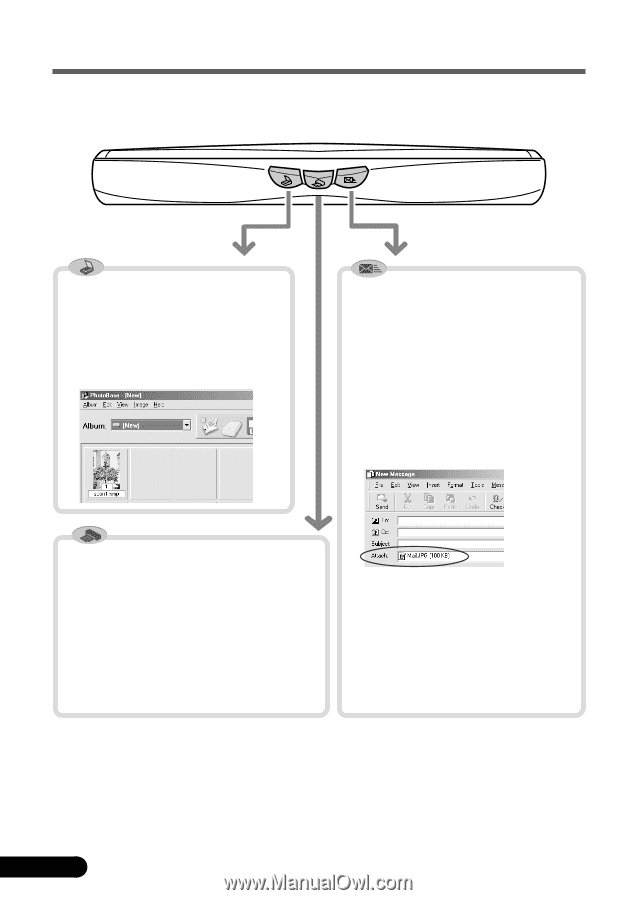
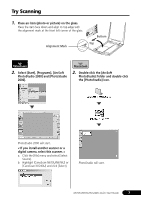
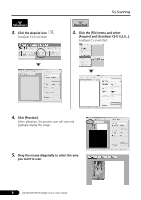
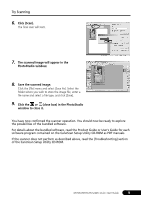
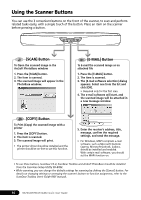
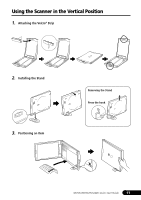
Using the Scanner Buttons You can use the 3 convenient buttons on the front of the scanner, to scan and perform related tasks easily, with a single touch of the button. Place an item on the scanner before pressing a button. SCAN COPY E-MAIL [SCAN] Button To Open the scanned image in the ArcSoft PhotoBase window 1. Press the [SCAN] button. 2. The item is scanned. 3. The scanned image will appear in the PhotoBase window. [E-MAIL] Button To E-mail the scanned image as an attached file 1. Press the [E-MAIL] button. 2. The item is scanned. 3. The [E-mail software selection] dialog appears. Select one from the list and click [OK]. • Required only for the first scan. 4. The e-mail software will start, and the scanned image will be attached in a new message window. [COPY] Button To Print (Copy) the scanned image with a printer 1. Press the [COPY] button. 2. The item is scanned. 3. The scanned image will print. • The printer driver should be installed and the printer should be on-line to use this function. 5. Enter the receiver's address, title, message, confirm the required settings, and send the message. • For Windows, MAPI compliant e-mail software, such as Microsoft Outlook Express, Microsoft Outlook, Eudora, should be installed and enabled. With certain mail software, you should set the MAPI function on. • To use these buttons, ScanGear CS-U, ScanGear Toolbox and ArcSoft PhotoBase should be installed from the CanoScan Setup Utility CD-ROM. • While scanning, you can change the default settings for scanning by clicking the [Cancel] button. For details on changing settings or arranging the scanner's button-to-function assignment, refer to the ScanGear Toolbox User's Guide (PDF manual). 10 N670U/N676U/N1240U Quick Start Guide
-
 1
1 -
2
-
3
-
4
-
5
-
6
-
 7
7 -
 8
8 -
 9
9 -
 10
10 -
 11
11 -
 12
12 -
 13
13 -
 14
14
 |
 |