Canon HF100 VIXIA HF10/VIXIA HF100 Instruction Manual - Page 68
to record the still images.
 |
UPC - 013803092004
View all Canon HF100 manuals
Add to My Manuals
Save this manual to your list of manuals |
Page 68 highlights
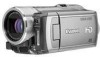
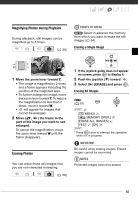
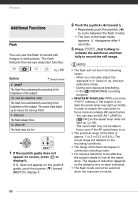
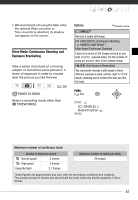
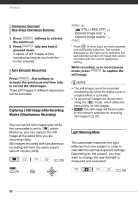
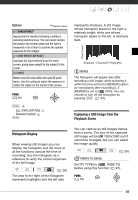
Photos CONTINUOUS SHOOTING/ HIGH-SPEED CONTINUOUS SHOOTING 1 Press PHOTO halfway to activate the autofocus. 2 Press PHOTO fully and hold it pressed down. A series of still images will be recorded as long as you hold the button pressed. AUTO EXPOSURE BRACKETING Press PHOTO , first halfway to activate the autofocus and then fully to record the still images. Three still images in different exposures will be recorded. Capturing a Still Image while Recording Movies (Simultaneous Recording) You can record still images even while the camcorder is set to mode. Moreover, you can capture the still image at the same time you are recording video. Still images recorded with simultaneous recording will have the same aspect ratio of movies (16:9). FUNC. ( 28) ( 26) FUNC. [ STILL I.REC OFF] Desired image size* Desired image quality* FUNC. * Press to move back and forth between size and quality selection. The number displayed on the right corner indicates the approximate number of images that can be recorded with the current quality/size setting. While recording, or in record pause mode, press PHOTO to capture the still image. NOTES • The still image cannot be recorded simultaneously while the digital zoom or a digital effect is activated. • To record still images we recommend using the mode, which offers the best quality for still images. • The still image will be recorded to the memory selected for recording still images ( 33). Light Metering Mode The camcorder measures the light reflected from the subject in order to calculate the optimal exposure settings. Depending on the subject, you may want to change the way the light is measured and evaluated. ( 26) 68
-
 1
1 -
2
-
3
-
4
-
5
-
6
-
7
-
8
-
9
-
10
-
11
-
12
-
13
-
14
-
15
-
16
-
17
-
18
-
19
-
20
-
21
-
22
-
23
-
24
-
25
-
26
-
27
-
28
-
29
-
30
-
31
-
32
-
33
-
34
-
35
-
36
-
37
-
38
-
39
-
40
-
41
-
42
-
43
-
44
-
45
-
46
-
47
-
48
-
49
-
50
-
51
-
52
-
53
-
54
-
55
-
56
-
57
-
58
-
59
-
60
-
61
-
62
-
 63
63 -
 64
64 -
 65
65 -
 66
66 -
 67
67 -
 68
68 -
 69
69 -
 70
70 -
 71
71 -
 72
72 -
 73
73 -
74
-
75
-
76
-
77
-
78
-
79
-
80
-
81
-
82
-
83
-
84
-
85
-
86
-
87
-
88
-
89
-
90
-
91
-
92
-
93
-
94
-
95
-
96
-
97
-
98
-
99
-
100
-
101
-
102
-
103
-
104
-
105
-
106
-
107
-
108
-
109
-
110
-
111
-
112
-
113
-
114
-
115
-
116
-
117
-
118
-
119
-
120
-
121
-
122
-
123
-
124
-
125
-
126
-
127
-
128
-
129
 |
 |