Canon MK 1500 Mk1500 Users Guide - Page 23
Before You Begin, Transport roller 3
 |
View all Canon MK 1500 manuals
Add to My Manuals
Save this manual to your list of manuals |
Page 23 highlights
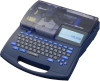
Cover Open this cover when you need to load a cassette or tube. Cover release Pull this lever to the left to open the cover. Power switch Use this switch to turn the power on and off. Flip the switch to the "|" position to turn the power on, and flip the switch to the " " position to turn the power off. LCD screen Displays text that has been input or the information about settings. Ribbon cassette holder Place the ribbon cassette here. Mounting location for tube attachment or printing media cassette Mount the tube attachment or label tape cassette here. The optional Tube Warmer also mounts here. Cutter The cutter cuts printing media automatically. The cutter can be replaced. Cutter receiver This is the receiver for the cutter blade when cutting printing media. When the cutter is replaced, the cutter receiver is replaced at the same time. Print head This device prints by applying heat to a ribbon. As it becomes very hot, not touch this device while printing is in progress or immediately after printing. Transport roller 1 This roller feeds printing media to the print head. Transport roller 2 This roller feeds printing media past the print head. Before You Begin Part 1 Transport roller 3 This roller feeds printed printing media to the cutter. Transport roller 3 release lever Pull this lever to the right to release transport roller 3. Use this lever when clearing jammed printing media. Tube intake Insert tube here (when tube attachment installed). Outlet Printed printing media emerge here. Keyboard Input text to be printed and data for settings through this keyboard. AC adapter connector Connect the AC adapter cable here. Wrap-around tape guide This guide is installed when printing on wraparound tape. Remove it when printing to other media. Handle Hold this handle when carrying the printer. Connector for ribbon cassette This is to read out information of the ribbon cassette. Do not touch and deform the connector. 19
-
 1
1 -
2
-
3
-
4
-
5
-
6
-
7
-
8
-
9
-
10
-
11
-
12
-
13
-
14
-
15
-
16
-
17
-
 18
18 -
 19
19 -
 20
20 -
 21
21 -
 22
22 -
 23
23 -
 24
24 -
 25
25 -
 26
26 -
 27
27 -
 28
28 -
29
-
30
-
31
-
32
-
33
-
34
-
35
-
36
-
37
-
38
-
39
-
40
-
41
-
42
-
43
-
44
-
45
-
46
-
47
-
48
-
49
-
50
-
51
-
52
-
53
-
54
-
55
-
56
-
57
-
58
-
59
-
60
-
61
-
62
-
63
-
64
-
65
-
66
-
67
-
68
-
69
-
70
-
71
-
72
-
73
-
74
-
75
-
76
-
77
-
78
-
79
-
80
-
81
-
82
-
83
-
84
-
85
-
86
-
87
-
88
-
89
-
90
-
91
-
92
-
93
-
94
-
95
-
96
-
97
-
98
-
99
-
100
-
101
-
102
-
103
-
104
-
105
-
106
-
107
-
108
-
109
-
110
-
111
-
112
-
113
-
114
-
115
-
116
-
117
-
118
-
119
-
120
 |
 |
