Canon PIXMA MP160 User's Guide - Page 103
Computer Stops Operating During Scanning, Scan Quality Is Poor Poor Image Displayed On The Monitor - scanning guide
 |
View all Canon PIXMA MP160 manuals
Add to My Manuals
Save this manual to your list of manuals |
Page 103 highlights
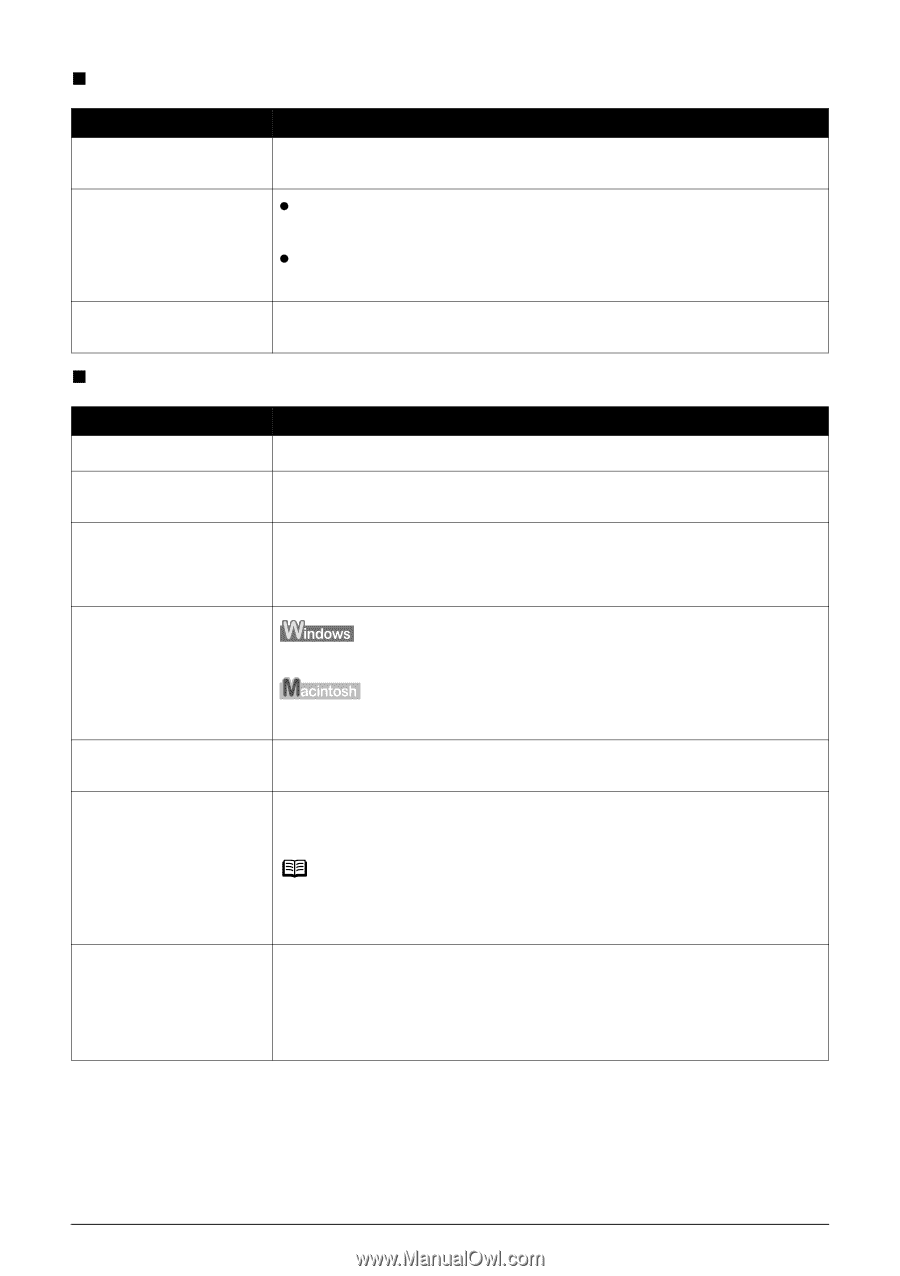
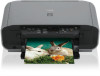
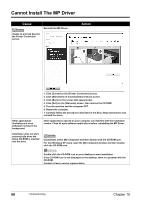
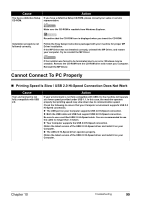
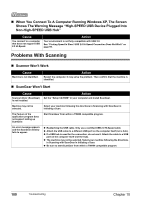
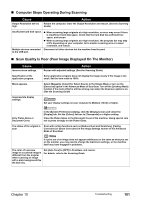
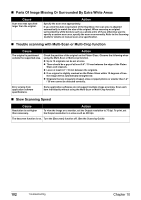
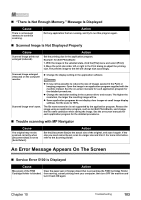
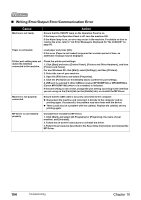
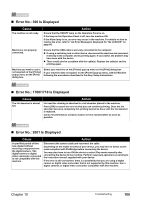
„ Computer Stops Operating During Scanning Cause Output Resolution set too high. Action Reboot the computer, lower the Output Resolution and rescan. (See the Scanning Guide) Insufficient hard disk space. z When scanning large originals at a high resolution, an error may occur if there is insufficient hard disk space. Check that the hard disk has sufficient free space, and rescan. z When scanning large originals at a high resolution, the progress bar may stay at 0% depending on your computer. Set a smaller scanning area or a lower resolution, and rescan. Multiple devices connected Disconnect all other devices but the machine from the port. to the USB port. „ Scan Quality Is Poor (Poor Image Displayed On The Monitor) Cause Incorrect scan settings. Specification of the application program. Moiré appears. Inappropriate display settings. Action Rescan with adjusted settings. (See the Scanning Guide) Some application program does not display the image clearly if the image is too small. Set the view mode to 100%. Select [Magazine (Color)] for Select Source in the Simple Mode or turn on the [Descreen] option in the Advanced Mode of ScanGear. Turn off the [Unsharp Mask] function if the moiré effect is still too strong even when the Descreen option is on. (See the Scanning Guide) Set your display settings on your computer to Medium (16 bit) or higher. Dirty Platen Glass or Document Cover. In the [System Preferences] dialog, click the [Displays] icon and select the [Display] tab. Set the [Colors] list box to [Thousands] or a higher setting. Clean the Platen Glass or the Document Cover of the machine, taking special care not to press strongly on the Platen Glass. The status of the original is poor. Scan with certain functions such as [Reduce Dust and Scratches], [Fading Correction] or [Grain Correction] in the Image Settings section of the Advanced Mode of ScanGear. Note If a print out of an image does not appear satisfactory or the same as what you see on the monitor, you may need to change the machine's settings, or the machine itself may have engaged in problems. The color of a preview image or a scanned image is different from the original when scanning an image with a plain background like the blue sky. Set [Auto Tone] to [OFF] in ScanGear, and rescan. For details, refer to the Scanning Guide. Chapter 10 Troubleshooting 101
-
 1
1 -
2
-
3
-
4
-
5
-
6
-
7
-
8
-
9
-
10
-
11
-
12
-
13
-
14
-
15
-
16
-
17
-
18
-
19
-
20
-
21
-
22
-
23
-
24
-
25
-
26
-
27
-
28
-
29
-
30
-
31
-
32
-
33
-
34
-
35
-
36
-
37
-
38
-
39
-
40
-
41
-
42
-
43
-
44
-
45
-
46
-
47
-
48
-
49
-
50
-
51
-
52
-
53
-
54
-
55
-
56
-
57
-
58
-
59
-
60
-
61
-
62
-
63
-
64
-
65
-
66
-
67
-
68
-
69
-
70
-
71
-
72
-
73
-
74
-
75
-
76
-
77
-
78
-
79
-
80
-
81
-
82
-
83
-
84
-
85
-
86
-
87
-
88
-
89
-
90
-
91
-
92
-
93
-
94
-
95
-
96
-
97
-
 98
98 -
 99
99 -
 100
100 -
 101
101 -
 102
102 -
 103
103 -
 104
104 -
 105
105 -
 106
106 -
 107
107 -
 108
108 -
109
-
110
-
111
-
112
-
113
-
114
-
115
-
116
-
117
-
118
-
119
-
120
-
121
-
122
-
123
-
124
-
125
-
126
-
127
-
128
 |
 |