Canon PIXMA MP610 MP610 series Quick Start Guide - Page 54
Important, Caution, Close the Inner Cover., Gently close the Scanning Unit Printer Cover. - print head cleaning
 |
View all Canon PIXMA MP610 manuals
Add to My Manuals
Save this manual to your list of manuals |
Page 54 highlights
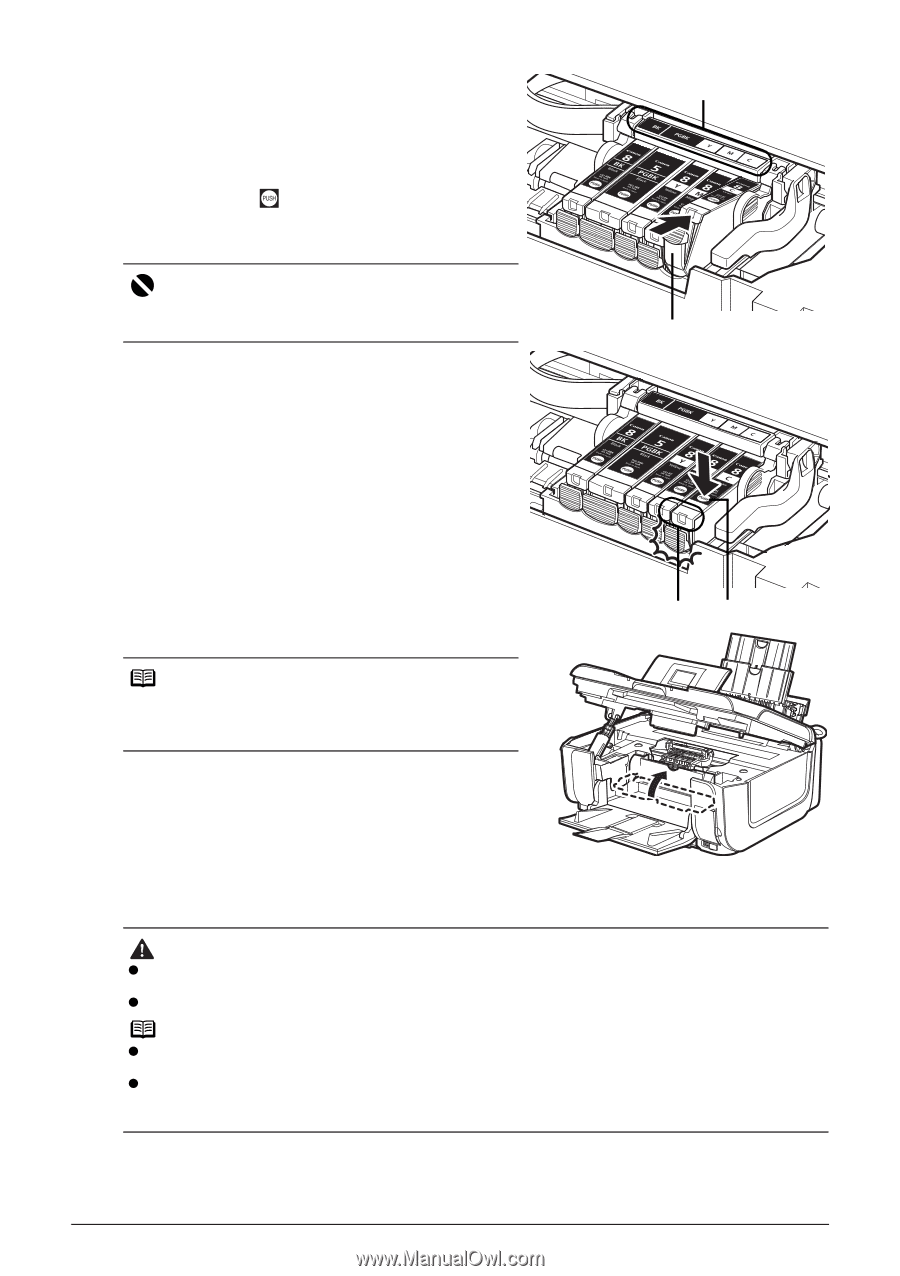
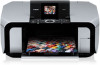
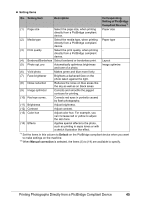
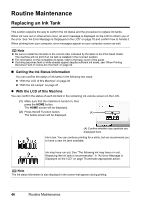
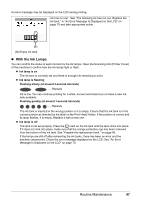
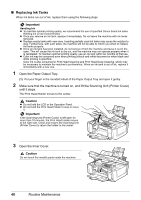
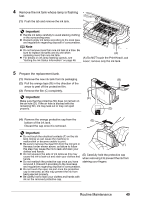
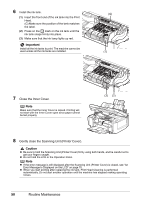
6 Install the ink tank. (1) Insert the front end of the ink tank into the Print Head. (G) Make sure the position of the tank matches the label. (2) Press on the mark on the ink tank until the ink tank snaps firmly into place. (3) Make sure that the ink lamp lights up red. Important Install all the ink tanks to print. The machine cannot be used unless all the ink tanks are installed. (G) (1) 7 Close the Inner Cover. Note Make sure that the Inner Cover is closed. Printing will not start with the Inner Cover open since paper cannot be fed properly. (3) (2) 8 Gently close the Scanning Unit (Printer Cover). Caution z Be sure to hold the Scanning Unit (Printer Cover) firmly using both hands, and be careful not to get your fingers caught. z Do not hold the LCD or the Operation Panel. Note z If the error message is still displayed after the Scanning Unit (Printer Cover) is closed, see "An Error Message Is Displayed on the LCD" on page 70. z When you start printing after replacing the ink tank, Print Head Cleaning is performed automatically. Do not start another operation until the machine has stopped making operating noises. 50 Routine Maintenance
-
 1
1 -
2
-
3
-
4
-
5
-
6
-
7
-
8
-
9
-
10
-
11
-
12
-
13
-
14
-
15
-
16
-
17
-
18
-
19
-
20
-
21
-
22
-
23
-
24
-
25
-
26
-
27
-
28
-
29
-
30
-
31
-
32
-
33
-
34
-
35
-
36
-
37
-
38
-
39
-
40
-
41
-
42
-
43
-
44
-
45
-
46
-
47
-
48
-
 49
49 -
 50
50 -
 51
51 -
 52
52 -
 53
53 -
 54
54 -
 55
55 -
 56
56 -
 57
57 -
 58
58 -
 59
59 -
60
-
61
-
62
-
63
-
64
-
65
-
66
-
67
-
68
-
69
-
70
-
71
-
72
-
73
-
74
-
75
-
76
-
77
-
78
-
79
-
80
-
81
-
82
-
83
-
84
-
85
-
86
-
87
-
88
-
89
-
90
-
91
-
92
-
93
-
94
-
95
-
96
-
97
-
98
-
99
-
100
-
101
-
102
-
103
-
104
-
105
-
106
-
107
-
108
-
109
-
110
-
111
-
112
 |
 |