Canon PIXMA MX850 Quick Start Guide - Page 123
Aligning the Print Head, Automatic Print Head Alignment
 |
View all Canon PIXMA MX850 manuals
Add to My Manuals
Save this manual to your list of manuals |
Page 123 highlights
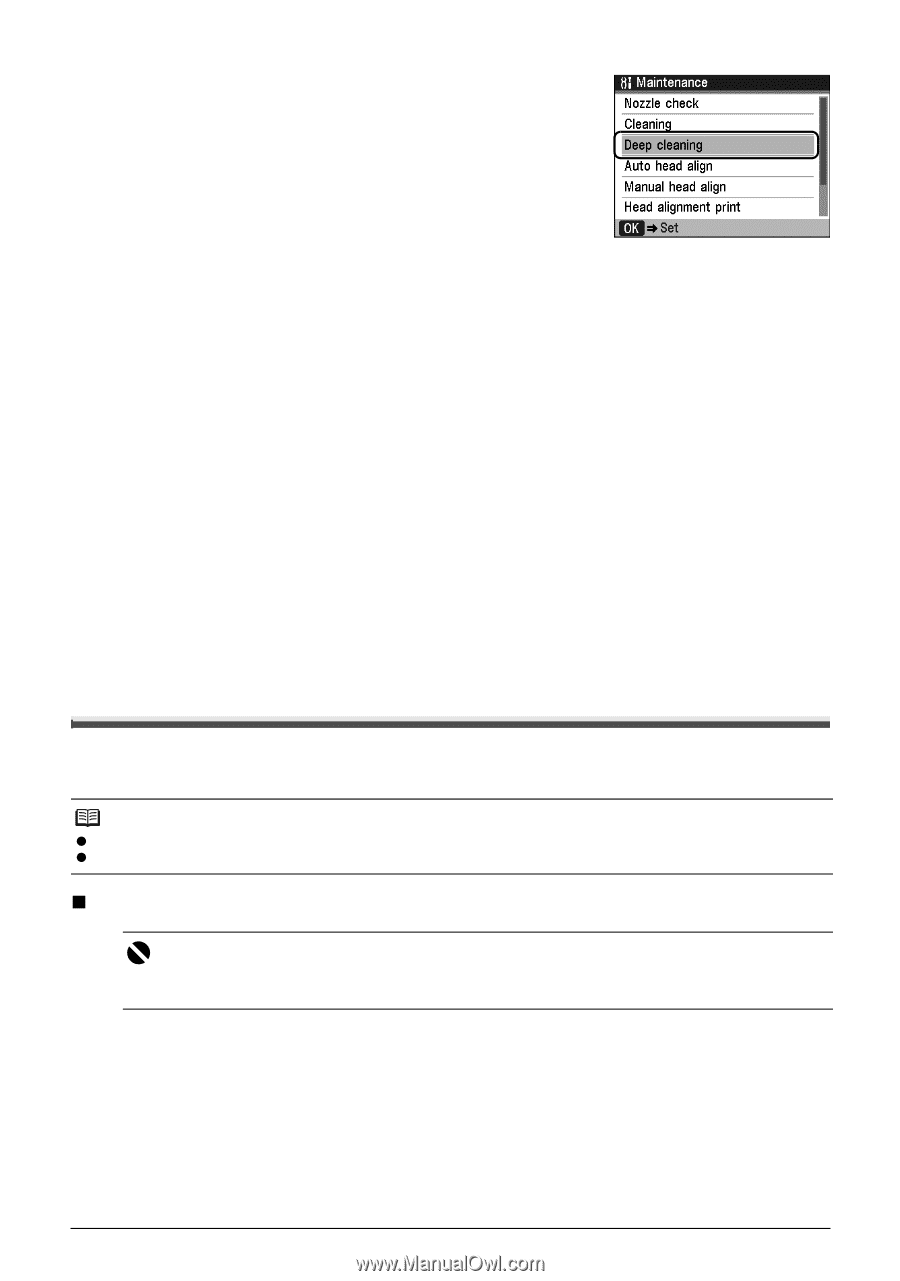
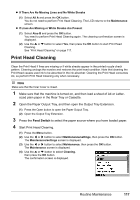
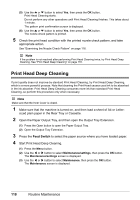
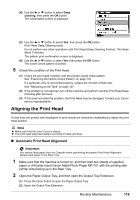
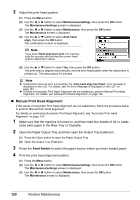
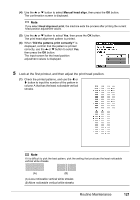
(4) Use the { or } button to select Deep cleaning, then press the OK button. The confirmation screen is displayed. (5) Use the { or } button to select Yes, then press the OK button. Print Head Deep Cleaning starts. Do not perform any other operations until Print Head Deep Cleaning finishes. This takes about 2 minutes. The pattern print confirmation screen is displayed. (6) Use the { or } button to select Yes, then press the OK button. The nozzle check pattern is printed. 5 Check the condition of the Print Head. (1) Check the print head condition with the printed nozzle check pattern. See "Examining the Nozzle Check Pattern" on page 116. If a particular color is not printed properly, replace the ink tank of that color. See "Replacing an Ink Tank" on page 107. (2) If the problem is not resolved, turn off the machine and perform another Print Head Deep Cleaning after 24 hours. (3) If this does not solve the problem, the Print Head may be damaged. Contact your Canon service representative. Aligning the Print Head If ruled lines are printed with misaligned or print results are otherwise unsatisfactory, adjust the print head position. Note z Make sure that the Inner Cover is closed. z The print head alignment pattern is printed in black and blue. „ Automatic Print Head Alignment Important You cannot feed paper from the Cassette when performing Automatic Print Head Alignment. Always load paper in the Rear Tray. 1 Make sure that the machine is turned on, and then load two sheets of supplied paper or A4/Letter-sized Canon Matte Photo Paper MP-101 with the printing side (whiter side) facing up in the Rear Tray. 2 Open the Paper Output Tray, and then open the Output Tray Extension. (1) Press the Open button to open the Paper Output Tray. (2) Open the Output Tray Extension. Routine Maintenance 119
-
 1
1 -
2
-
3
-
4
-
5
-
6
-
7
-
8
-
9
-
10
-
11
-
12
-
13
-
14
-
15
-
16
-
17
-
18
-
19
-
20
-
21
-
22
-
23
-
24
-
25
-
26
-
27
-
28
-
29
-
30
-
31
-
32
-
33
-
34
-
35
-
36
-
37
-
38
-
39
-
40
-
41
-
42
-
43
-
44
-
45
-
46
-
47
-
48
-
49
-
50
-
51
-
52
-
53
-
54
-
55
-
56
-
57
-
58
-
59
-
60
-
61
-
62
-
63
-
64
-
65
-
66
-
67
-
68
-
69
-
70
-
71
-
72
-
73
-
74
-
75
-
76
-
77
-
78
-
79
-
80
-
81
-
82
-
83
-
84
-
85
-
86
-
87
-
88
-
89
-
90
-
91
-
92
-
93
-
94
-
95
-
96
-
97
-
98
-
99
-
100
-
101
-
102
-
103
-
104
-
105
-
106
-
107
-
108
-
109
-
110
-
111
-
112
-
113
-
114
-
115
-
116
-
117
-
 118
118 -
 119
119 -
 120
120 -
 121
121 -
 122
122 -
 123
123 -
 124
124 -
 125
125 -
 126
126 -
 127
127 -
 128
128 -
129
-
130
-
131
-
132
-
133
-
134
-
135
-
136
-
137
-
138
-
139
-
140
-
141
-
142
-
143
-
144
-
145
-
146
-
147
-
148
-
149
-
150
-
151
-
152
-
153
-
154
-
155
-
156
-
157
-
158
-
159
-
160
-
161
-
162
-
163
-
164
-
165
-
166
-
167
-
168
-
169
-
170
-
171
-
172
-
173
-
174
-
175
-
176
-
177
-
178
-
179
-
180
-
181
-
182
-
183
-
184
-
185
-
186
-
187
-
188
 |
 |