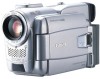
Canon Pi Optura Pi Instruction Manual - Page 49
Using the DM-50 Microphone optional
 |
UPC - 013803606102
View all Canon Pi manuals
Add to My Manuals
Save this manual to your list of manuals |
Page 49 highlights
#3_OPTURA Pi_E(34-78) 1/25/00 13:42 Page 50 (1,1) Using the DM-50 Microphone (optional) E Using the Full Range of Features The highly sensitive Directional Stereo Microphone DM-50 has been designed exclusively for camcorders equipped with an advanced accessory shoe . It is powered by the camcorder's power supply. Use during recording or audio dubbing ( 95). Refer to the DM-50's instructions for further details. Turn the camcorder's power off before attaching/removing the microphone. 1. Slide the microphone onto the accessory shoe and tighten with the shoe lock. • Slide in the direction of the arrow on the bottom of the microphone until it clicks securely into place. • Make sure that the microphone does not come disconnected when turning the shoe lock. 2. Turn the camcorder's POWER switch to camera mode. • C (Connection) appears in the display. • When dubbing audio, C (Connection) appears when you set AUDIO DUB in the VCR menu to MIC. IN ( 97). 3. Set the microphone's directivity switch. SHOTGUN: Clearly picks up sound arriving from the front of the microphone (monaural). STEREO1: Picks up sound arriving from the front of, as well as sound surrounding the microphone. STEREO2: Picks up sound surrounding the microphone in a wider range than STEREO 1. • Never carry the camera holding the microphone. • The DM-50 will not pick up any sound if another microphone is attached to the camcorder's microphone terminal. 50
-
 1
1 -
2
-
3
-
4
-
5
-
6
-
7
-
8
-
9
-
10
-
11
-
12
-
13
-
14
-
15
-
16
-
17
-
18
-
19
-
20
-
21
-
22
-
23
-
24
-
25
-
26
-
27
-
28
-
29
-
30
-
31
-
32
-
33
-
34
-
35
-
36
-
37
-
38
-
39
-
40
-
41
-
42
-
43
-
 44
44 -
 45
45 -
 46
46 -
 47
47 -
 48
48 -
 49
49 -
 50
50 -
 51
51 -
 52
52 -
 53
53 -
 54
54 -
55
-
56
-
57
-
58
-
59
-
60
-
61
-
62
-
63
-
64
-
65
-
66
-
67
-
68
-
69
-
70
-
71
-
72
-
73
-
74
-
75
-
76
-
77
-
78
-
79
-
80
-
81
-
82
-
83
-
84
-
85
-
86
-
87
-
88
-
89
-
90
-
91
-
92
-
93
-
94
-
95
-
96
-
97
-
98
-
99
-
100
-
101
-
102
-
103
-
104
-
105
-
106
-
107
-
108
-
109
-
110
-
111
-
112
-
113
-
114
-
115
-
116
-
117
-
118
-
119
-
120
-
121
-
122
-
123
-
124
-
125
 |
 |
