Canon PowerShot A20 Software Starter Guide DC SD Ver.4 - Page 11
Installing/Uninstalling the Software - usb driver
 |
View all Canon PowerShot A20 manuals
Add to My Manuals
Save this manual to your list of manuals |
Page 11 highlights
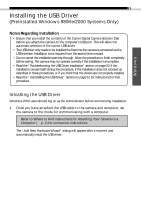
Windows 7 Installing/Uninstalling the Software Installing from the Canon Digital Camera Solution Disk If you are installing the software onto Windows NT 4.0 or Windows 2000, you must first log on as the administrator and then install the software. Precaution about the USB Interface • Ensure that you install the software from the Canon Digital Camera Solution Disk onto the computer before you attach the camera to the computer's USB port. If you attach the camera to the USB port after installing the software, it will automatically select the correct USB driver. 1. Close any programs that are running. 2. Place the Canon Digital Camera Solution Disk in the CD-ROM drive. The installer panel will automatically display. • If the installer panel does not automatically display, use the following procedures to start it. 1. Double-click the [My Computer] icon on the desktop, and double-click the CD-ROM icon in the next window. 2. Double-click the [Setup] icon. 3. Click [Software Installation]. 4. Select the install location and click the [Next] button. 5. Select the software you wish to install and follow the on-screen instructions to proceed. 6. Click the [Exit] button when the installation is complete and the installer panel appears again.
-
 1
1 -
2
-
3
-
4
-
5
-
 6
6 -
 7
7 -
 8
8 -
 9
9 -
 10
10 -
 11
11 -
 12
12 -
 13
13 -
 14
14 -
 15
15 -
 16
16 -
17
-
18
-
19
-
20
-
21
-
22
-
23
-
24
-
25
-
26
-
27
-
28
-
29
-
30
-
31
-
32
-
33
-
34
-
35
-
36
-
37
-
38
-
39
-
40
-
41
-
42
-
43
-
44
-
45
-
46
-
47
-
48
-
49
-
50
-
51
-
52
-
53
-
54
-
55
-
56
-
57
-
58
-
59
-
60
-
61
-
62
-
63
-
64
-
65
-
66
-
67
-
68
-
69
-
70
-
71
-
72
-
73
-
74
-
75
-
76
-
77
-
78
-
79
-
80
-
81
-
82
-
83
-
84
-
85
-
86
-
87
-
88
-
89
-
90
-
91
-
92
-
93
-
94
-
95
-
96
-
97
-
98
-
99
-
100
-
101
-
102
-
103
-
104
-
105
-
106
-
107
-
108
 |
 |
