Canon RC-IP100 Remote Camera Controller User Manual - Page 9
Changing an Assigned Function, Selecting a Preset, Deleting a Registered Preset
 |
View all Canon RC-IP100 manuals
Add to My Manuals
Save this manual to your list of manuals |
Page 9 highlights
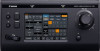
Operation Changing an Assigned Function . Functions assigned to a knob or button can be changed. The following describes the steps to assign the F1 knob with "Focus" and the USER1 button with "Focus Mode". 1 Select [F1] on the operation panel. 2 Select "Focus" from the function selection area on the right side of the screen. If the function you want to select is not displayed, tap to jump to the next page. 3 Select [USER1] on the operation panel. 4 Select "Focus Mode" from the function selection area on the right side of the screen. If the function you want to select is not displayed, tap to jump to the next page. You can switch between "AF" and "MF" focus using the USER1 button. Setting focus to "MF" allows you to adjust the focus using the F1 knob. 5 Tap the [ENTER] button. Tapping the [ENTER] button confirms the selected setting and returns the display to home screen. Tapping the [HOME] button cancels the selected setting and returns the display to home screen. Memo : 0 The functions that can be assigned to each button or knob are as follows. Some functions might not be configurable depending on the camera to be connected, and the menus cannot be operated in this case. o F1/F2 Focus, Iris, Gain, WB R:Gain, WB B:Gain, PT Speed, Focus Speed, Zoom Speed, Shutter Speed, Clear Scan, Slow(Second), AGC Limit, AE Shift, Color Temperature, R Gain, B Gain, Sharpness:Level, Sharpness:Limit, Noise Reduction, Knee:Slope, Knee:Point, Knee:Saturation, Master Pedestal, Master Black R, Master Black B, Black Gamma Level, Black Gamma Range, Black Gamma Point, Color Matrix:Gain, Color Matrix:Phase, Color Matrix:R-G, Color Matrix:G-R, Color Matrix:B-R, Color Matrix:R-B, Color Matrix:G-B, Color Matrix:B-G o F3 Zoom, Iris, Focus, None o USER1/USER2 Shooting Mode, Iris, Shutter Mode, Gain, ND Filter, Metering Mode, None, One Shot AF, Focus Mode, White Balance Mode, WB Calibration, Rec, Preset Color Settings, Gamma, Color Space, Color Matrix, HLG Color, Noise Reduction, KneeーActivate, Knee-Automatic o F4 Focus/One Shot AF, PT Speed/None Selecting a Preset o What is preset? This system allows multiple shooting positions and settings to be registered for one camera. Such a registered shooting position or setting is referred to as a "preset". Up to 100 presets can be registered for a remote camera. This product manages the presets by dividing them into 10 groups. For example, the first preset of the camera corresponds to the first preset of Group 1 on this product, while the 11th preset corresponds to the first preset of Group 2. Selecting a Preset Follow the steps below to specify a preset number for retrieving the corresponding camera shooting position or setting. 1 Select a camera to operate. (A P8 "Selecting a Camera") 2 Tap the [VIEW] button on the operation panel. 3 Select the [CAMERA/PRESET] tab. 4 Tap [Group] of [Preset No./Preset Group] to light up the button, followed by selecting a group number. 5 Tap the [Group] button again to turn off the button's light, followed by tapping a preset number. The registered shooting position or setting is being retrieved. Memo : 0 The number of the button is displayed in white if a preset number is registered to it. Registering a Preset 1 Select a camera to operate. (A P8 "Selecting a Camera") 2 Tap the [STORE] button on the operation panel. 3 Select the [CAMERA/PRESET] tab. 4 Tap [Group] of [Preset No./Preset Group] to light up the button, followed by selecting a group number. 5 Tap the [Group] button again to turn off the button's light, followed by tapping a preset number. 6 Tap the [ENTER] button. The current shooting position or setting is registered to the preset number of the selected preset group. Deleting a Registered Preset 1 Select a camera to operate. (A P8 "Selecting a Camera") 2 Tap the [DELETE] button on the operation panel. 3 Select the [CAMERA/PRESET] tab. 4 Tap [Group] of [Preset No./Preset Group] to light up the button, followed by selecting a group number. 5 Tap the [Group] button again to turn off the button's light, followed by tapping a preset number. 6 Tap the [ENTER] button. The registration information of the selected preset number of the preset group is deleted. Selecting and Operating a Camera 9
-
 1
1 -
2
-
3
-
 4
4 -
 5
5 -
 6
6 -
 7
7 -
 8
8 -
 9
9 -
 10
10 -
 11
11 -
 12
12 -
 13
13 -
 14
14 -
15
-
16
-
17
-
18
-
19
-
20
-
21
 |
 |
