Canon REALiS LCOS WUX6000 MULTIMEDIA PROJECTOR WUX6000 Users Manual - Page 119
Ceiling Mounting or Rear Projection, Mounting the Projector on the, Ceiling
 |
View all Canon REALiS LCOS WUX6000 manuals
Add to My Manuals
Save this manual to your list of manuals |
Page 119 highlights
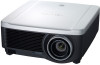
Installation Procedure ■ Ceiling Mounting or Rear Projection You can mount the projector on the ceiling (ceiling mounting) with it turned upside down or place it behind the screen (rear projection) if you use a translucent screen. Installation and Maintenance Installation Ceiling mounting Rear projection Make sure to use the optional ceiling attachment. For the ceiling attachment, refer to "Option" (P227). For details, refer to the assembly and installation manual provided with the ceiling attachment. Mounting the Projector on the Ceiling You can mount the projector on the ceiling. The ceiling attachment (part No.: RSCL11) is required in order to mount the projector on the ceiling. Depending on the installation environment, an extension pipe (part No.: RS-CL08 or RS-CL09) may also be required. Contact the Canon Customer Support Center for more detailed information. • Make sure to use the optional ceiling attachment. • You should never install the ceiling attachment by yourself. If you mount the projector on the ceiling, you have to invert the projected image by selecting [Image flip H/V] from the menu. (P141) 119
-
 1
1 -
2
-
3
-
4
-
5
-
6
-
7
-
8
-
9
-
10
-
11
-
12
-
13
-
14
-
15
-
16
-
17
-
18
-
19
-
20
-
21
-
22
-
23
-
24
-
25
-
26
-
27
-
28
-
29
-
30
-
31
-
32
-
33
-
34
-
35
-
36
-
37
-
38
-
39
-
40
-
41
-
42
-
43
-
44
-
45
-
46
-
47
-
48
-
49
-
50
-
51
-
52
-
53
-
54
-
55
-
56
-
57
-
58
-
59
-
60
-
61
-
62
-
63
-
64
-
65
-
66
-
67
-
68
-
69
-
70
-
71
-
72
-
73
-
74
-
75
-
76
-
77
-
78
-
79
-
80
-
81
-
82
-
83
-
84
-
85
-
86
-
87
-
88
-
89
-
90
-
91
-
92
-
93
-
94
-
95
-
96
-
97
-
98
-
99
-
100
-
101
-
102
-
103
-
104
-
105
-
106
-
107
-
108
-
109
-
110
-
111
-
112
-
113
-
 114
114 -
 115
115 -
 116
116 -
 117
117 -
 118
118 -
 119
119 -
 120
120 -
 121
121 -
 122
122 -
 123
123 -
 124
124 -
125
-
126
-
127
-
128
-
129
-
130
-
131
-
132
-
133
-
134
-
135
-
136
-
137
-
138
-
139
-
140
-
141
-
142
-
143
-
144
-
145
-
146
-
147
-
148
-
149
-
150
-
151
-
152
-
153
-
154
-
155
-
156
-
157
-
158
-
159
-
160
-
161
-
162
-
163
-
164
-
165
-
166
-
167
-
168
-
169
-
170
-
171
-
172
-
173
-
174
-
175
-
176
-
177
-
178
-
179
-
180
-
181
-
182
-
183
-
184
-
185
-
186
-
187
-
188
-
189
-
190
-
191
-
192
-
193
-
194
-
195
-
196
-
197
-
198
-
199
-
200
-
201
-
202
-
203
-
204
-
205
-
206
-
207
-
208
-
209
-
210
-
211
-
212
-
213
-
214
-
215
-
216
-
217
-
218
-
219
-
220
-
221
-
222
-
223
-
224
-
225
-
226
-
227
-
228
-
229
-
230
-
231
-
232
-
233
-
234
-
235
-
236
 |
 |
